Airaid 883-314 User Manual
Page 2
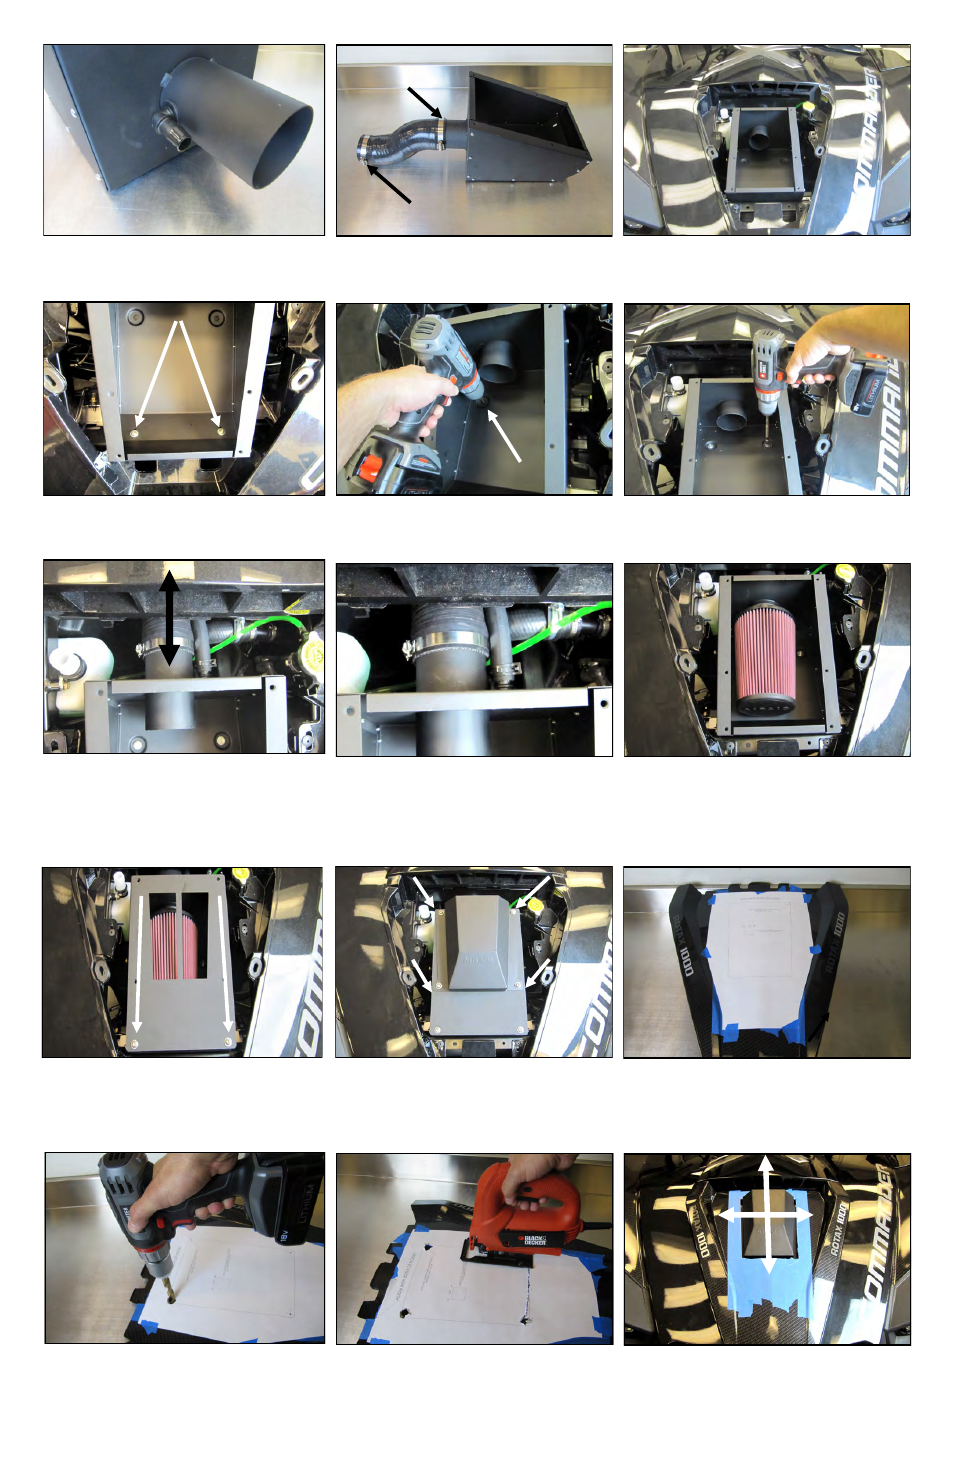
11. Slide the Silicone Coupler (#8) onto the Airbox
tube as shown. Pre install the # 44 and 48 Clamps onto
the Coupler with out tightening them.
12. Position the Airaid Intake assembly into the vehicle
and the coupler onto the throttlebody.
13. Secure the Intake assembly to the core support using
the two 1/4-20 Button Head Screws (#12), 1/4” Flat
Washers(#13), and 1/4-20 Flange Nuts (#14).
14. Drill two 1/8 inch pilot holes into the vehicle cross
member underneath of the Airbox assembly's rear
holes.
15. Using the drill and a 8mm socket, drive the Self Drill-
ing Screws (#15) with a 1/4” Flat Washer into the cross
member.
20. Mount the Hood Scoop onto the Airbox assembly a
shown using four sets of 1/4-20 Button Heads and
Washers. Leave the Screws Finger Tight for now.
19. Install the Pre Filter Tray (#5) onto the Airbox using
two 1/4-20 Button Heads and Flat Washers as shown.
21. Prepare the hood for cutting by laying tape strips side
by side all across the center section for scratch protection.
Cut out the template and tape it into position.
44
48
10. Install the Grommet (#10) and Elbow Fitting (#11)
into the Airbox Tube.
23. Using a jigsaw or equivalent, cut along the template
line and connect the 1/2” holes. Remove the hood cen-
ter and the template.
22. Using a 1/8’’ bit, drill out four pilot holes in the
hood followed by a 1/2’’ bit to finish.
24. Install the hood and check the positioning of the
Scoop. Reposition if necessary.
16. Slide the Coupler rearward to fully seat it onto the
throttlebody and tighten both of the Clamps. Re route
the PCV hose to run on top of the coolant hose and at-
tach it to the Elbow Fitting .
17. Close up view of rerouted PCV hose. Note that the
factory spring clamp is reused.
18. Slide the Airaid Premium Filter onto the inner Air-
box tubing and tighten the Clamp.