Airaid 400-272 User Manual
Installation instructions, Component identification
Installation Instructions
For Part Numbers:
400-272
720-478 Airaid Oiled Media Filter
401-272
721-478 SynthaMax Dry Media Filter - Red
402-272
722-478 SynthaMax Dry Media Filter - Black
403-272
723-478 SynthaMax Dry Media Filter - Blue
2010-14 SVT Ford Raptor 6.2L
2011-14 Ford F-150 6.2L
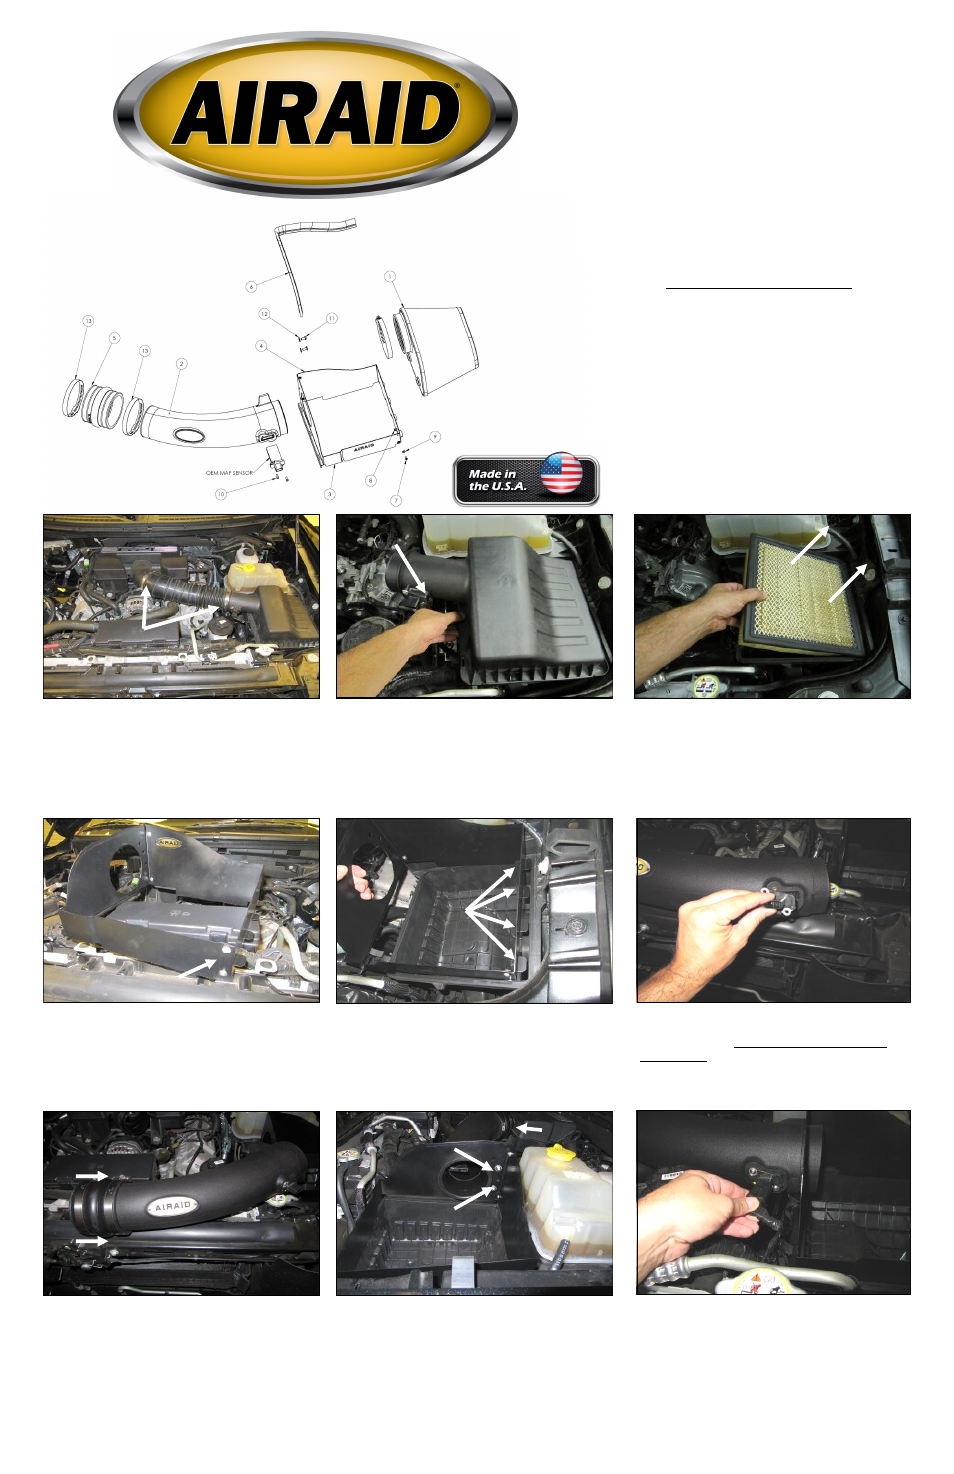
1. Disconnect the negative battery cable!
Loosen the two intake clamps and remove the Factory
intake tube.
3. Remove the factory air filter from the lower half of
the airbox.
4. Assemble the two Quick Fit panels (#3 & #4) as
shown using four 6-32 screws (#7) flat washers (#9)
and kep nuts (#8).
5. Install the assembly onto the lower half of the facto-
ry airbox. Slide the metal tabs into the airbox slots, and
fasten the 3 airbox clips.
6. . Transfer the MAF sensor into the Airaid Intake
Tube (#2) and secure using two 8-32 x 1/2” button
head screws (#10). Do Not Use The Factory Torx
Head Screws
7. Install the Hump Hose (#5), and the clamps (#13)
onto the Intake Tube. Slide the hump hose and clamps
down the tube as far as they will go and leave the
clamps loose for now.
8. A.) Mount the Intake Tube to the Rear Panel using
the two 1/4-20 Button Head Bolts (#11) and 1/4” Flat
washers (#12).
B.) Slide the Hump Hose and clamps onto the engine
air inlet, check for alignment, and tighten the clamps.
2. A.) Disconnect the Mass Air Flow (MAF) Sensor.
B.) Unfasten the three airbox clips on the left side, and
remove the upper half of the factory airbox.
A
9. Re connect the Mass Air Flow Sensor.
Note: Tab is outside
Component Identification
1.
Airaid Premium Filter
1
2.
Airaid Intake Tube
1
3.
Front Panel
1
4.
Rear Panel
1
5.
Urethane Hump Hose
1
6a.
Weather Strip Short
1
6b.
Weather strip Tall
1
7.
6-32 x 5/16” Screw 4
8.
6-32 Keps Nut
4
9.
#6 Flat Washer
4
10.
8-32 x 1/2” Button Head Screw 2
11.
8-32X 1/2”Button Head Bolt
2
12.
1/4” Flat Washer
2
13.
#68 Hose Clamp
2
14.
T-20 Torx Driver
1
Tabs
B
A