Hard disk installation, Step 1: remove the tray – ACTi GNR-3000 V3.0.09 User Manual
Page 19
GNR-3000 System Administrator’s Manual
Hard Disk Installation
For video recordings, you should install at least ONE certified 3.5-inch SATA hard disk. Be
sure to use the hard disk models ACTi tested to be compatible with GNR-3000
, and it’s
strongly recommended that you use hard disks of the same model and capacity. You may find
the certified models vi
The actual necessary space depends on number of devices, recording and event rules settings.
To get an approximate value, you may use the software tool Bandwidth & Storage Calculator
-
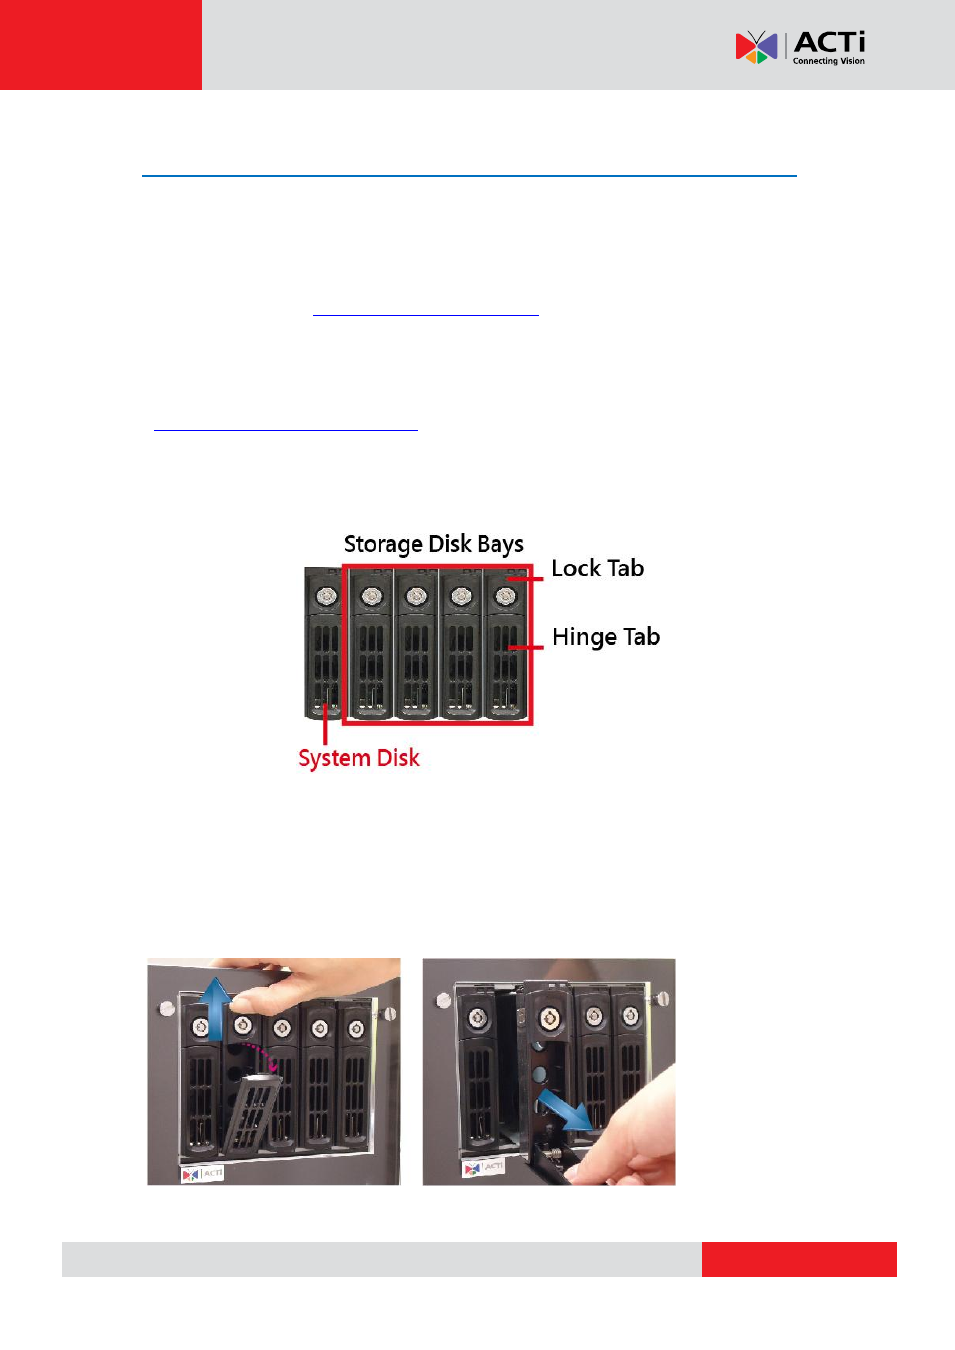
You can install up to four disks into Storage Disk Bays. During the installation, please avoid
removing the
System Disk Bay
.
Repeat Step 1~3 to finish installing all the storage disks. During the installation, please avoid
removing the
System Disk Bay
.
Step 1: Remove the Tray
Slide the Lock Tab up, the Hinge Tab will pop out by itself.
Pull the Hinge Tab to 90 degrees from the front, and then pull out the tray.
- ECD-1000 (2 pages)
- ECD-1000 V.1.02.09 (135 pages)
- Outdoor Mini Dome and Mini Fisheye Dome on Tilted Wall (40 pages)
- I912 (43 pages)
- PMON-2000 (2 pages)
- Indoor Box (B2xI2x) on Tilted Wall By Bracket (33 pages)
- Bullet Camera (B4xI4x) on Dropped Ceiling with Ceiling Bracket (52 pages)
- KCM-8211 (53 pages)
- V32 (91 pages)
- V11 (20 pages)
- V11 (2 pages)
- V24 (2 pages)
- V24 (32 pages)
- B87 (47 pages)
- E86 (47 pages)
- E223 (32 pages)
- V32 (2 pages)
- V32 (31 pages)
- B910 (48 pages)
- E913 (36 pages)
- Indoor PTZ on Dropped Ceiling (9 pages)
- E59 (31 pages)
- Indoor Hemispheric / Fisheye Dome on Dropped Ceiling (26 pages)
- E271 (42 pages)
- Outdoor Dome on Straight Wall with Accessory Sets of PMAX-0314 (65 pages)
- KCM-5211 (18 pages)
- KCM-5611 (27 pages)
- E69 (37 pages)
- Outdoor PTZ / Speed Dome (I9x) on Vertical Pole with Accessory Sets of PMAX-0305 (36 pages)
- Indoor Box Camera on Ceiling with Bracket (31 pages)
- Outdoor Dome (B8xI8x) on Dropped Ceiling with Gang Box Converter (35 pages)
- Indoor Box Camera with Outdoor Housing on Wall (44 pages)
- Outdoor Hemispheric / Fisheye Dome on Tilted Wall (27 pages)
- Outdoor Hemispheric / Fisheye Dome on Corner with Tilted Mount (PMAX-0310) (22 pages)
- KCM-7911 (32 pages)
- Outdoor Dome on Hard Ceiling (31 pages)
- Outdoor Dome on Corner with Accessory Sets (51 pages)
- Outdoor Dome on Hard Ceiling with Pendant Mount (77 pages)
- Outdoor Dome on Straight Wall with L-Bracket Wall Mount (33 pages)
- Outdoor Dome on Hard Ceiling with Flush Mount (34 pages)
- Indoor Mini Dome and Mini Fisheye Dome on Hard Ceiling with Gang Box (21 pages)
- Indoor Mini Dome and Mini Fisheye Dome on Hard Ceiling with Gang Box (21 pages)
- Indoor Mini Dome and Mini Fisheye Dome on Hard Ceiling (19 pages)
- Indoor Dome (B6x) on Hard Ceiling (25 pages)
- Indoor Dome on Dropped Ceiling (22 pages)