Appendix a: installation overview, A.1. vel-3 – Thinklogical X4 and Touchpanels User Manual
Page 42
®
V e l o c i t y D V I E x t e n d e r P r o d u c t M a n u a l , R e v . H , D e c .
2 0 1 4
Page 40
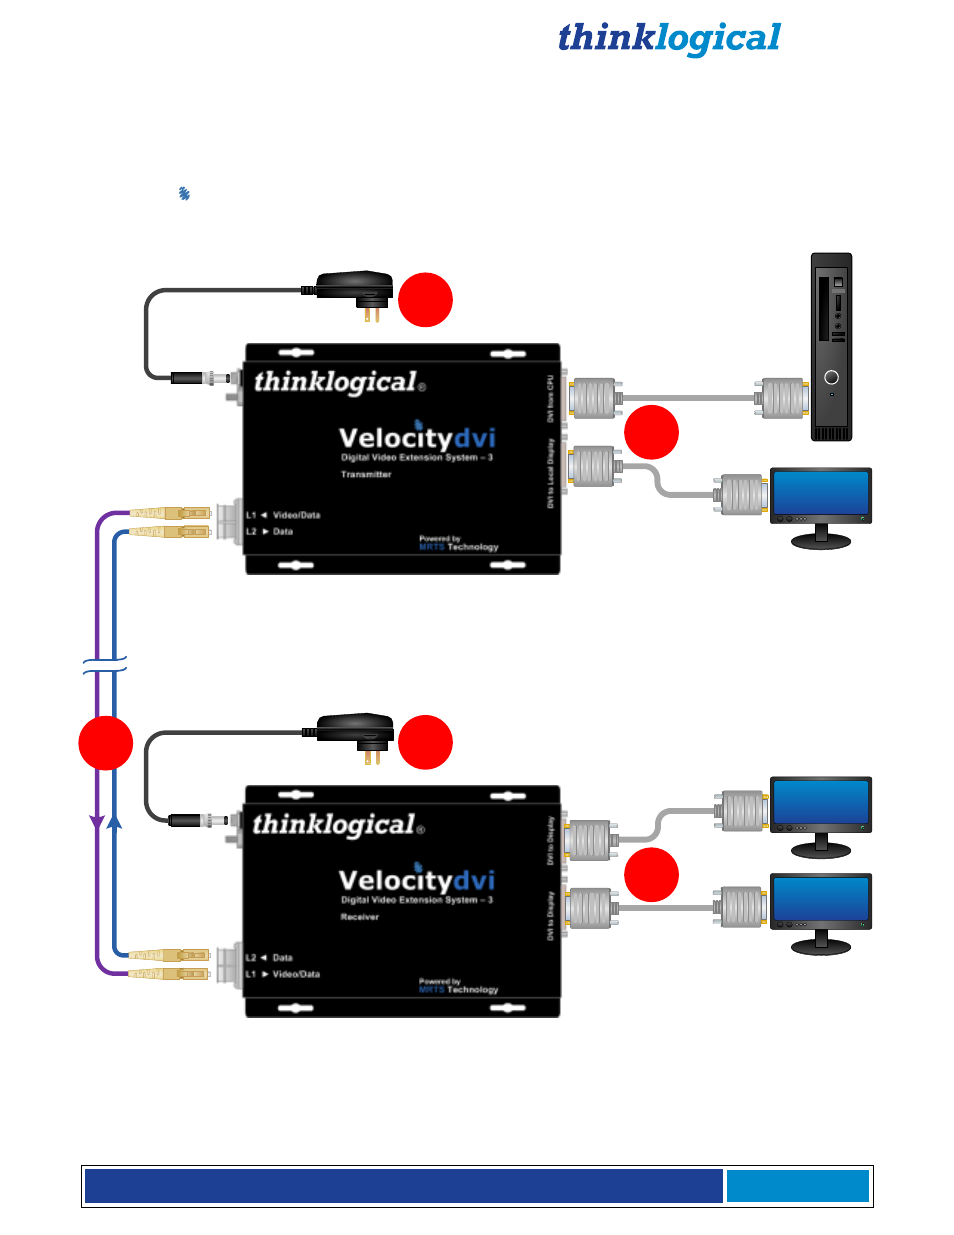
Appendix A: Installation Overview
A.1. VEL-3
Receiver VEL-000M03-LCRX
CPU
Primary DDC Port
Power Supply
(PWR-000022-R)
Power Supply
(PWR-000022-R)
Digital Video Extender-3 Installation Overview
Velocity
dvi
STEP 5:
Connect the video source
(CPU) to the Tx with a DVI-D M-M
Cable. An optional local display can also
be connected using a DVI-D M-M Cable.
5
4
2
STEP 2:
Connect the supplied AC Power
Adapter (PWR-000022-R) to the Rx and
plug it into a standard AC source.
3
STEP 3:
Connect the DVI to Display DDC
port to a video monitor (or projector or other
viewing device) with a DVI-D M-M Cable. A
second device can be installed at the DVI to
Display port using a similar cable. Turn on the
DVI video devices.
1
STEP 1:
Connect multi-mode fiber optic cables
(up to 1000 meters) between the Rx and Tx units.
L1: Data Tx to Rx & Video
L2: Data Rx to Tx
STEP 4:
Connect the supplied AC Power
Adapter (PWR-000022-R) to the Tx and
plug it into a standard AC source.
L1
L2
L2
L1
Local
Monitor
DVI OUT
DVI OUT
DDC
Transmitter VEL-000M03-LCTX