Sloan 111 Crown/Crown II Exposed Flushometer User Manual
Page 4
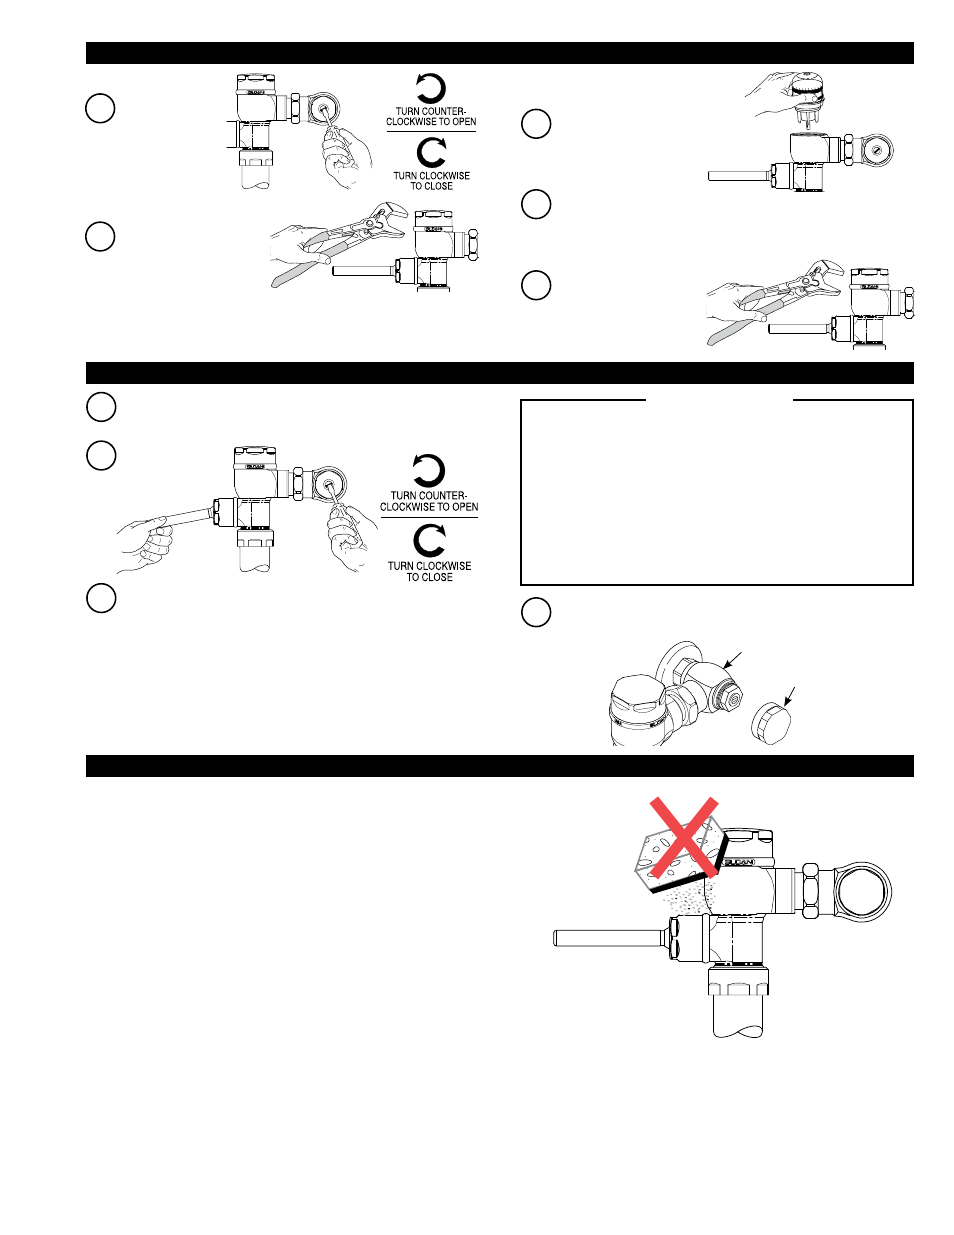
DO NOT USE abrasive or chemical cleaners (including chlorine bleach) to
clean Flushometers that may dull the luster and attack the chrome or special
decorative finishes. Use
ONLY mild soap and water, then wipe dry with clean
cloth or towel.
While cleaning the bathroom tile, protect the Flushometer from any
splattering of cleaner. Acids and cleaning fluids will discolor or remove
chrome plating.
D
Install locking vandal resistant control stop cap onto control stop.
A
Open control stop COUNTERCLOCKWISE ½ turn from closed
position.
C
Adjust control stop after each flush until the rate of flow delivered
properly cleanses the fixture.
CONTROL STOP
CAP
H-700-A BAK CHEK
®
CONTROL STOP
SLOAN’S FLUSHOMETER ARE ENGINEERED FOR QUIET OPERATION.
EXCESSIVE WATER FLOW CREATES NOISE, WHILE TOO LITTLE
WATER FLOW MAY NOT SATISFY THE NEEDS OF THE FIXTURE.
PROPER ADJUSTMENT IS MADE WHEN PLUMBING FIXTURE IS
CLEANSED AFTER EACH FLUSH WITHOUT SPLASHING WATER OUT
FROM THE LIP AND A QUIET FLUSHING CYCLE IS ACHIEVED.
NEVER OPEN CONTROL STOP TO WHERE THE FLOW FROM THE
VALVE EXCEEDS THE FLOW CAPABILITY OF THE FIXTURE. IN THE
EVENT OF A VALVE FAILURE, THE FIXTURE MUST BE ABLE TO
ACCOMMODATE A CONTINUOUS FLOW FROM THE VALVE.
!!! IMPORTANT !!!
3
A
Make sure control
stop is CLOSED.
B
Remove flushometer
cover.
C
Lift out the piston
assembly.
D
Replace inner cover and re-install flushometer cover wrench tight.
Open control stop to flush supply line. Close control stop and
remove flushometer cover.
E
Reinstall piston assembly
and flushometer cover.
Tighten flushometer cover
wrench tight.
6 - FLUSH OUT SUPPLY LINE
7 - ADJUST CONTROL STOP AND INSTALL VANDAL RESISTANT STOP CAP
CARE AND CLEANING
B
Activate
flushometer.