Ip address confi guration, Pt-link ii interface pt-link ii bacnet, Technical guide 7 – Orion System PT-Link II BACnet2 User Manual
Page 7
PT-Link II Interface
PT-Link II BACnet
®
Technical Guide
7
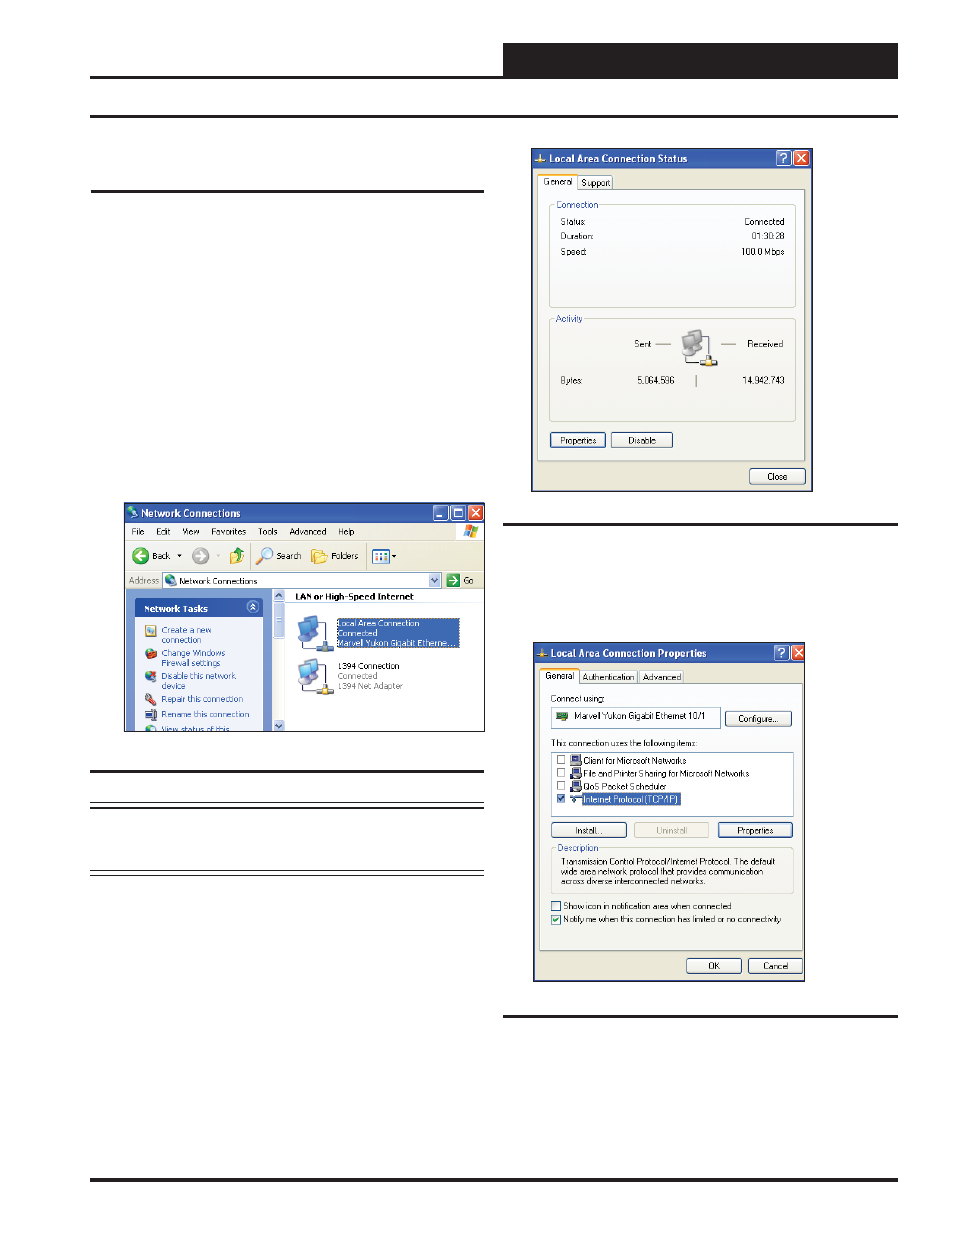
4.) As shown in Figure 6, click
in the lower
left of the window. The Local Area Connection Properties
Window will appear.
5). As shown in Figure 7, in the Connection Items list box,
be sure the Internet Protocol (TCP/IP) is checked. Select the
Internet Protocol (TCP/IP) item to highlight it and then click
. The Internet Protocol Properties Window will
appear.
IP Address Confi guration
Computer IP Address Set-up for Windows
NT & XP
1.) Click
; then click
.
2.) Double-click on the Network Connections icon.
The Network Connections Window will appear (Figure 5).
NOTE:
If any wireless connections are listed, disable them
by right-clicking the connection and selecting
.
3.) In
the
Network Connections Window, double-click the
Local Area Connections entry. The Local Area Connection
Status
Window will appear (Figure 6).
Figure 5: Network Connections Window
Figure 6: Local Area Connection Status Window
Figure 7: Local Area Connection Properties Window
Computer IP Address Set-up for
Windows XP, Vista, and 7
In order for the PT-Link II to communicate properly, it is imperative to set
the IP address of both the PT-Link II as well as the computer to be within
the same netmask. You need to change the IP address on your computer.
The following instructions will explain how to confi gure the IP address
for Microsoft
®
Windows XP, Vista, and 7 operating systems.