Measurement Computing DIAdem User Manual
Page 9
DIAdem
09-06-00
DIAdem
Quick Start Guide 7
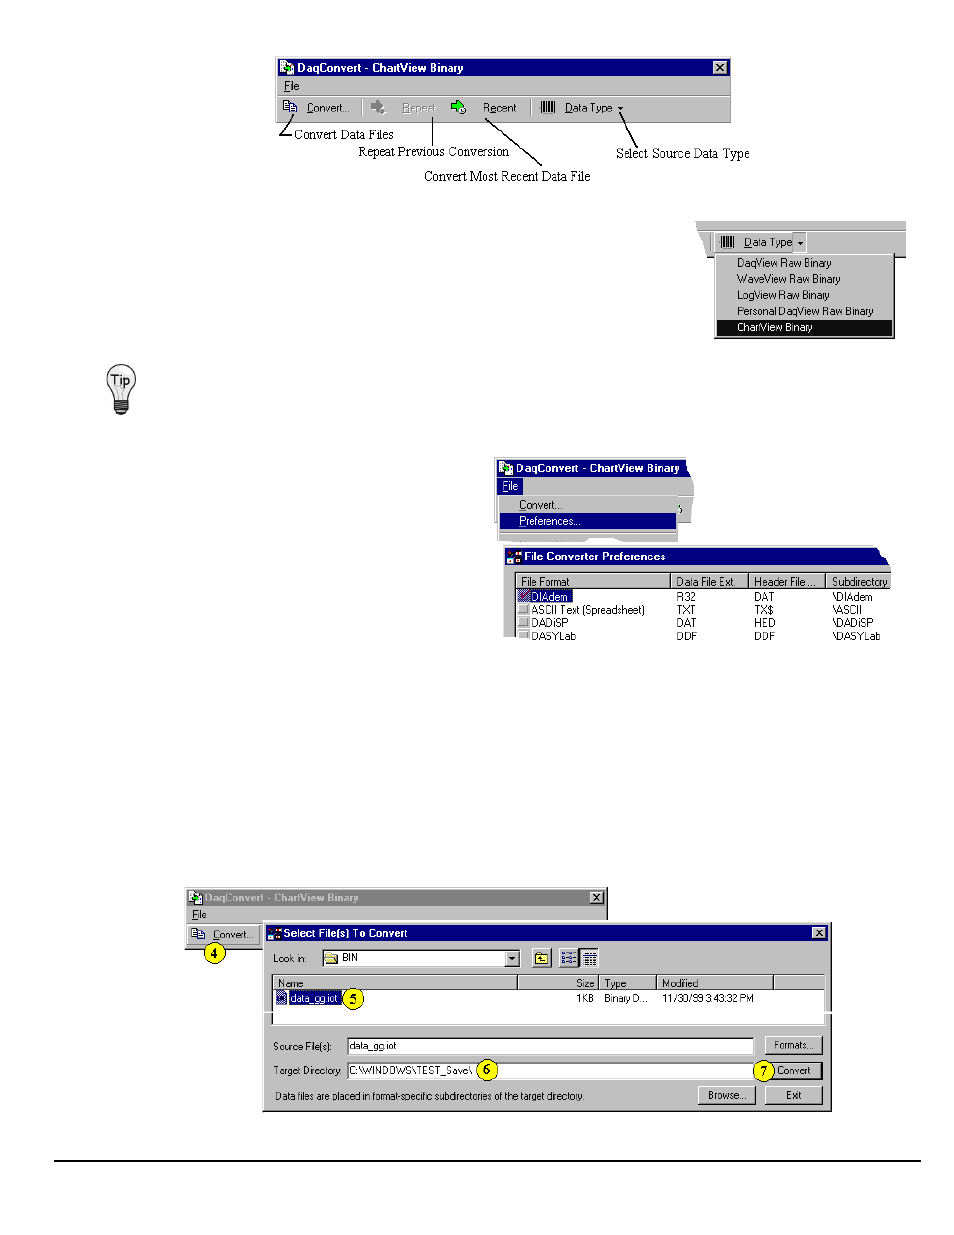
Data Conversion Utility (appearance shown is for ChartView)
2.
Select "ChartView Binary" as the Data Type.
The first time you run the data converter, a dialog box prompts you to select a data
type. The data type designation is based on the program that was used to collect the
data, e.g., ChartView.
If the prompting dialog box does not appear, use the Select Source Data Type Tool
to select ChartView Binary (as shown in the figure at the right).
Selecting a Data Type
If this is the first time you are using the data converter you can skip
to step 4 since the DIAdem format is initially selected by default.
3.
Select the DIAdem File Format.
This can be done as follows by dropping down the
data converter's File menu and clicking
"Preferences." This opens a dialog box displaying
a list of formats into which your data can be
converted.
If there is not a check mark next to the DIAdem
item, click on it once to check it.
Note: You can select additional file formats for
other application uses; but for our Quick Start
purposes we only need to select the DIAdem
format.
Selecting the DIAdem File Format
4.
Click the Convert Button [on the data converter's tool bar].
A dialog box will appear that is similar to the Open File dialog used by many programs (see following figure).
Note that this directory differs for each of the View programs.
If this is the first time that you are converting files of this type, you will have to navigate to the directory containing
your data. For example, to get to
data_gg.iot
(as shown if the following figure), we navigated as follows:
E:\XFER\BIN\DATA_GG.IOT
Note that this is the path that was identified earlier in our example application’s Data
Destination for the binary file (on
).
Converting a ChartView Binary File to a DIAdem Format File