Preparing the model for the vacuum-forming process – Ivoclar Vivadent Vectris User Manual
Page 54
54
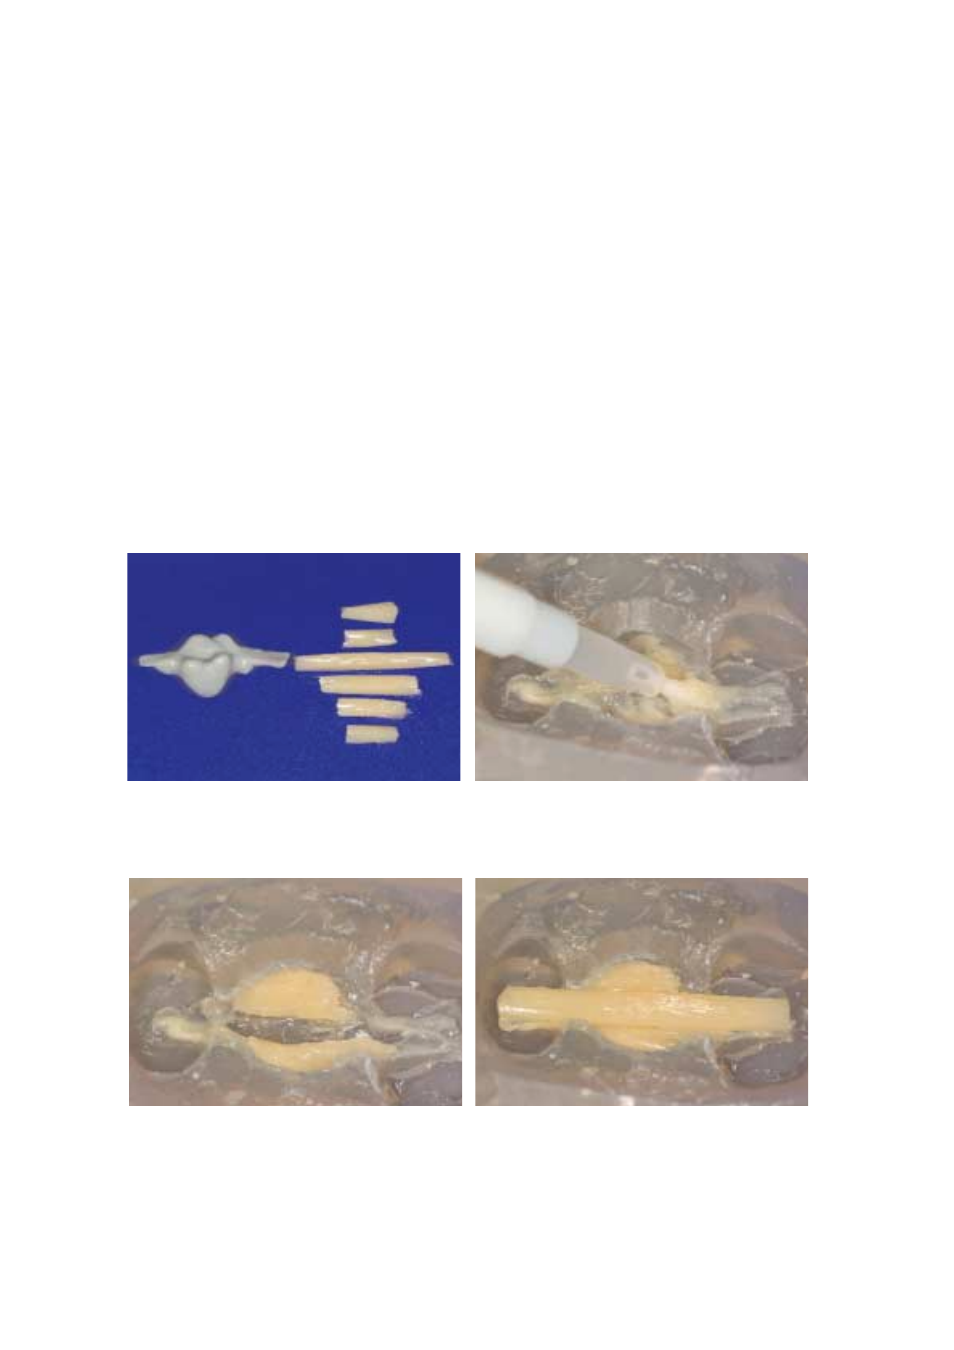
Schematic of the order in which the individual Vectris strips have to be placed.
Moisten the Transil matrix with Vectris Glue.
First, place a short Vectris strip on each cusp …
…then place a long Vectris strip to establish the pontic/abutment contact surface…
Placing Vectris Pontic into the Transil matrix and vacuum-forming the pontic
Slightly moisten the Transil matrix with Vectris Glue to facilitate the adaptation of the Vectris Pontic strips. Remove the
Vectris Pontic from the light-protected package, cut it to the desired length, remove it from the foil and place it into the
Transil matrix using tweezers. Insert the individual strips as indicated in the schematic below. Then, place the Transil matrix
on the duplicate model in the correct position, press it into place and mount the model on the model carrier of the
Vectris VS1 framework former. Start Program 1 to commence the vacuum-forming and polymerization process. The
program takes 10 minutes to complete.
Preparing the model for the vacuum-forming process
Before removing the Vectris Pontic from the packaging, adjust the height of the model carrier of the vacuum former so
that the distance to the upper rim of the container is 2 to max. 3 cm. If necessary, the height may be further adjusted with
the help of the spacer rings. Finally, check the position of the membrane.