Contouring the pontic – Ivoclar Vivadent Vectris User Manual
Page 39
39
3-
UNIT
ANTERIOR
BRIDGES
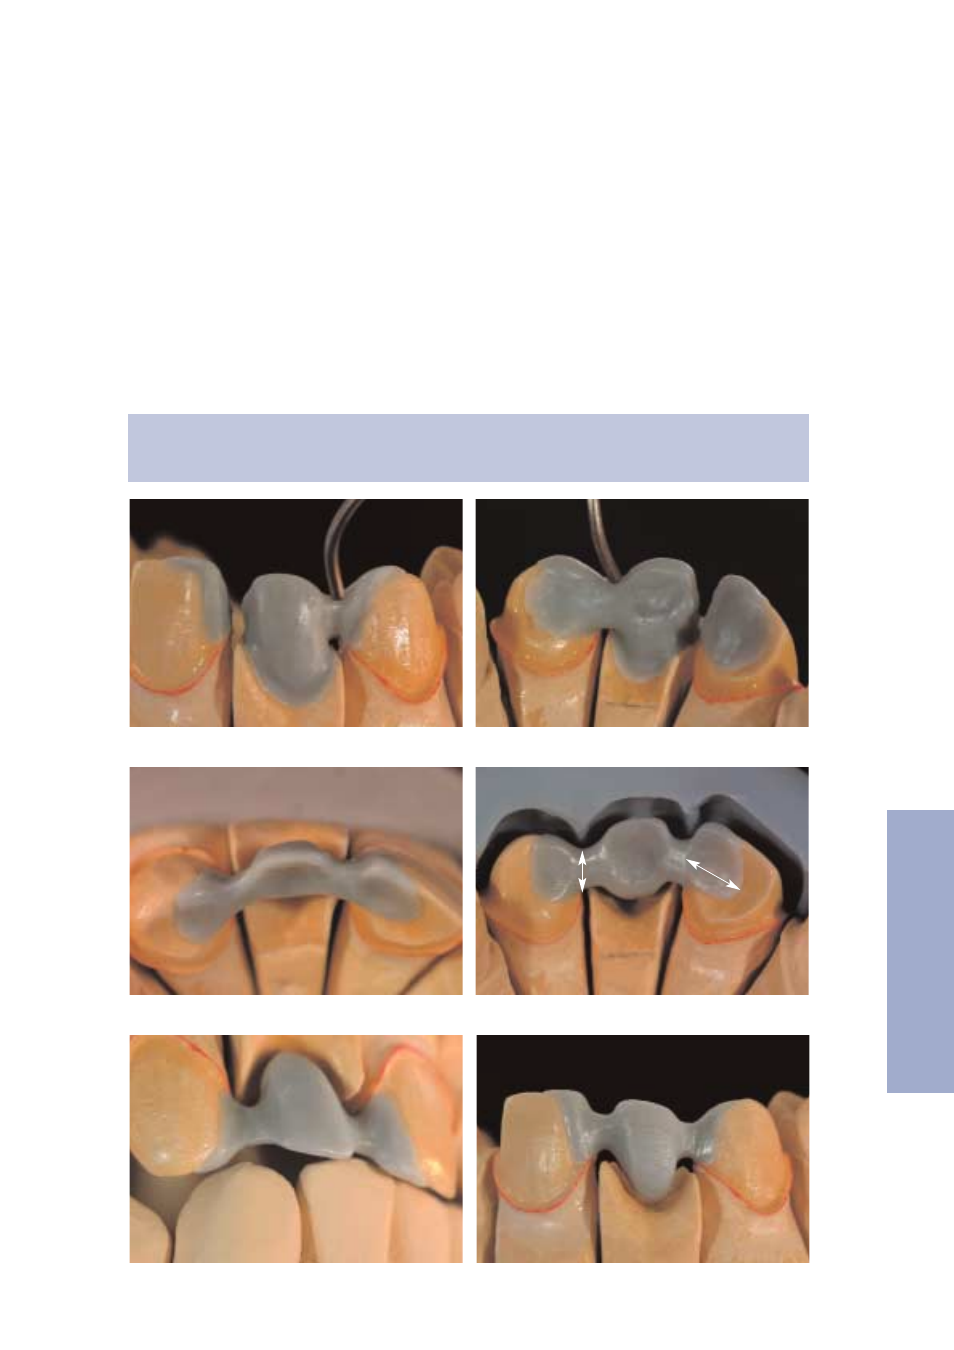
Contouring the pontic
First, seal the dies with a wax/stone or resin/stone separator. Form the pontic on the master model in a shape- and cusp-
supporting manner similar to the metal-ceramic technique, using wax or composite (Light Tray). This step helps to obtain a
homogeneous layer thickness in the following veneering material. The palatal or lingual abutment/pontic contact layers
should exhibit the following dimensions:
– surface: at least 3 x 3 mm
– thickness: at least 0.3 mm
– joint face of the connector: at least 3 x 3 mm
It is advisable to contour the pontic insert in a shape-and cusp-supporting design, depending on the space available. Check
the pattern in the articulator and adjust as necessary. If a full wax-up has been prepared, the wax rim may be used for
checking purposes.
Contour the pontic on the master model.
Check as to whether the minimum requirements are met by means of the wax rim.
Conduct a final check in the articulator.
Tip:
The pontic can be contoured using a tray material (Light Tray) and adjusted by grinding after completion of the
polymerization process.
≥
3 mm
≥
3 mm