Front view, A. determine pigtail lag screw (b) location, Install pigtail lag screws – Harken 7801 4-Point Storage System - 60 lb User Manual
Page 8
8
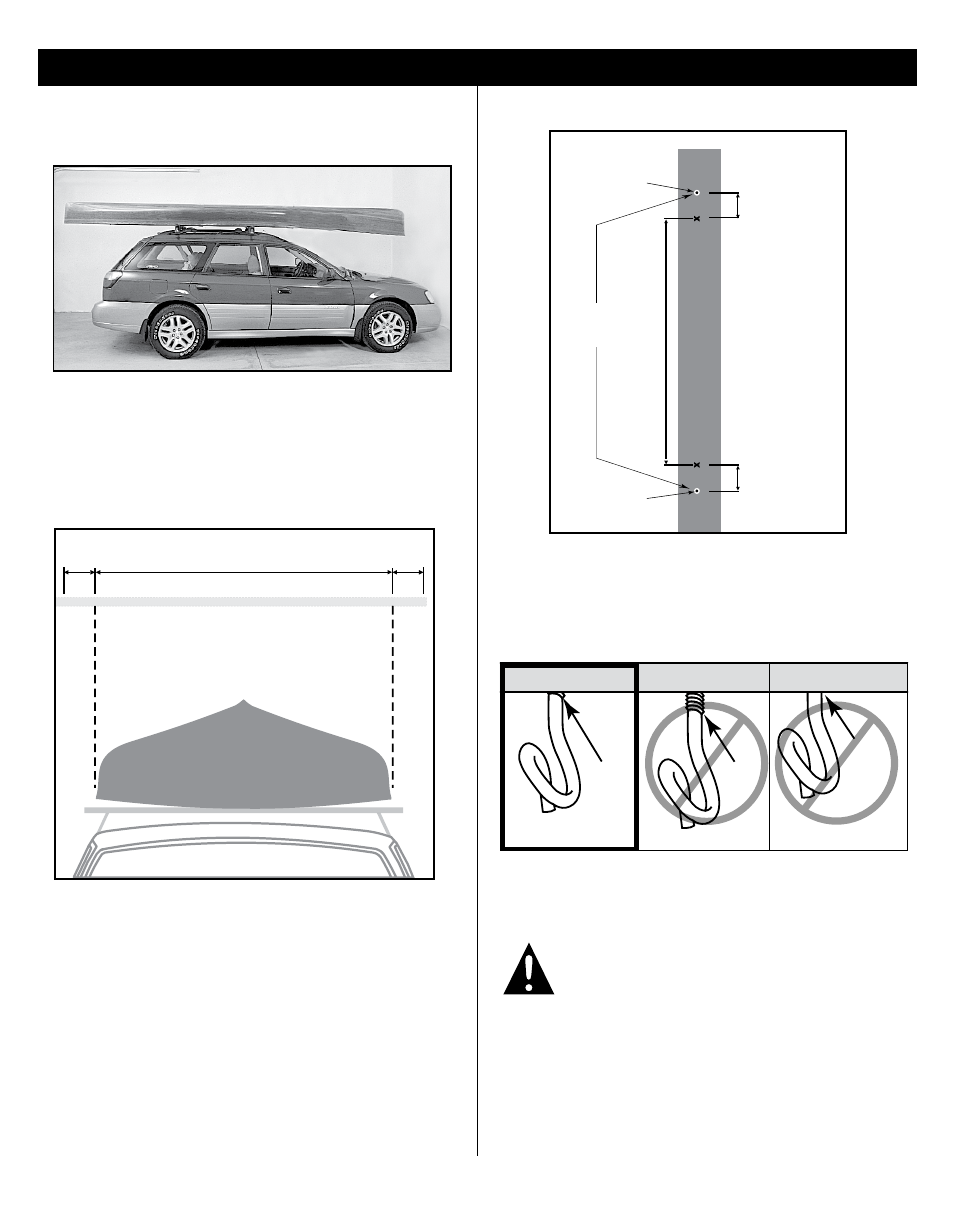
Pull vehicle into garage with object on car rack.
Disconnect automatic garage door.
2"
(50 mm)
Object width
2"
(50 mm)
Plumb lines
Ceiling
Plumb lines
Front view
Object
DIAGRAM 5. Mark object width on mounting boards.
DIAGRAM 6. Add 2" (50 mm) outside each mark. Drill a
7
/
32
" (5.5 mm)
hole at each drill point on mounting boards. Always wear safety glasses.
DIAGRAM 7. Install a pigtail lag screw (B) in each hole.
Threads should disappear into mounting board.
STEP 3: INSTALL PIGTAIL LAG SCREWS; RAFTERS RUNNING FRONT-TO-BACK
Top
thread
Top
thread
Mounting board
Mounting board
Overtightened
past top
thread
Mounting board
Top
thread
Top
thread
Mounting board
Mounting board
Overtightened
past top
thread
Mounting board
Top
thread
Top
thread
Mounting board
Mounting board
Overtightened
past top
thread
Mounting board
WARNING! Do not overtighten pigtail lag screw
past top thread. This can weaken fastener hold
which can considerably weaken system, causing
load to fall and cause an accident.
INSTALL PIGTAIL LAG SCREWS
A. DETERMINE PIGTAIL LAG SCREW (B) LOCATION
PULL VEHICLE INTO GARAGE
MARK LOCATION POINTS
Use plumb line to locate four lifting points on mounting
boards above vehicle.
DRILL 2 HOLES ON EACH MOUNTING BOARD
Object width
Add 2"
(50 mm) outside
Mounting
board
2"
(50 mm)
2"
(50 mm)
Drill hole
point
Drill hole
point
Pigtail lag
screw holes
Drill
7
/
32
"
(5.5 mm) hole at
each outside point
VIEWED FROM BELOW