Part 3: for all assemblies, Step 6: assemble hoister system for all assemblies, B. attach pulleys – Harken 7801 4-Point Storage System - 60 lb User Manual
Page 16
16
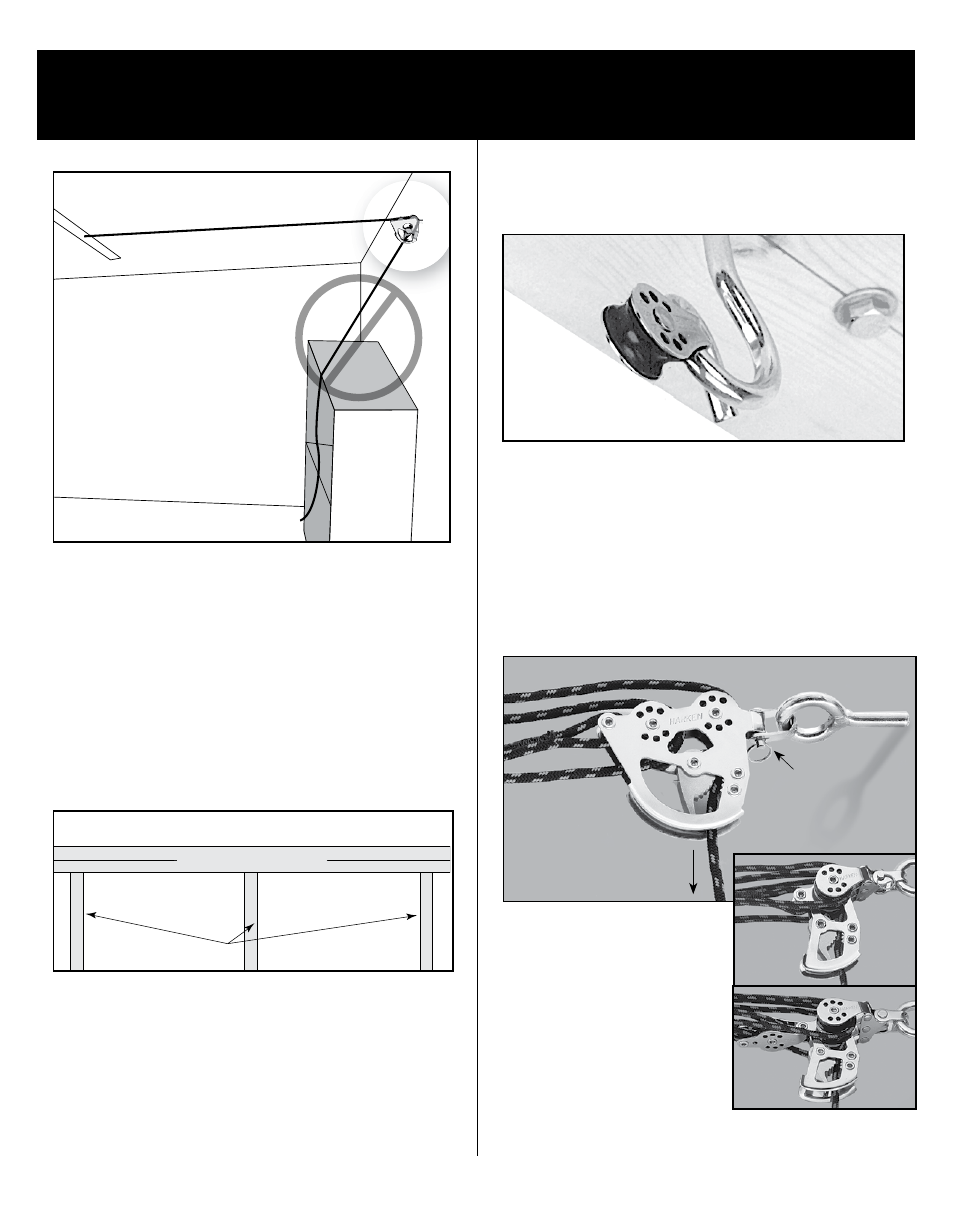
DIAGRAM 24. Single black/red
hoisting rope must face down.
*NOTE: Appearance of cleat (G1)
varies by system size. Refer to
system part number for specific
block and tackle cleat.
Top plate of front wall
Front view
Studs
DIAGRAM 23. Top plate of front wall.
Shackle (C)
Single black/red
hoisting rope (F)
Block and tackle cleat (G1)
*
7801
7802
7803
7806
PART 3: FOR ALL ASSEMBLIES
STEP 6: ASSEMBLE HOISTER SYSTEM FOR ALL ASSEMBLIES
Front
wall
Ceiling
DIAGRAM 22. Avoid installing welded screw eye above tall shelves.
Rope must point down to lock.
B. ATTACH PULLEYS
Place one pulley (D) on each pigtail lag screw (B).
ATTACH BLOCK AND TACKLE (G)
Attach block and tackle system (G) to welded screw
eye (A) with shackle (C). Remove ring from shackle
like a key ring. Put pin through top of cleat (G1).
Put ring back on to secure shackle (C).
INSTALL WELDED SCREW EYE (A) ON FRONT WALL
Use stud finder to locate solid wood of top plate.
Drill
7
/
32
" (5.5 mm) hole. Screw welded screw eye (A)
into top plate of front wall (near top of ceiling).
Welded screw eye (A)