A. raise object, B. store object, C. lower object – Harken 7801 4-Point Storage System - 60 lb User Manual
Page 18
18
Locked
Lowering
(cleat open)
DIAGRAM 30. Locked (left): Single black/red hoisting rope (F) pointed
straight down locks cleat. Open (right): Angled rope opens cleat.
Locked
Rope (F) down
Open
Rope (F) angled
STEP 7: OPERATING HOISTER SYSTEM FOR ALL ASSEMBLIES
Tip: Use gloves to protect hands.
WARNING! Disable garage door opener when
installing, raising, or lowering the Hoister.
Do not raise or lower with anyone standing
under object. Keep area below Hoister clear.
If the load falls it can cause an accident.
WARNING! Hang coiled rope where it will not
accidentally snag on persons or vehicle. Keep
coiled rope out of reach of children. Damage
or injury can result if rope is angled away from
wall with some tension; the object can come
down very quickly and cause an accident.
WARNING! When operating system, make sure
area below object is clear of persons. If object
comes down too quickly, this can cause an accident.
WARNING! Stop pulling as soon as object contacts
ceiling, or webbing strap knots stop at pulley (D).
Damage or injury can result from forcing the
system. If in doubt, stop hoisting, allow cleat to
lock by angling rope down. Stand back to see if
object is raised to the maximum, or if something
is jamming rope or object.
CAUTION! Avoid injury, do not let rope slip
through hands. Angle rope to wall to lock rope.
WARNING! Do not use this product for human
suspension. Components can fail causing person
to fall, possibly resulting in serious injury or death.
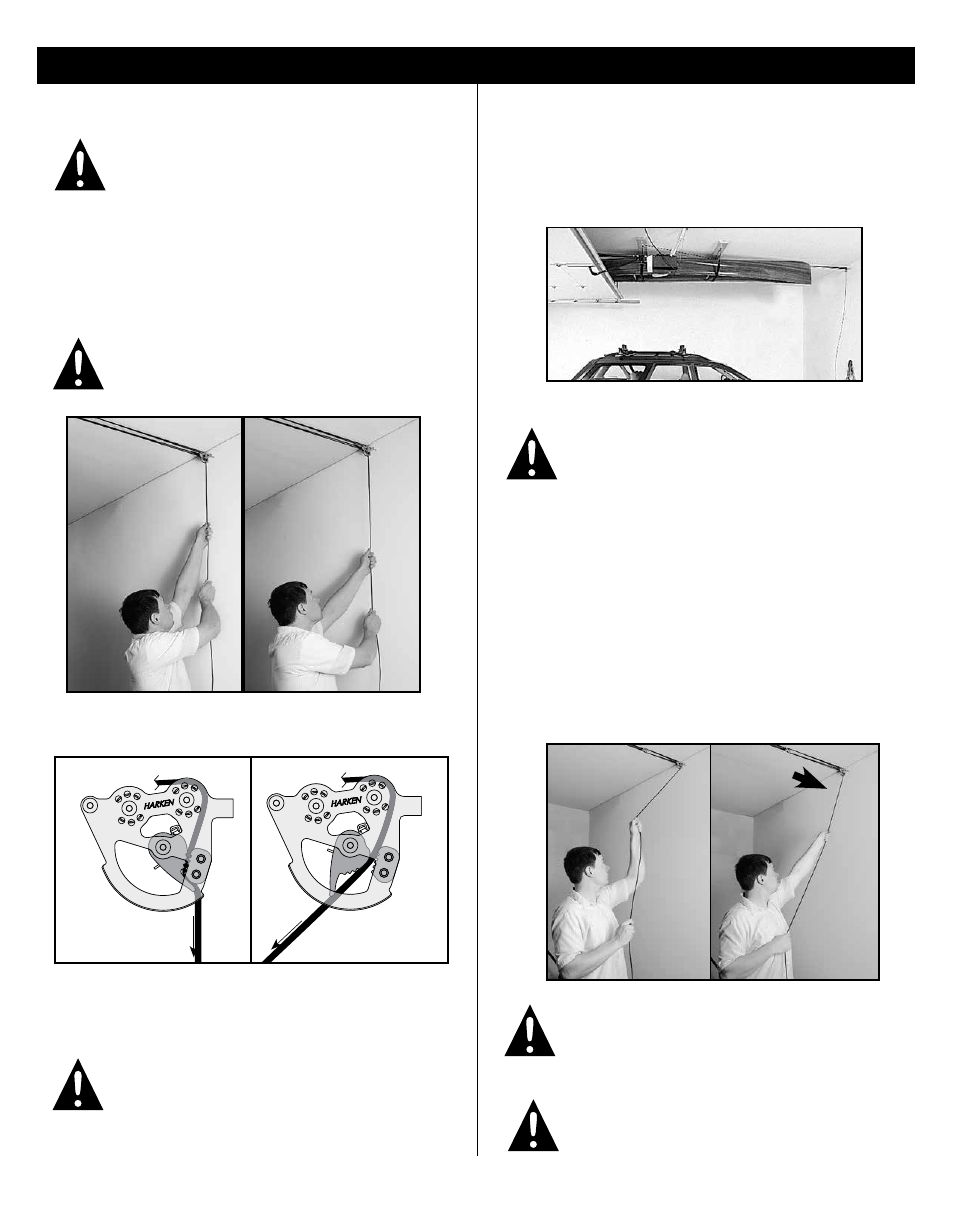
With rope pointed down, the cleat will lock the rope.
Angle to release. Repeat until object is at desired height.
A. RAISE OBJECT
Hoist in a series of pulls. Pull single black/red hoisting
rope (F) straight down.
B. STORE OBJECT
With object in raised position, make sure single black/
red hoisting rope (F) is securely locked in cleat with
rope pointed down (Diagram 21). Coil loose rope end.
Tip: For additional security, use two 5/16" (8 mm) polyester safety
ropes. Securely tie ends to pigtail lag screws under object, parallel
with webbing straps (E). Remove safety ropes before lowering object.
C. LOWER OBJECT
Securely grip rope, apply tension, and angle it away
from front wall. Bring arm up to let rope out and then
back toward the wall to lock the rope. Repeat until
object is at desired height.