Greenheck TSU Base Unit Manual (464441) User Manual
Page 5
Make-Up Air Unit
5
®
Sealant
1. Equipment Support(s)
-
consult factory
Position equipment support(s)
on the roof (reference
the CAPS submittal for
placement of equipment
support(s) in relation to
the unit). Verify that all unit
supports are level, shim if
necessary. Attach equipment
support to the roof, remove metal
cover, flash to wooden nailer and
reinstall cover.
2. Apply Sealant
Apply an appropriate sealant
around the airstream opening to
create an airtight seal.
3. Set Evaporative Cooling Module
Use a crane and a set of
spreader bars hooked
to the factory lifting lugs
to lift and center the
module on the equipment
support(s). The flange on
the evaporative cooler
should overlap the flange
on the unit.
4. Secure Cooling Module to Unit
Use self-tapping screws to fasten the cooling module to
the base unit along the top and down both sides. Fasten
at the top through the flanges.
Installation of Evaporative Cooling
Module (optional)
NOTE
Small evaporative coolers ship attached to the base
unit and require no additional mounting.
NOTE
The use of all lifting lugs and a set of spreader bars
is mandatory when lifting the evaporative cooling
module.
NOTE
When mounting the evaporative cooler, it is important
that it is level to ensure proper operation and water
drainage.
Metal Cover
Equipment
Support
Equipment Support
Sealant
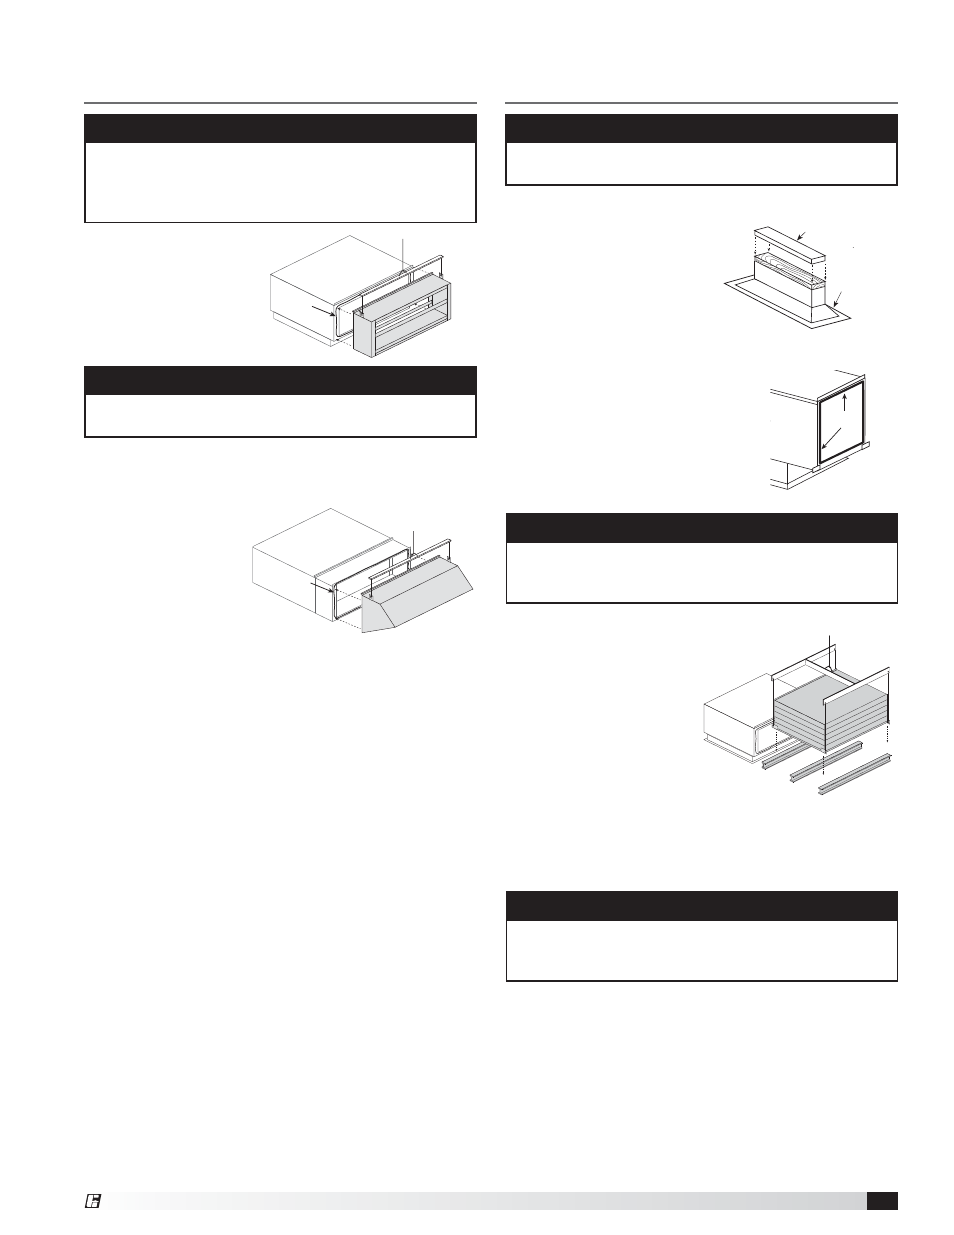
Installation – Filter Section and
Weatherhood
NOTE
Installation instructions for the filter section and
weatherhood apply only to non-evaporative cooling
units. For evaporative cooling units, skip to the
evaporative cooler installation instructions.
1. Apply Sealant
Apply an appropriate
sealant around the
intake end of the
base unit to create a
weathertight seal.
2. Install Filter Section
Use a crane and a set of spreader bars hooked to the
factory lifting lugs to
lift and center the filter
section on the intake
end of the base unit.
The flange along the
top of the filter section
should overlap the
flange along the top of
the base unit.
Use self-tapping sheet metal screws to fasten the filter
section to the base unit across the top and down the
sides.
If filters are not installed in the filter section, install them
now. Airflow arrows are located on the filters to ensure
proper installation.
3. Apply Sealant
Apply an appropriate sealant around the intake end of
the filter section to create a weathertight seal.
4. Install Weatherhood
Use a crane and a set of spreader bars hooked to the
factory lifting lugs to lift and center the assembled
weatherhood on the intake end of the base unit. The
flange along the top of the weatherhood should overlap
the flange along the top of the filter section.
Use self-tapping sheet metal screws to fasten the
weatherhood to the filter section across the top and
down the sides.
Sealant
NOTE
The use of all lifting lugs and a set of spreader bars is
mandatory when lifting the weatherhood.
Sealant