Current loop (direct), Current loop (direct) -5, Figure 6: direct current loop connection -5 – Daktronics DF-1030 User Manual
Page 21
To gain access to the driver enclosure, open the access door and remove the cover
from the enclosure. Refer to the Electrical Specifications Drawings for the access
location for your sign. For 13", 18" and 24" displays, access to the interior
components is gained by removing the screws from the hinged door. In the 36" and
48" displays, there are door latches, providing for access to the interior components
by removing the digits.
Current Loop (Direct)
Reference Drawings:
Riser Diagram, Outdoor Wire Control .......................... Drawing A-164988
Riser Diagram, Indoor Wire Control............................. Drawing A-175342
Quick Install, DF-1030 & DF-1040 Rate Displays........ Drawing A-177150
Enclosed Driver, 4 Column .......................................... Drawing A-184918
A direct controlled display uses a current loop connection from the j-box at the base
of the display to the driver enclosure in the sign. All the power and signal wiring
terminates at the driver enclosure. The DataMaster hand-held controller receives its
power from the display. The display layout is shown in Drawing A-177150.
Note: The cable from the j-box to the display needs to be routed through conduit or
the display pole to protect it from weather and vandalism.
1. Mount the j-box near the display.
2. Route a 6-conductor, 22 AWG, shielded cable through conduit from the j-
box to the driver enclosure in the host display. (Distance limit from the j-
box to the display is 50 ft.)
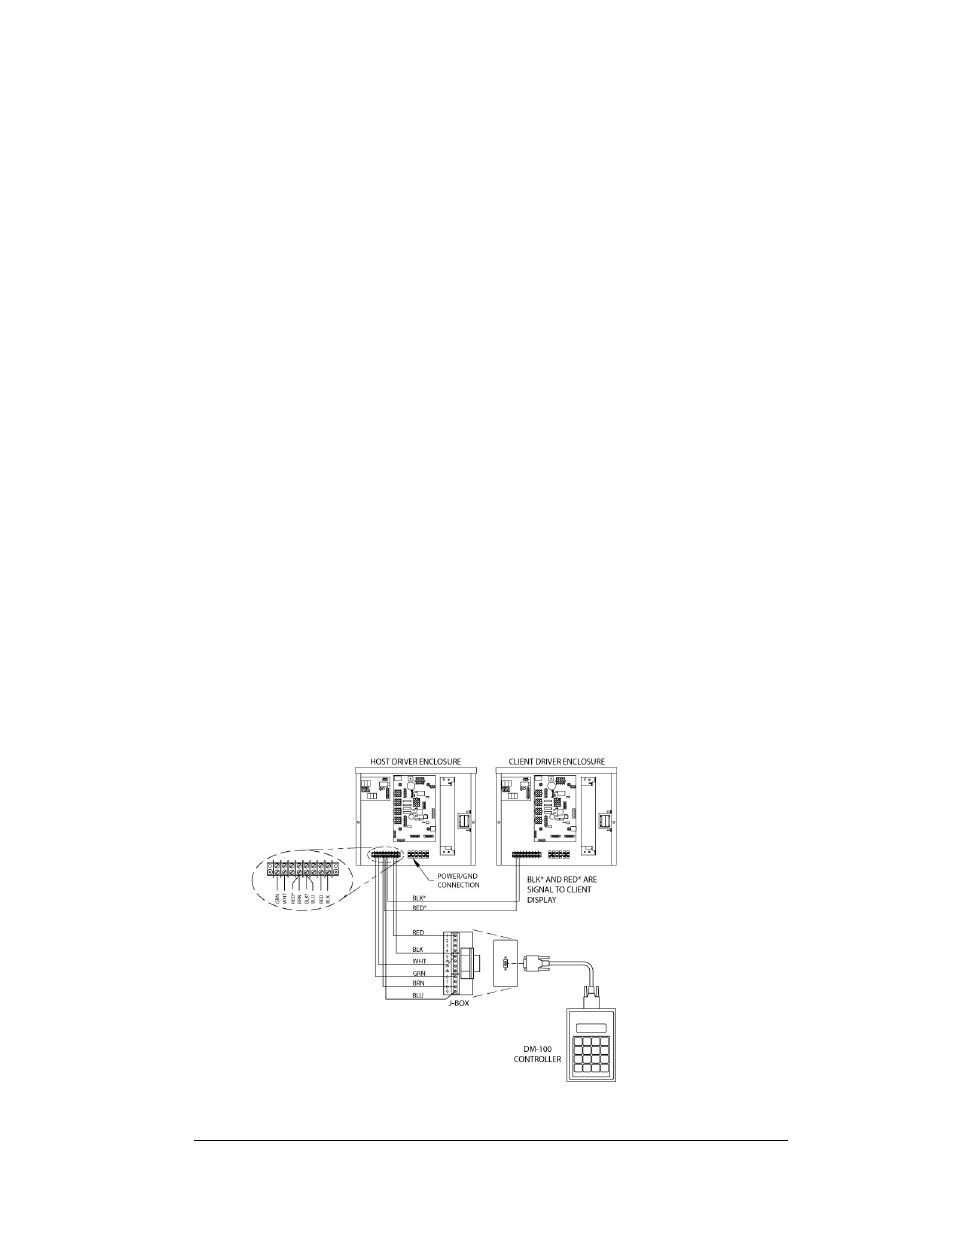
3. Connect the signal/power cable from the j-box to the driver enclosure as
and listed in the table. Refer to Drawings A-164988 and
A-184918 for additional information.
4. Using a DB9M to DB9F serial cable, plug the DataMaster controller into
the j-box, connected to the host display driver enclosure.
Figure 6: Direct Current Loop Connection
Electrical Installation
3-5