Blue alert® mobile, Blue alert mobile powered by guardly, User guide – Code Blue BLUE ALERT MOBILE User Manual
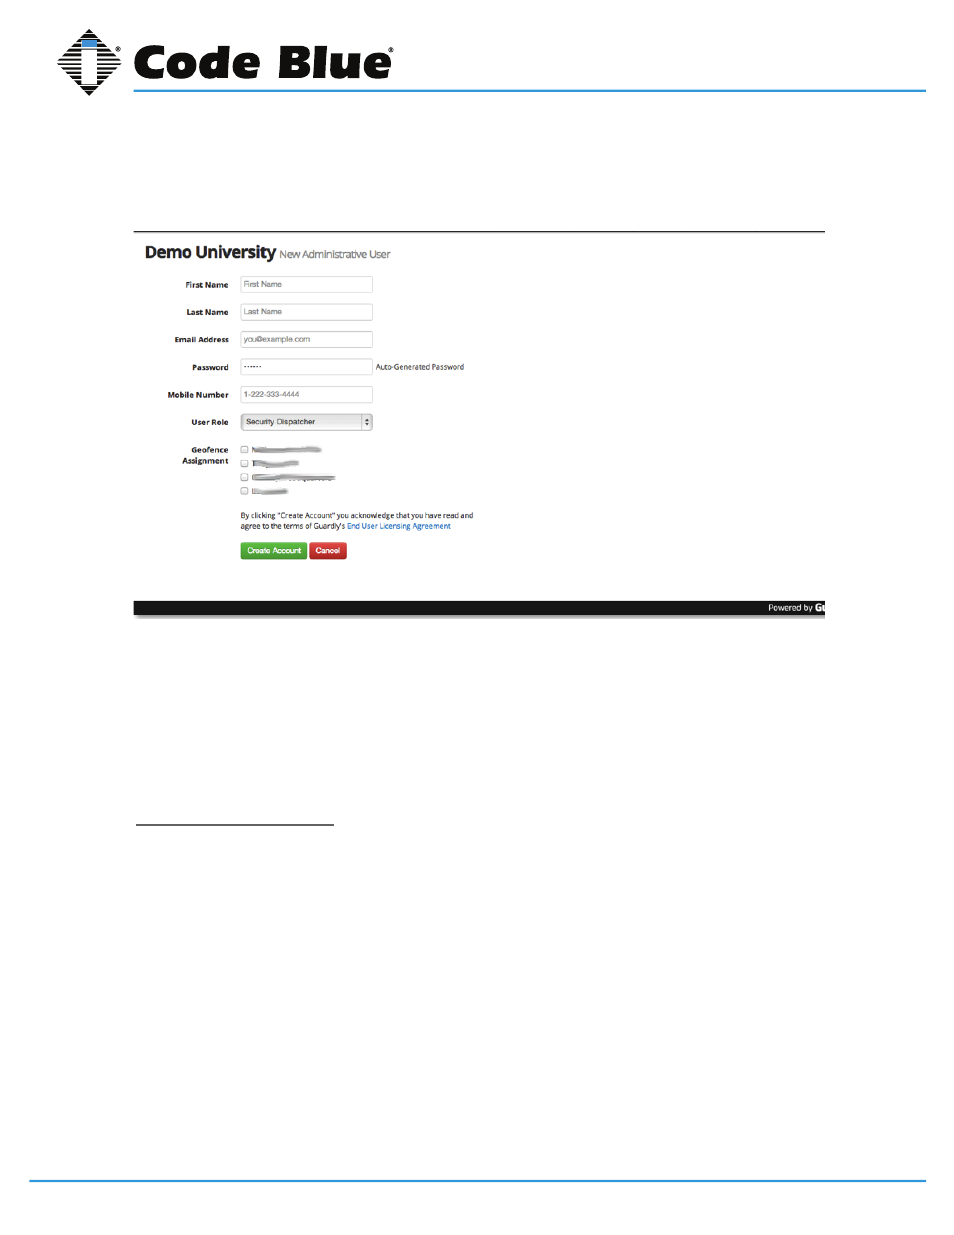
Page 22: Create new user screen
Code Blue
•
259 Hedcor Street
•
Holland, MI 49423 USA
•
800.205.7186
•
www.codeblue.com
GU-151-A
page 22 of 30
Blue Alert® Mobile
User Guide
To completely remove a user from the system, click the Remove from Admin icon at the bottom
of the screen. This will remove the user and revoke access to the Blue Alert Mobile Powered by
Guardly system.
If you do not wish to edit the user’s information or remove them from the system, click the Back link
in the top right hand corner of the screen.
5.2 Geofence Manager Screen
The Geofence Manager screen allows you to create, manage and disable Geofences around the
respective perimeters you monitor.
To access the Geofence Manager screen, select Geofence Manager under the Tools tab.
Create a new Geofence
Once you have selected the Geofence Manager tab, you will be brought to the default Geofence
Manager screen to create a new Geofence.
Geofence Manager Toolkit
On the left side of the screen you will have the Geofence Manager Toolkit that allows you to create,
edit and disable specific Geofences.
Use the following fields to select the appropriate customers and Geofences you wish to create, edit
or disable:
Customer
List the customers which you have oversight.
Blue Alert Mobile Powered by Guardly
23
IN-170-A
o Green checkmarks represent the user has successfully onboarded.
o Red X’s represent the user has unsuccessfully onboarded.
Active: Determines whether the user account is.
o Green checkmarks represent the user has an active account.
o Red X’s represent the user has an inactive account.
Edit: The Edit link brings you to the Edit Administrative User Screen.
Create a New User
To create a new user, select the New User Icon in the top right corner of the Administrative User Screen.
This will bring you to the Create New User Screen.
Create New User Screen
The Create New User Screen allows you to create new administrative users for the system.
To create a new user you must provide the information for the respective user in the following fields:
First Name: Add the first name of the user.
Last Name: Add the last name of the user.
Email Address: Add the email address of the user.