Cloud Electronics DCM1 User Manual
Page 60
DCM1 & DCM1e Installation and User Guide v1.0
60
•
Mic Priority
– enables mic-over-music priority
(music “ducking”) for the selected Zone or Group.
The priority mic must first be enabled for the Zone or
Group in Mic Inputs above for Mic Priority
to have effect. This corresponds to the Select Mic
Priority Input function in Installer Mode, Priorities
menu; see page 42.
•
Input Enable
– this allows the installer to define
which line inputs are available to the selected Zone or
Group as music sources; the default is for all eight to
be enabled. This corresponds to the Input Enable
function in Installer Mode, Routing menu; see page 33.
•
EQ
– three (Bass/Mid/Treble) drop-down lists allowing
EQ adjustment in the selected Zone or Group; these
correspond to the Treble, Mid and Bass functions in
Installer Mode, Music menu; see page 30 & 31.
•
Send Output
– transmits all OUTPUTS tab settings
for the currently selected Zone or Group.
•
Send All Outputs
– transmits all OUTPUTS tab
settings for all eight zones and all four Groups.
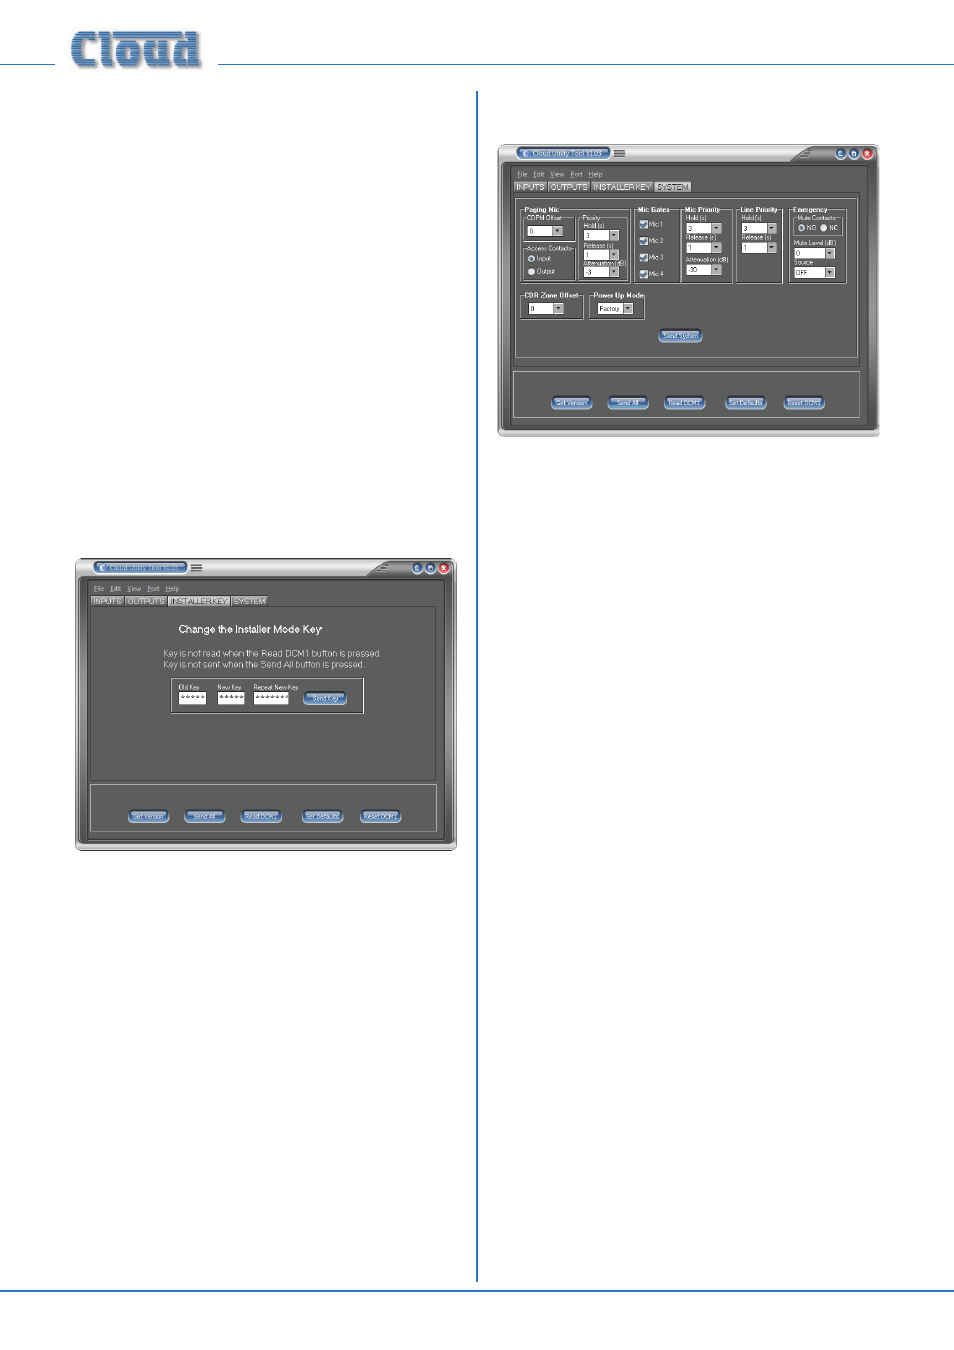
Installer Key Tab
This tab is solely concerned with resetting the four-digit key
allowing access to Installer Mode.
To change the Installer Mode Key, enter the existing key into
the Old Key field, and then enter the new key into both the
New Key
and Repeat New Key fields. The change will
take effect when the Send Key button is pressed.
This procedure corresponds to the Set Key menu function,
in Installer Mode, System Menu; see page 38.
System Tab
•
Paging Mic: CDPM Offset
– allows PM and
CDPM paging microphones to access more than
eight zones when using multiple DCM1s. This setting
corresponds to the PM Zone Offset menu function,
in Installer Mode, Routing Menu; see page 34.
•
Paging Mic: Priority Hold (s)
, Release
(s)
and Attenuation (dB) – these three related
controls determine how the ducking operates during
paging. They correspond to the Page Priority Hold
Time, Page Priority Release Time and Page
Priority Attenuation menu functions respectively;
see page 43 & 44.
•
Paging Mic: Access Contacts
– radio buttons
selecting whether the
PAGING ACCESS connector will
operate as an input port (for zone access during paging) or
an output port (to provide zone tallies)*. This corresponds
to the menu function Configure Access Connector in
Installer Mode, Routing Menu; see page 33.
•
Mic Gates
– enables noise gates on ME-1 remote
input modules; this control corresponds to the menu
function Mic Gate Enable in Installer Mode, Routing
Menu; see page 35.
•
Mic Priority
: Hold (s), Release(s) and
Attenuation (dB)
- these three related controls
determine how music ducking operates when the
priority microphone is in use. They correspond to the
Mic Priority Hold Time, Mic Priority Release
Time and Mic Priority Attenuation menu functions
respectively; see page 42 & 43.
•
Line Priority
: Hold (s) and Release (s)
- these two related controls determine how music
fades during operation of the Priority Line Input.
They correspond to the Line Priority Hold Time
and Line Priority Release Time menu functions
respectively; see page 41.
•
Emergency
: Mute Contacts – set whether the
MUSIC MUTE input responds to external N/C or
N/O contacts. This corresponds to the menu function
Configure Music Mute in Installer Mode, Priorities
Menu; see page 45.