Maintenance – Beisler 2211-5 User Manual
Page 54

- C 54 -
Short Seam Automat 2211-5 Working Instructions
Beisler Automated Sewing Equipment
C.5
Maintenance
C.5.5 Machine set-up
Adjustment of the clamp slide disengagement po-
sition:
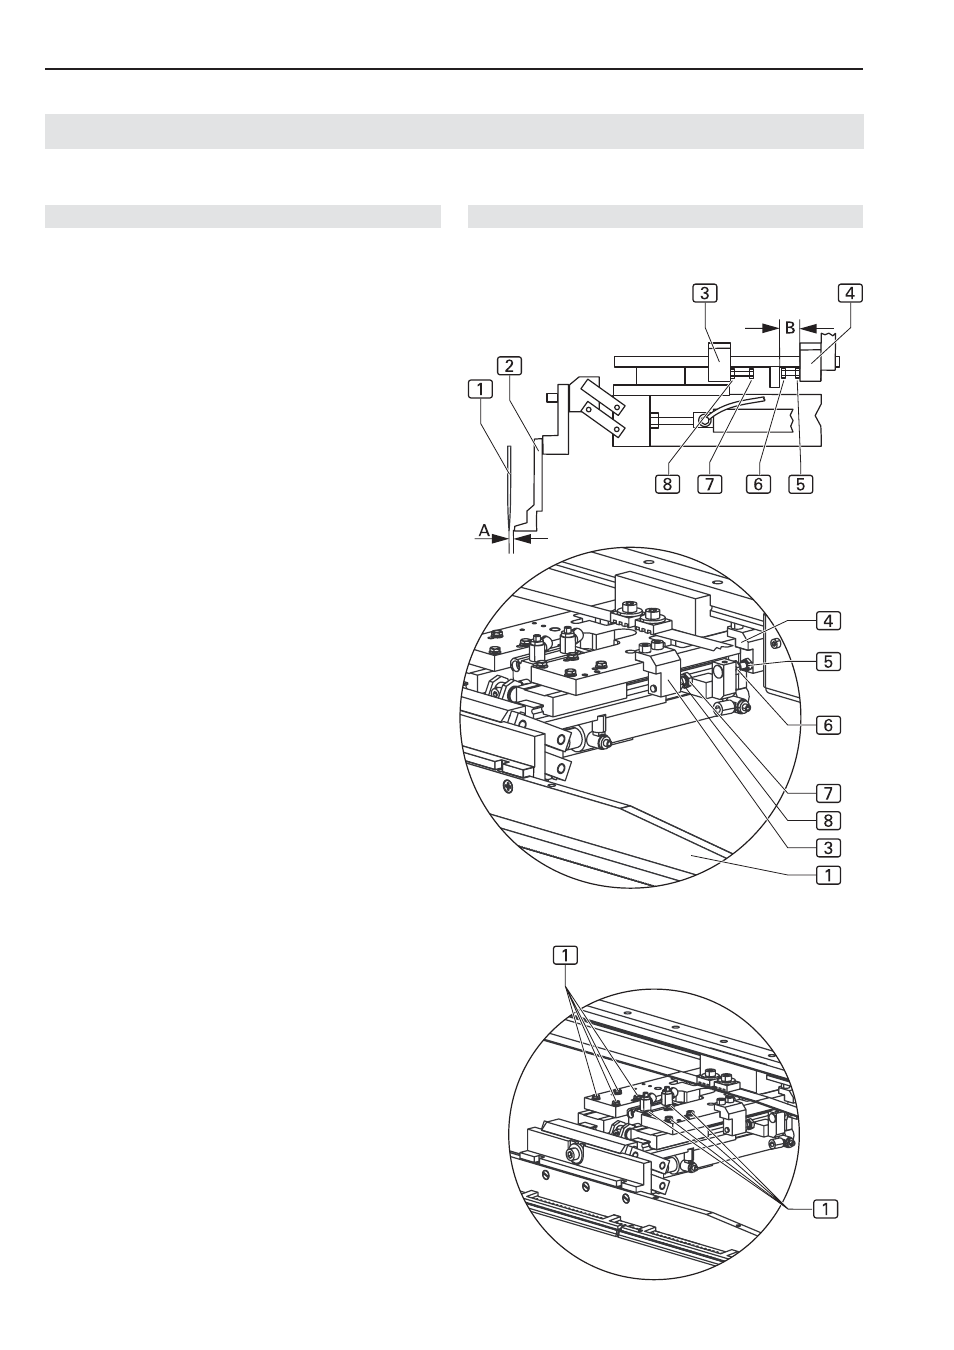
The disengagement position for the front and rear stop
point of the clamp slide is set at the pedestal.
Fig. 16: The front stop point 3 determines how far the
clamp slide will approach the needle of the sewing head,
the rear stop point 4 determines how far the clamp slide
will return to its start position.
Front stop point adjustment:
1. Lower main clamp.
2. Depressurize the machine. Disconnect compressed air
supply hose from on-site compressed air supply sy-
stem.
3. Move main clamp by hand below sewing head and lo-
wer needle using handwheel.
4. Fig. 16: Distance A between clamp rail 2 and needle
1 must be 1-1.5 mm.
5. Loosen lock nut 8 of stop screw 7 at pedestal and
rotate stop screw to the desired position.
6. Check distance A.
7. Tighten stop screw lock nut.
Rear stop point adjustment:
The rear stop point is adjusted correctly if the clear length
B of stop screw 6 measures exactly 10 mm.
1. Fig. 16: Loosen lock nut 5 of stop screw 6 and ro-
tate stop screw to the desired position.
2. Check length B.
3. Tighten stop screw lock nut.
Adjustment of the clamp rail parallel orientation:
1. Check to see if the sewing head needle is positioned
exactly parallel to the clamp rail along the entire length
of the rail by moving the main clamp under the sewing
head and checking the distance between rail and need-
le at several locations.
2. Fig. 17: If distance is not identical at all locations, loosen
eight retaining screws 1 of clamp bracket and move
clamp rail to parallel position.
3. Tighten clamp bracket retaining screws and recheck
parallel orientation of clamp rail.
Fig. 16/17
Fig. 16
Fig. 17
