Xtramus NuApps-MultiUnits-RM Ver1.5 User Manual
Page 22
Please follow the steps down below to start NuApps-MultiUnits-RM and NuServer properly.
Starting NuServer / NuApps-MultiUnits-RM
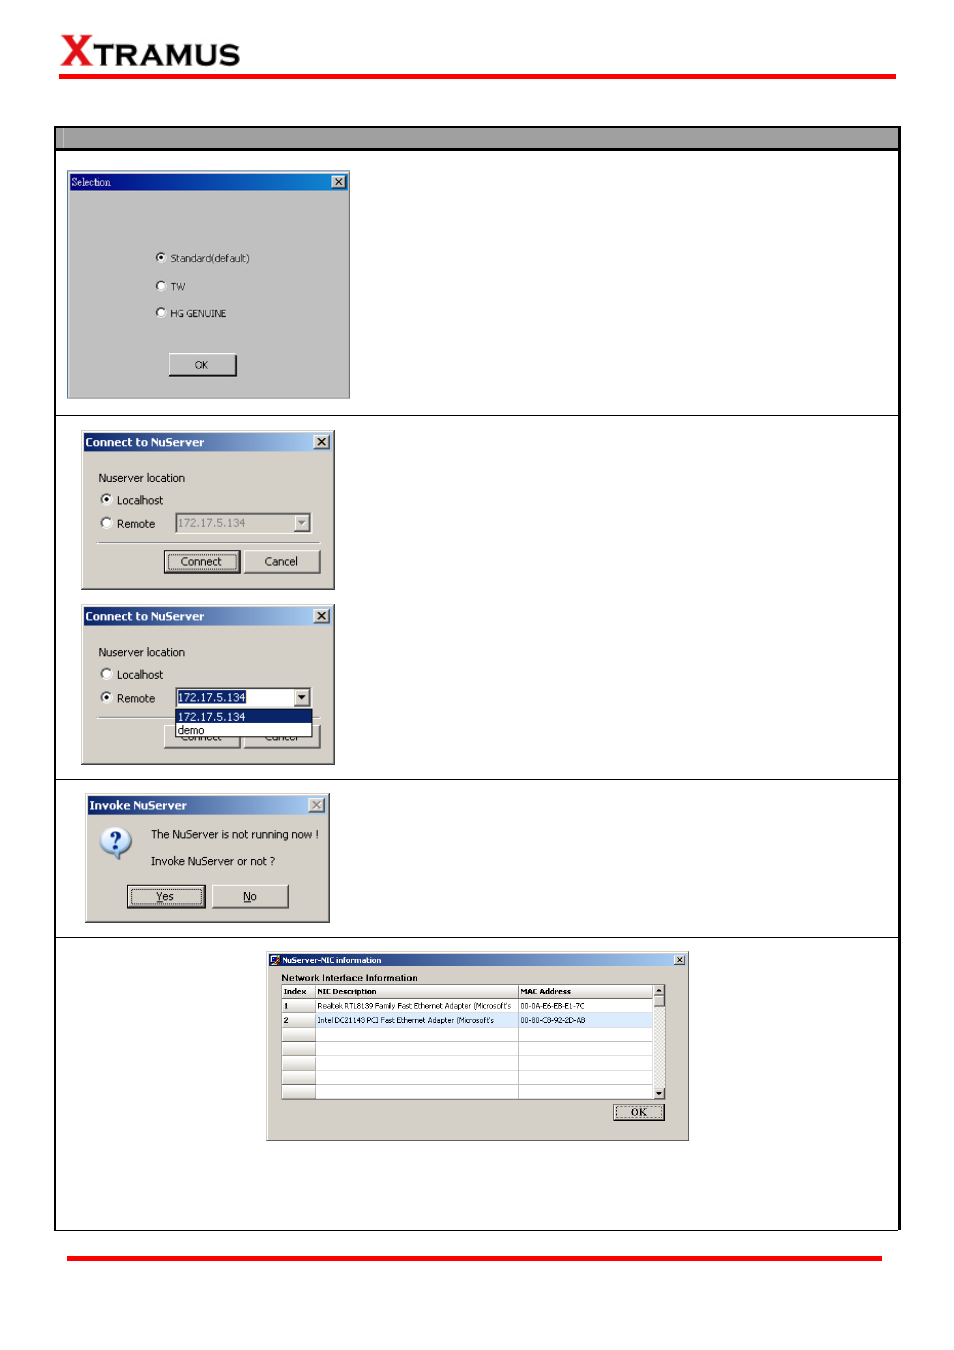
When you activate the NuApps-MultiUnits-RM, the first step is to
choose the right version of interface. Please choose the Standard
(default) and click OK button to proceed.
Note: If you chose a wrong interface, you can go to C:\Program
Files\NuStreams\NuApps-MultiUnits-RM v1.0bXXX and double
click the config.txt notepad to modify manually the correct
interface. Please modify the current Baron to OnInputDlg=0 for
standard interface.
When starting NuApps-MultiUnits-RM, a “Connect to NuServer”
window will pop up and ask how you are going to connect to
NuServer.
¾
Local Host: Choose this option when you’re running
NuApps-MultiUnits-RM from NuStreams-2000i IPC module or a
PC that’s connected to NuStreams-2000i/600i via an RJ45
cable.
¾
Remote: Choose this option when you’re running
NuApps-MultiUnits-RM from other PC located on the network.
Choose the IP address which is assigned from
NuStreams-2000i/600i from the scroll-down menu, or choose
demo to enter NuApps-MultiUnits-RM’s Demo Mode.
¾
Connect/Cancel: Click the Connect/Cancel button to connect
to NuStreams-2000i/600i or cancel starting
NuApps-MultiUnits-RM.
If NuServer is not running while starting NuApps-MultiUnits-RM, a
window will pop up and ask if you would like to run NuServer or not.
Please click YES to continue.
A “NuServer-NIC Information” window will pop up. Please select the NIC (Network Interface Card) which
is connected to NuStreams -2000i/ 600i’s from the Network Interface Information table, and click OK. If
you’re using NuStreams-2000i’s IPC module, please choose “Realtek RTL8139 Family Fast Ethernet”.
22
E-mail: [email protected]
Website: www.Xtramus.com
XTRAMUS TECHNOLOGIES
®