Tempest Cyclone User Manual
Page 39
Cyclone Enclosure User Manual
page 39
5.
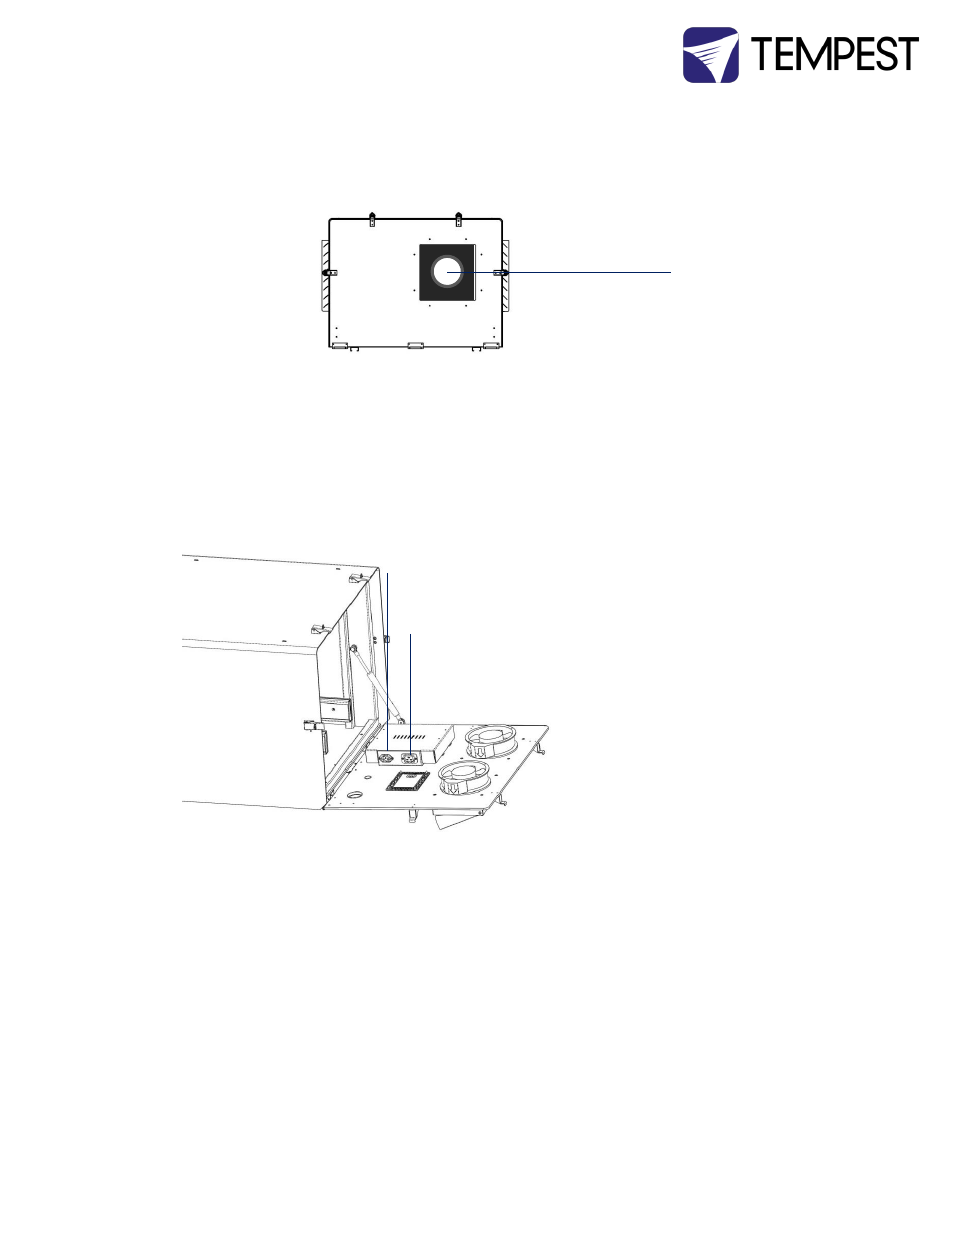
Return the projector tray into the Cyclone enclosure and check that the lens is aligned with the
projection window. Projectors with wide-angle lenses should be positioned with the front of the
lens as close to the window as possible to avoid clipping.
6.
Connect all cables to the projector, threading them through the flexible cable management
track. Allow for 7-13’/2-4m of cable inside the enclosure to run through the cable management
track to the projector. Actual length depends on the Cyclone model, front or rear tray slide, and
the location of connectors on the projector body.
7.
Plug the projector into the Projector power outlet on the back door.
*IMPORTANT:
North American models (model # with .US suffix, running on 208V or 240V
feeds): The Auxiliary power receptacle is NOT connected. Run a 15 Amp 120V circuit into the
enclosure and terminate on the back of the IEC C14 receptacle.
International models (with .IN model # suffix, running on 230V feeds): the Auxiliary power
socket is wired in parallel with the projector outlet.
8.
Slide the tray back into the Cyclone enclosure. Power up the projector and adjust the projector
feet as needed.
9.
Pull the tray out of the enclosure and either:
a. Bolt the projector through the mounting slots to the tray using the bolts and washers
provided.
DO NOT OVERTIGHTEN – THIS MAY DAMAGE THE PROJECTOR.
Lens should be
close to center of
projection window
Auxiliary Power Outlet
(IEC C14) *
Projector Power Outlet
(IEC C14 or NEMA L6-30 Twistlock)