Hapter, Nstallation – NEXCOM NEX 611 User Manual
Page 18
Copyright © 2011 NEXCOM International Co., Ltd. All Rights Reserved.
7
Chapter 2: Installation
NEX 611 User Manual
This is a Mini-ITX form factor motherboard. Before you install the mother-
board, study the configuration of your chassis to ensure that the mother-
board fits into it.
1.
Make sure to unplug the power cord before installing or removing the
motherboard. Failure to do so may cause physical injuries to you and
damages to motherboard components.
2.
In order to avoid damage from static electricity to the motherboard’s
components, NEVER place your motherboard directly on a carpet. Also
remember to use a grounded wrist strap or touch a safety grounded
object before you handle the components.
3.
Hold components by the edges and do not touch the ICs.
4.
Whenever you uninstall any components, place them on a grounded
anti-static pad or in the bag that comes with the components.
5.
When placing screws to secure the motherboard to the chassis, please
do not over-tighten the screws! Doing so may damage the mother-
board.
C
haPter
2: I
nstallatIon
Pre-installation Precautions
Take note of the following precautions before you install motherboard
components or change any motherboard settings.
2.1 Installing Memory Modules (DIMM)
This motherboard provides two 204-pin DDR3 (Double Data Rate 3)
SO-DIMM slots.
Step 1. Unlock a DIMM slot by pressing the retaining clips outward.
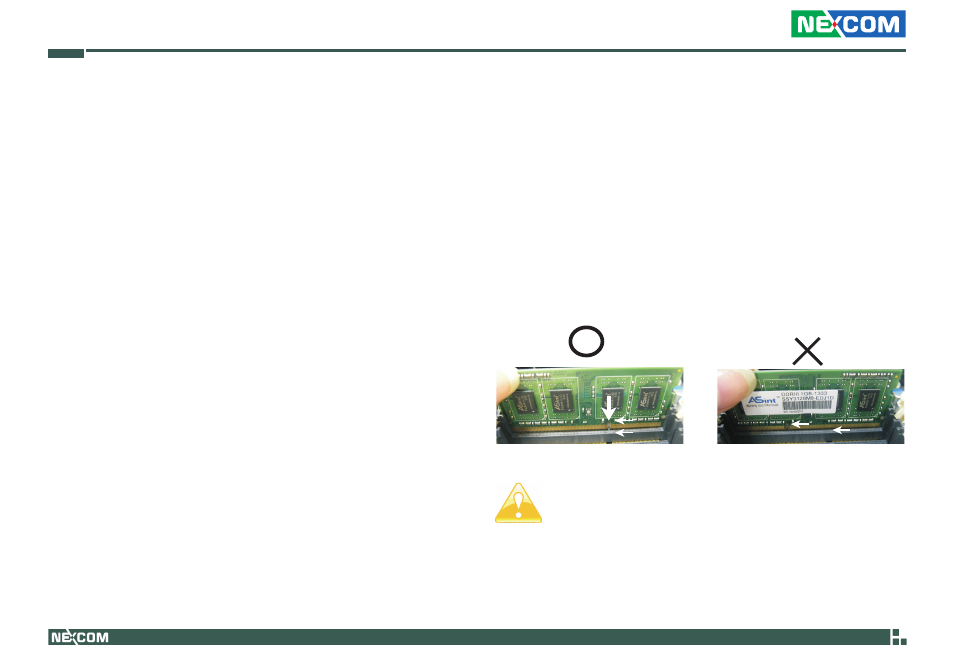
Step 2. Align a DIMM on the slot such that the notch on the DIMM
matches the break on the slot.
notch
break
notch
break
The DIMM only fits in one correct orientation. It will cause per-
manent damage to the motherboard and the DIMM if you force
the DIMM into the slot at incorrect orientation.
Step 3. Firmly insert the DIMM into the slot until the retaining clips at
both ends fully snap back in place and the DIMM is properly
seated.