d&b TI 385 d&b Line array design User Manual
Page 41
A mapping with a higher resolution would dramatically
increase calculation time while providing minimum
additional information.
Here you can also set the signal level that is applied to all
amplifier inputs. The selected frequency band is monitored
for sufficient headroom (Refer to section 10.7.9 Maximum
SPL and headroom on page 27).
Air absorption
Use the Air absorption switch to consider air absorption in
the SPL calculations. The Air absorption switch is located in
the Extras-Options menu and directly accessible from the
toolbar. The related settings for temperature and relative
humidity are also accessible there. (Refer to section
10.7.10 Air absorption on page 27).
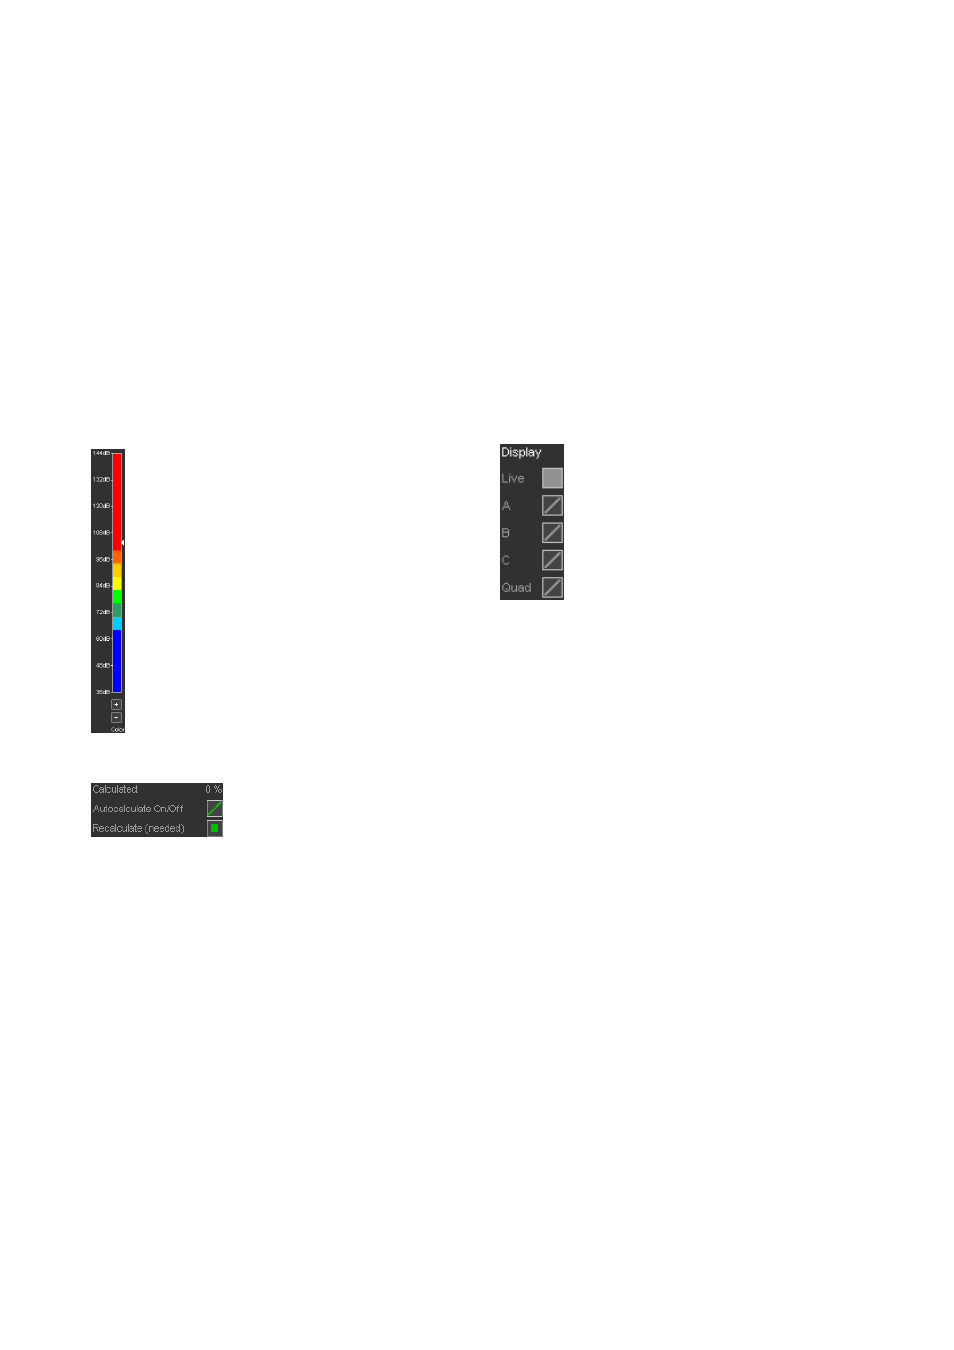
Color scale
The color scale for the SPL mapping has a fixed
6 dB per division resolution. The color scale
window displayed can be set according to the
calculation results. This is done by either clicking the
+/-- buttons underneath the scale or using the
mouse wheel while the mouse pointer is on the
scale. The small arrow to the right of the scale
indicates the highest SPL value calculated for the
plot.
The color scale does not rescale automatically. This
enables you to quickly notice the result of any
change in the setup while optimizing the project.
For a start, we recommend you to set the scale
taking the displayed "highest SPL" value as a
reference.
Automatic calculation and status
When the "Autocalculate" switch is
activated, the 3D mapping
calculation immediately starts as
soon as any relevant parameter in the project is changed,
even if the 3D plot tab is currently not active.
The calculation starts using a very rough resolution, getting
more and more detailed until the resolution set in the
options is reached. In the process, the 3D plot is constantly
updated.
This procedure allows you to modify setup parameters as
soon as a certain result or behavior is perceptible without
having to wait for the calculation to be completed. The
progress of the calculation in relation to the target resolution
is displayed in per cent.
Note: However, please note that constant
recalculation will lead to a persistently high processor
load and will quickly discharge your notebook batteries.
For this reason, when working on notebook computers
without AC supply, switch off the "Autocalculate"
function. You can trigger a recalculation manually by
clicking the "Recalculate" button. If a relevant parameter
in the project has been modified since the last
calculation, this is indicated by "Recalculate (required)".
Memories and display options
The 3D plot provides three memories to store calculated
mapping results and various display options. This feature
enables you to compare either different frequency bands
for one source configuration or different source
configurations for the entire venue.
In the "Memories" section underneath the diagram you can
store a calculated mapping result with the current viewport
settings including all related project data such as room and
array configurations to a particular memory (A, B or C) by
clicking one of the Save buttons. If you want to edit the
data of a memory, click the respective "Load" button next to
the "Save" button.
This will load the stored mapping results including the
complete room and source configurations to the live
workspace. Please note that loading a stored memory will
overwrite the current settings of your live workspace.
You can view a memory by selecting the
respective display option on the left side of
the diagram. You can choose individual
views (Live, A, B or C) or a combined view of
all results (Quad). If you want to change the
default preset view for a memory, display the
respective memory A, B or C individually and
select the desired preset view. This view will
then also be displayed in the Quad view.
Keep in mind that this option is intended for display
purposes only. The related project settings are not loaded
to your live workspace.
Notes:
1. ArrayCalc does not store any mapping results when
you save a project file. Only the project, room and
array settings of the live workspace are saved. Also
the A, B and C memories are only temporarily
stored during an ArrayCalc session. As soon as you
exit ArrayCalc, this data is also lost. That means, if
you want to keep the project configuration on which
an SPL mapping is based and which you stored to
one of the memories, you have to load the relevant
memory to the live workspace and then save it as a
project. When the project configuration has been
saved, the mapping results can easily be
recalculated by loading and recalculating the
respective project file.
2. Saving and loading high-resolution mapping data
for large venues can take a lot of time and require
massive amounts of RAM, easily reaching the
gigabyte range!
Print and Export
You can print out all possible display options of the
mapping diagram(s) or you can export them in *.png
format for further use in documentation. To use the print or
export function, select "Print" or ''Export" from the File menu.
TI 385 (6.0 EN) d&b Line array design, ArrayCalc V8.x
Page 41 of 54