4 arraycalc workspace, 1 general data input, 2 project settings – d&b TI 385 d&b Line array design User Manual
Page 17: 3 venue editor
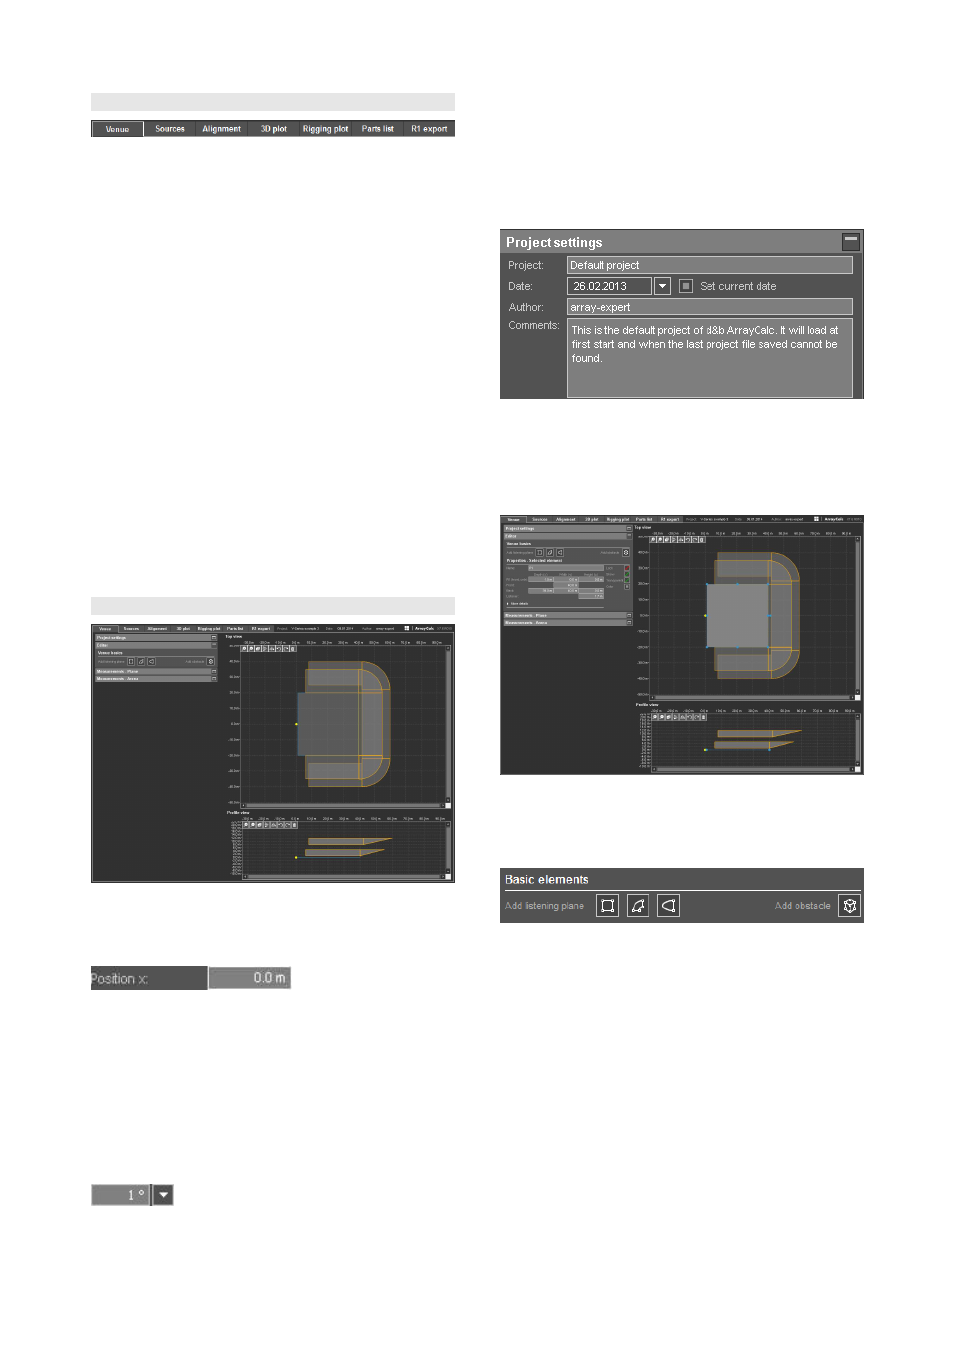
10.4 ArrayCalc workspace
The workspace is sub-divided into seven pages giving
access to the various data input tables and calculation
results:
The usual procedure is first to enter the project description
which can be accessed from the first four pages "Venue",
"Sources", Alignment" and "3D plot". Then room data is
provided in the Venue editor which is accessible on the
Venue page (see following section).
On the Sources page, you can add line arrays to the
project and design their profiles and locations depending
on the vertical dispersion requirements for each position. In
addition, or alternatively, you can define and enter a group
of d&b point sources or column loudspeakers. Furthermore
an optional SUB array can be defined and tuned here (see
also section 10.10 SUB arrays on page 32).
If you use more than one source, the Alignment page (see
section 10.11 Alignment page on page 38) helps you to
correctly time align the sources in a next step. This also
includes the SUB array alignment.
In a third step, the 3D plot page enables you to tune and
verify the detailed settings of the horizontal aiming and
relative leveling of the arrays in order to achieve the desired
level distribution.
10.5 Venue page
10.5.1 General data input
Cells with a gray background accept direct data input.
A single click places the cursor in the cell to edit data.
A double-click additionally highlights the value left of the
decimal point for editing and replacement while a triple
click highlights the entire cell contents for editing and
replacement.
To switch between metric and imperial units, refer to section
10.3 ArrayCalc menu options on page 16.
Cells with a drop-down icon attached offer a predefined
selection of data input available from the drop-down list.
Place the mouse pointer onto these cells and turn the mouse
wheel to scroll through the possible selections for the
respective cell.
This is a fast tool to manually set splay angles.
10.5.2 Project settings
Enter information about the project you are planning. This
data will be displayed in the headline or in the dedicated
Comments sections as well as in the printouts.
10.5.3 Venue editor
General editing
A listening plane is added to the project by clicking one of
the basic geometric shapes, the quadrangle, the arc
segment or the superelliptic plane.
A quadrangle starts as a square which can be moved,
rotated and modified to any possible shape of a
quadrangle. This is done by either modifying its coordinates
numerically or by grabbing and moving the shape with the
mouse as a whole, or dragging one of its corner points or
its rotation point in one of the diagrams.
An arc segment starts as a symmetrical section of two
concentric circle segments. It can be moved, rotated and
modified to any possible shape of an arc segment by
grabbing and dragging one of its corner points, one of its
center points or its rotation point.
In the Venue editor, an arc segment is displayed in full,
while for level calculations and mappings (3D plot) each
arc is segmented into a suitable number of quadrangles.
TI 385 (6.0 EN) d&b Line array design, ArrayCalc V8.x
Page 17 of 54