Set vertical aiming of the first t10 cabinet, Add further t10 cabinets – d&b T-Series User Manual
Page 35
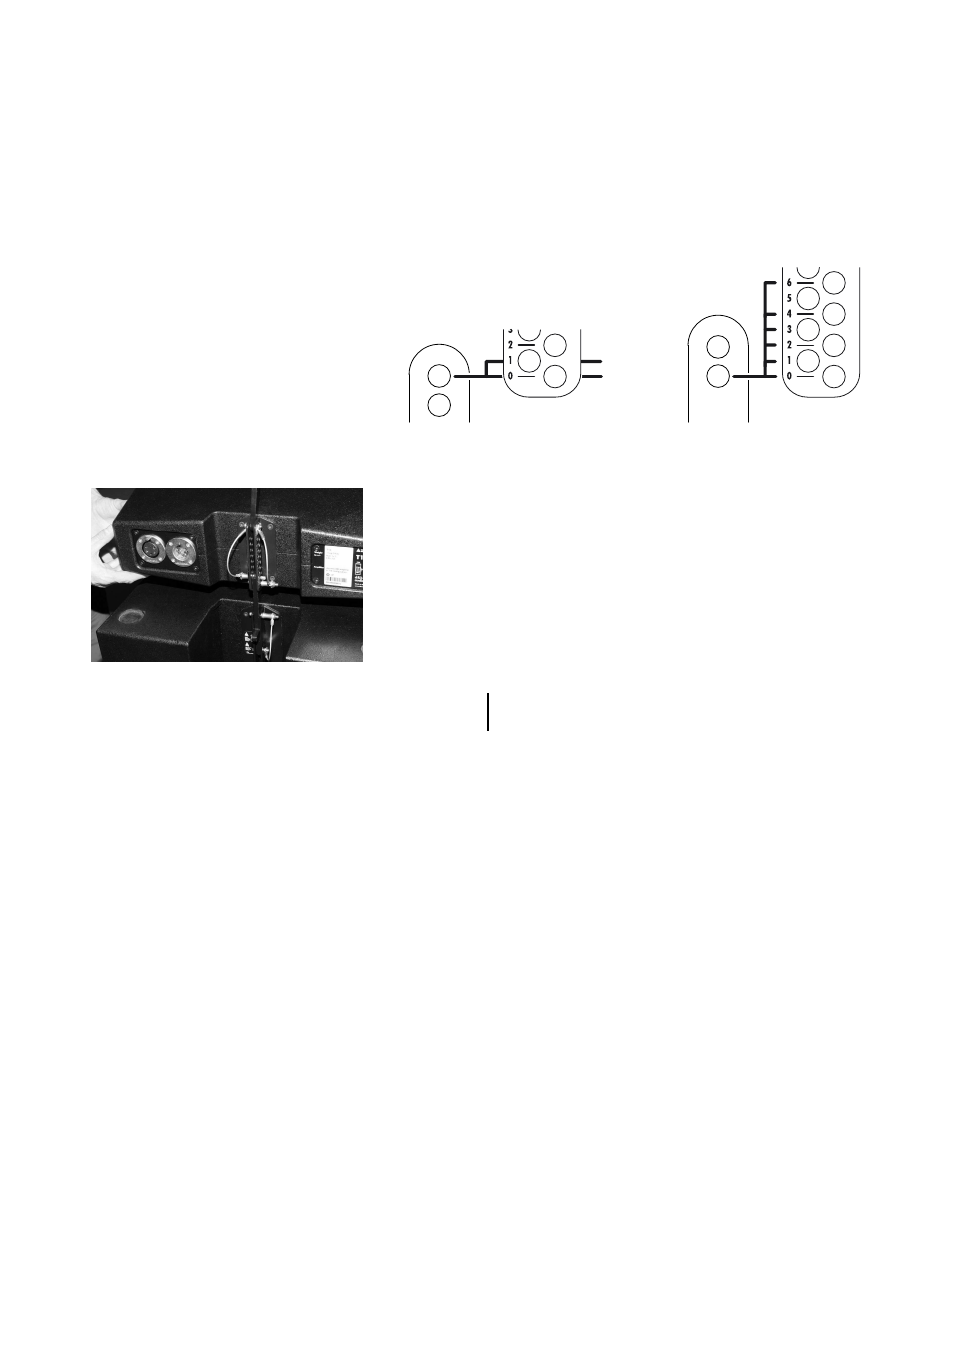
3. Set vertical aiming of the first T10 cabinet
The vertical aiming of the first T10 cabinet connected to the T-SUB
depends on the chosen hole of the T-SUB's Rear link.
Using the upper hole of the Rear link allows for angles of –2° or –1°.
Using the bottom hole allows for angles of 0°, +1°, +2°, +3°, +4° or
+6° corresponding to the scale on the T10 rear rigging strand.
-2°
-1°
To apply the angles proceed as follows:
- On the rear release the Locking pins of the Splay link of the T10
cabinet and fold up the Splay link.
- Release the Locking pin of the Rear link of the T-SUB.
- Slide out the Rear link up to its stop position.
- Insert and lock the Locking pin for the Rear link on the T-SUB cabinet.
- Align the T10 cabinet to the desired angle as shown in the graphic
above.
- Insert the Locking pin for the Rear link on the T10 cabinet.
Note:
The second Locking pin is not used. It should be stored in
one of the remaining holes on the rear rigging strand.
4. Add further T10 cabinets
- Slide out the Front links on the currently attached T10 cabinet.
- Prepare the next cabinet and preselect the desired splay angle on
the rear rigging strand of the next T10 cabinet.
- Release the Locking pins at the front of the cabinet.
- Attach the cabinet to the Front links of the bottom cabinet.
- Insert and lock the Locking pins for the Front links on both sides.
T-Series Rigging manual
(1.1 EN)
Page 35 of 44