Attach the flying frame to the assembly, Attach the next assembly – d&b T-Series User Manual
Page 28
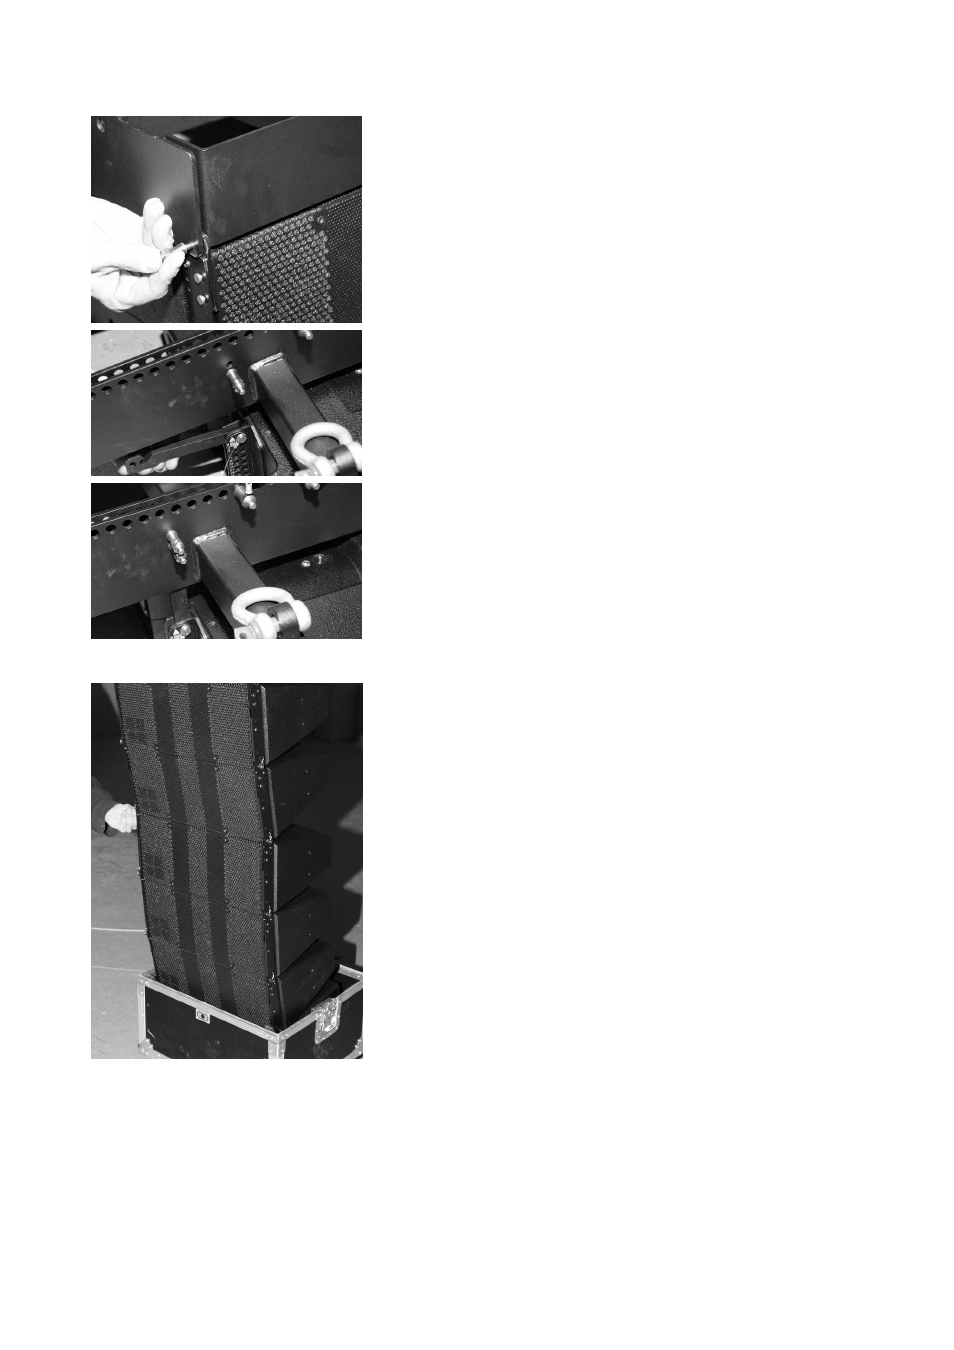
3. Attach the Flying frame to the assembly
- Lower the frame onto the assembly until the Front links fit into the
slots at the front of the frame while a second person secures the case
against moving and tipping over.
- Insert and lock the frame's Locking pins through the Front links of the
T10 cabinet on both sides.
- Release the upper Locking pin at the support point for the Splay link
on the center bar of the frame.
- Fold up the Splay link of the cabinet into the track of the frame's
center bar until the link hooks over the Locking pin.
To achieve this you may first have to lower the frame slightly more.
- Lift the frame by hand until the Splay link hooks into the Locking pin
and keep holding the frame in this position.
- Insert the second Locking pin (safety pin) to secure the Splay link.
- Lift the assembly out of the case to a suitable working height to add
the next assembly of T10 cabinets.
4. Attach the next assembly
- Place the next Touring case assembly.
- Set and secure the splay angles between the cabinets as described in
the previous step 2 on page 27.
- Slide out the Front links of the upper cabinet.
- Release the Locking pins at the front of the bottom cabinet of the
previously attached assembly.
- Lower the upper assembly until the Front links fit into the slots at the
front of the upper T10 cabinet while a second person secures the
case against moving and tipping over.
- Insert and lock the Locking pins through the Front links of the T10
cabinet on both sides.
- Slowly lift the entire assembly out of the bottom tray of the case.
T-Series Rigging manual
(1.1 EN)
Page 28 of 44