Installation, Method 1, Method 2 – Glow-worm Flue User Manual
Page 8
0020095198_02 - 06/11 - Glow-worm
INSTALLATION
- 8 -
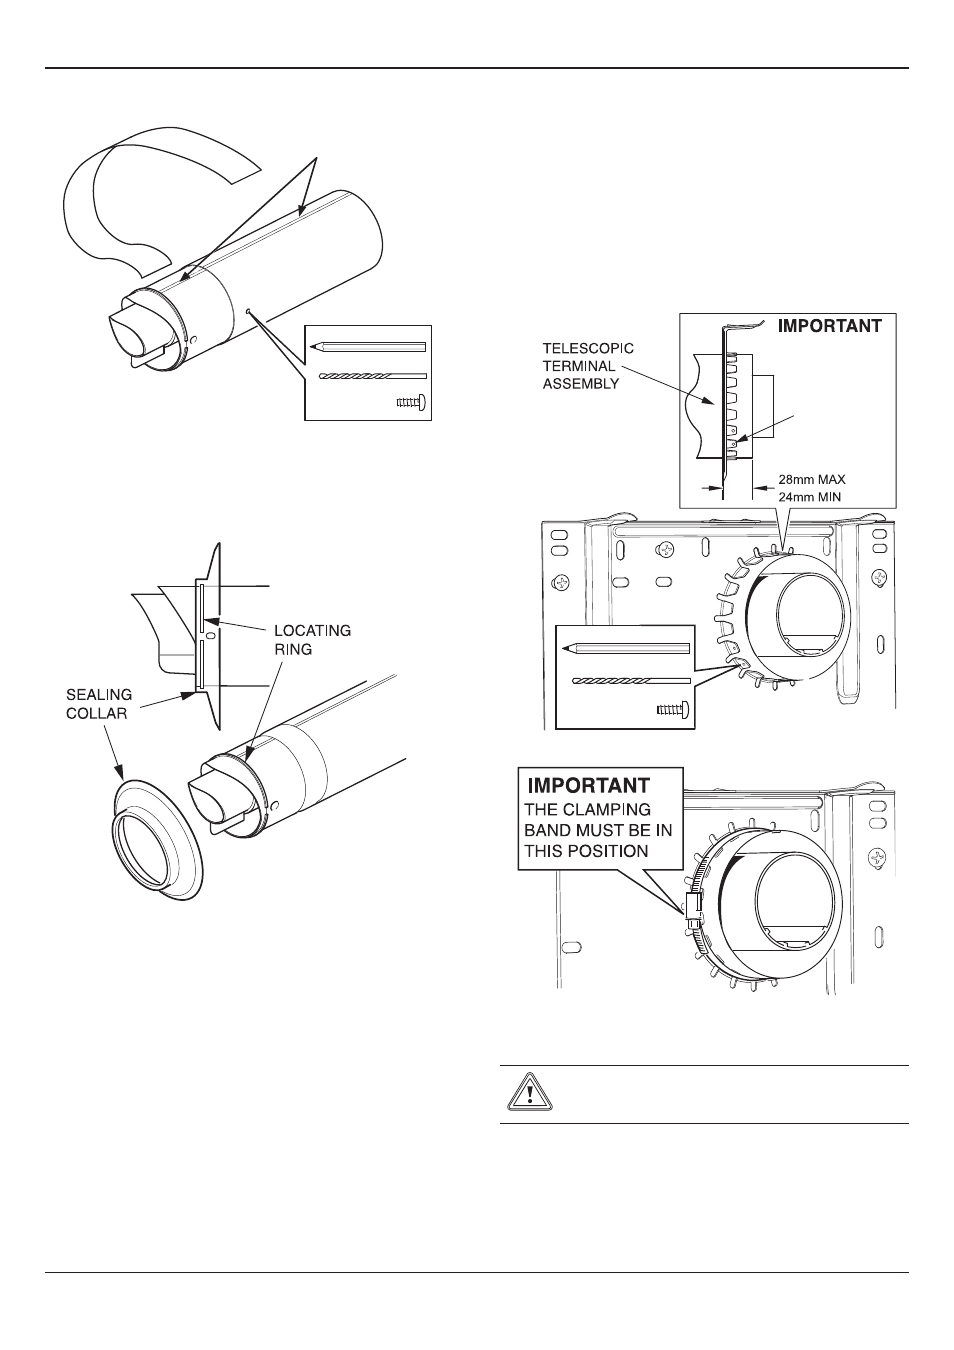
Align air duct seams
Ø 3mm
2.2
external flue Installation
• If required, fit the sealing collar onto the locating ring of the
flue terminal.
• Push the telescopic flue assembly into the wall and through
the grips.
• Pull the flue assembly forward to the required depth shown
in diagram, then secure using one of the described methods
opposite.
2.3
Internal flue Installation
• If required, fit the internal sealing collar onto the locating ring
of the flue terminal.
• Push the telescopic flue assembly through the grips and wall,
until the sealing collar has exited the hole.
• Pull the flue assembly forward to the required depth shown
in diagram opposite, then secure using one of the described
methods opposite:
Method 1. securing screws (3)
There are six holes provided in the grips, three of these
should be used to secure the flue. Mark and drill 3mm holes
in the air duct then secure to the grips with the screws
provided.
Method 2. clamping band
Secure the telescopic terminal assembly using the clamping
band supplied. The clamping band securing screw must be
fitted in the correct orientation.
MeTHoD 1
Secure clamping
band grips at
three positions
with screws
provided
Ø 3mm
MeTHoD 2
Secure clamping
band in position
Check that the flue air duct has been securely
retained by the clamping band and grips before
fitting the appliance.
On completion of flue installation, continue with the appliance
installation, referring to the appropriate section of the appliance
installation instructions supplied.