Installation – Glow-worm Flue User Manual
Page 21
0020095198_02 - 06/11 - Glow-worm
INSTALLATION
- 21 -
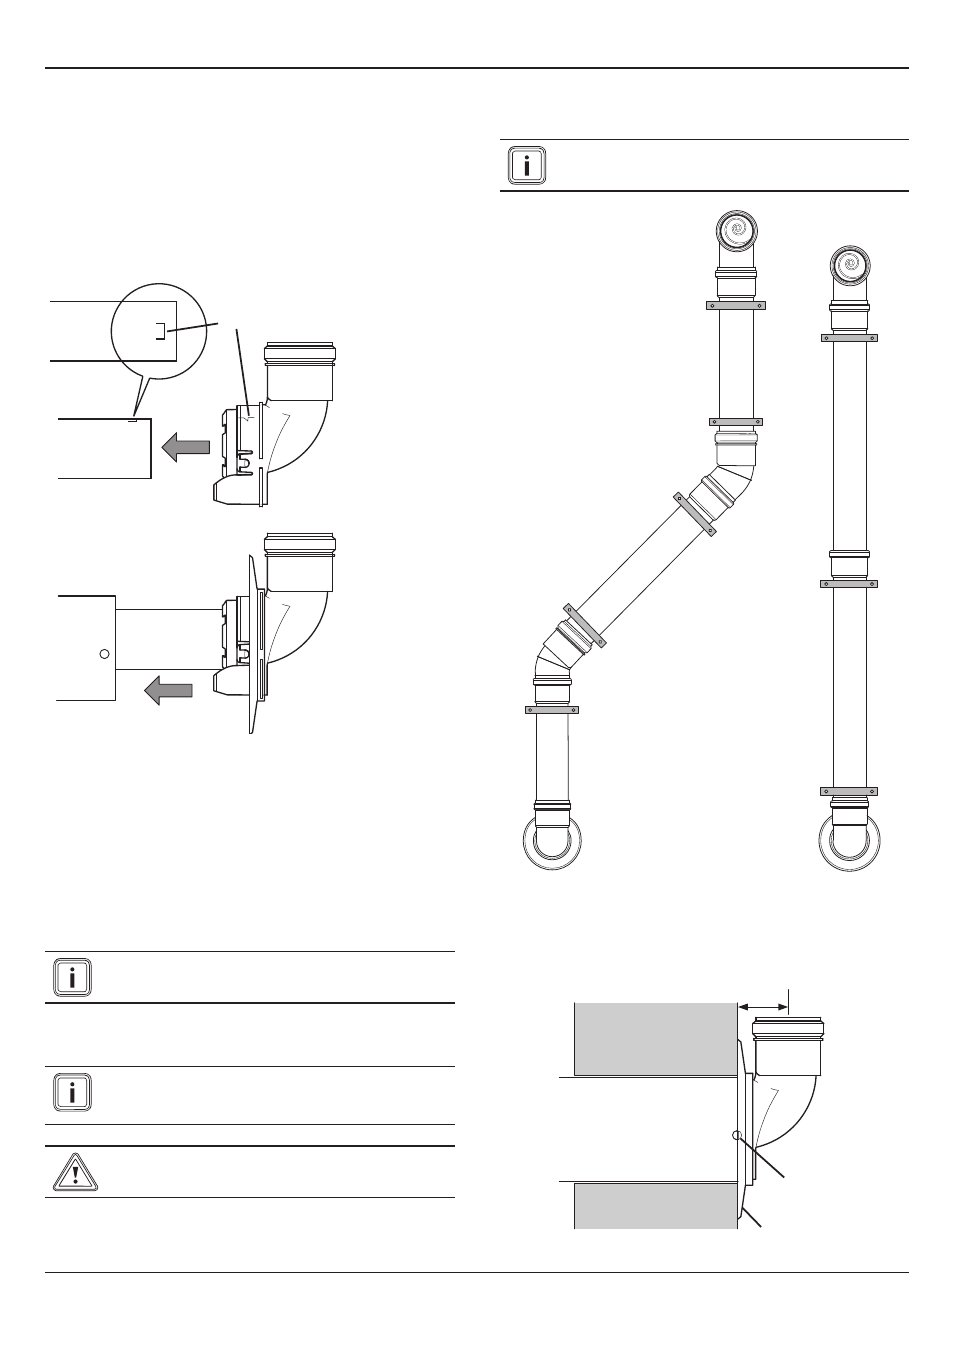
Push the wall connector onto the flue duct.
noTe: the catch on top (inside) of the wall connector must lock
firmly into the notch on top of the flue duct.
Fit the rubber collar.
Push the flue duct and wall connector into the air duct make
sure the seals fit tightly.
Catch
Wall
Connector
noTe: The seam of the air duct must be at the top.
If the appliance has not been fitted, continue as described in the
installation, instructions supplied with the appliance.
Using the 1M pipes, pipe fixing clips and 87° bend with bird
protection build the (All push fit) plume management kit from
the fitted wall connector to the selected location for the flue exit.
Ensuring the joints are totally sealed. The flue pipes will expand
when heated leave 1cm expansion gap in each connection.
The flue should always have a fall of at least 2
1
/
2
°
(44mm/metre) towards the appliance.
When cutting 1M pipes to desired length, cut the opposite end
to the seal and remove all burrs.
The flue seals are sensitive to mineral oil based
lubricants. Do not grease the seals. If the seals do
need to be lubricated use only water.
Take care when inserting not to push out the seals.
Additional pipe, 87° bends and 45° elbows may be used as
necessary.
Using the pipe fixing brackets supplied, secure the straight pipe
to the wall.
The first bracket must be positioned as close to the
Wall Connector as possible.
PIPE FIXING BRACKETS
The straight pipe must be secured every metre and at each
change of direction so more brackets may be required (3
supplied).
55
Locking
Position
Collar