Installation – Glow-worm Flue User Manual
Page 26
0020095198_02 - 06/11 - Glow-worm
INSTALLATION
- 26 -
TERMINAL
x
x
PITCHED ROOF
FLAT ROOF
TERMINAL
The maximum length
X
plus
terminal, refer to installation
instructions.
For every 87º or 2 x 45º bends
fitted, the maximum length
must be reduced by 1 metre.
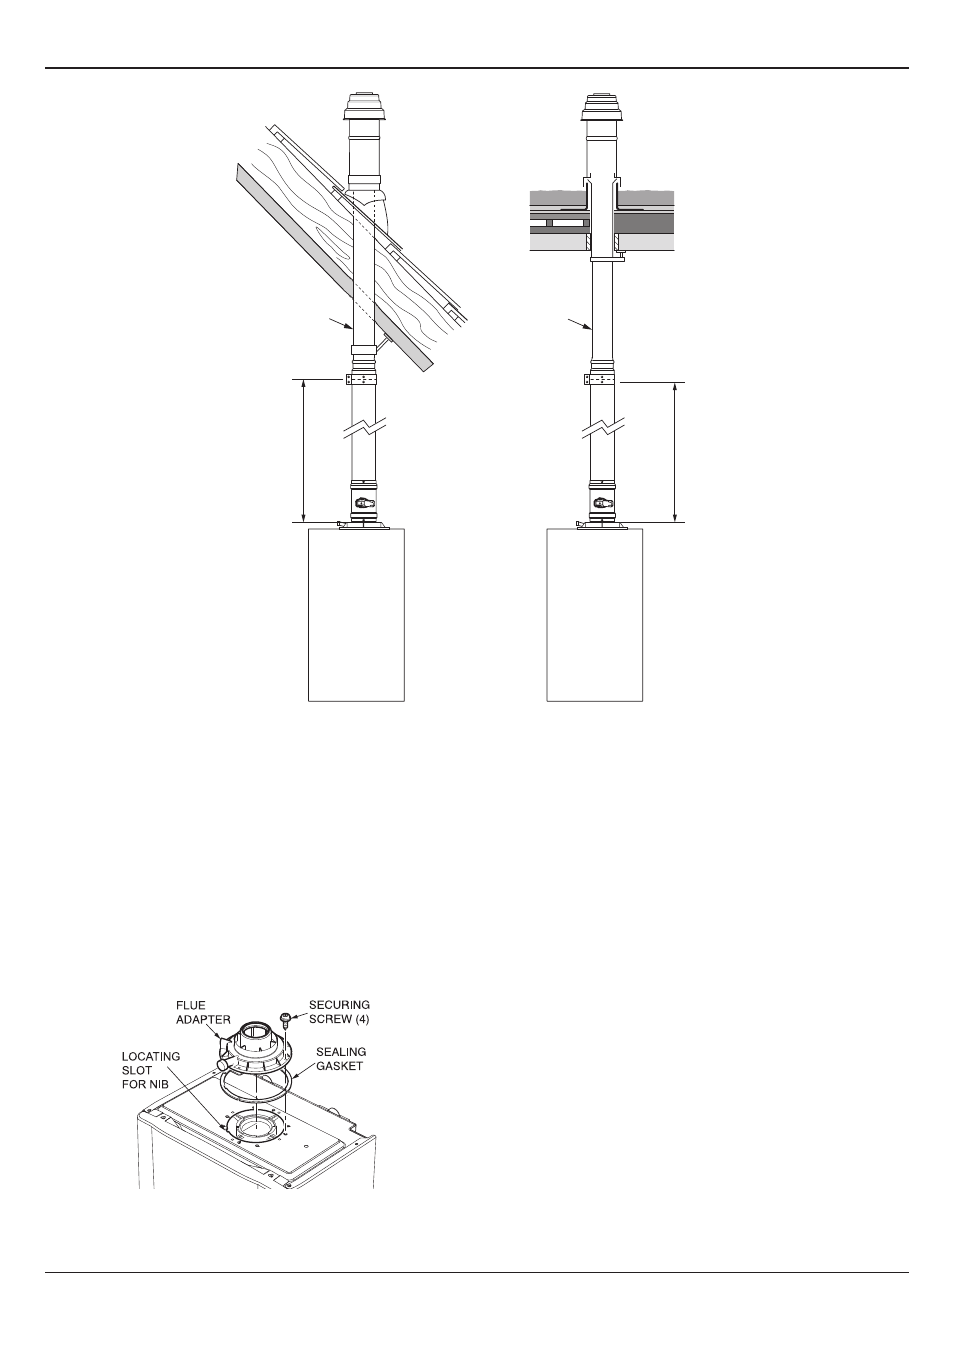
7.8
Vertical concentric flue Ø80/125
Check the contents of your kit.
Make sure you have all the necessary components before
proceeding with the installation.
7.9
flue length and Terminal Position
Determine your maximum flue length and terminal position
required, as described in your installation instructions supplied
with your appliance, then proceed as follows:
• Secure the flue adapter in position on top of the appliance
with four screws supplied.
noTe: Make sure the nib fits into the locating slot in the
appliance casing to ensure correct orientation.
• Fit the flue terminals as described in the following
paragraphs, pitched or flat roof.
• Measure the flue lengths required. In case of installation
directly to the boiler without elbows, it is essential that the
roof tile/collar is vertically aligned with the air/ flue duct of the
boiler.
7.10 Pitched Roof Terminal Installation
• Determine the point where the vertical air/flue duct and
terminal assembly will exit the roof.
• Fit the flexible pitched roof weather collar (2). over the
125mm. hole in the roof. Make good the tiling or slating
around the collar incorporating the flashing of the weather
collar.
• Position the angle cap over the weather collar in the correct
orientation to attain the correct angle for your roof.
• Working from above, insert the vertical roof duct (1) through
the roof tile and push it firmly into place.
• Vertically align the roof duct and attach it to the roof structure
with the fixing bracket (3) supplied.
• Fit the boiler hanging bracket and install the appliance
with reference to the installation and servicing instructions
supplied with the appliance.