SINGER 610U User Manual
Page 6
Attention! The text in this document has been recognized automatically. To view the original document, you can use the "Original mode".
ELEVEN CONTROLS (Continued)
REVERSE
FORWARD
THUMB NUT
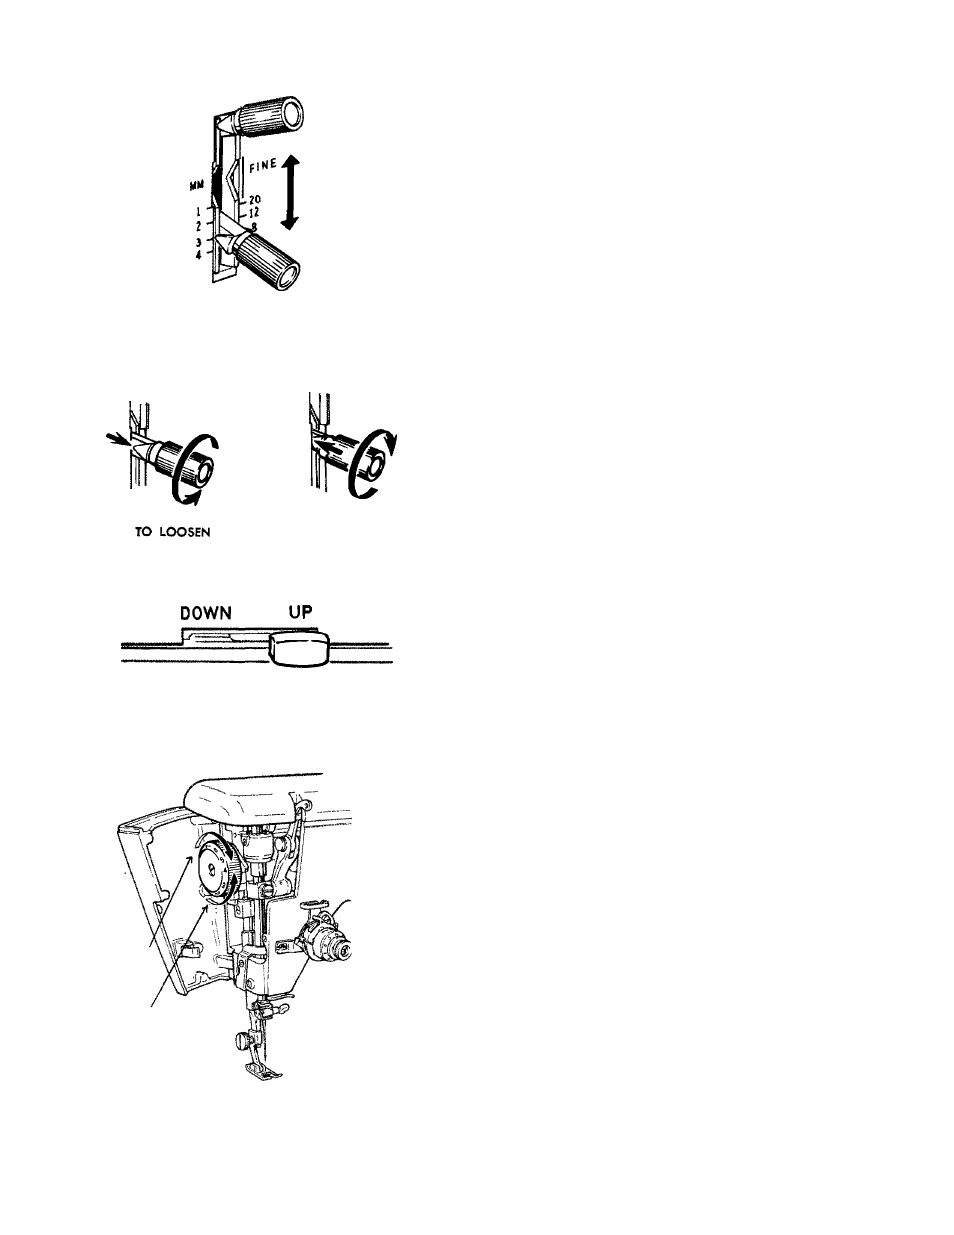
5. STITCH LENGTH REGULATOR
(1) This lever controls the number of stitches per inch.
Numerals on left side of the lever represent stitch
length in millimeters.
Numerals on right side represent number of stitches
per inch.
The
FINE
area, which represents over 20 stitches
per inch, is used for satin stitching (closely spaced
zigzag stitching).
To set stitch length
a. Loosen thumb nut by turning to left and posi
tion lever for desired stitch length.
b. Tighten thumb nut by turning to right.
(2) This lever controls the direction of stitching (either
forward or reverse).
For reverse stitching,
raise lever as far as it will go.
Hold lever in this position by hand while stitching.
TO TIGHTEN
6.
FEED THROW-OUT LEVER
Set feed throw-out lever to
“UP”
position at right for
normal stitching. Set feed throw-out lever to
“DOWN”
position at left for embroidery, mending and button
sewing. This will lower the feed dog below throat
plate surface and will not feed the material.
TO INCREASE
TO DECREASE
7.
PRESSURE REGULATING DIAL
This dial regulates the pressure that the presser foot
exerts
on
the
fabric.
Correct
pressure
is
important
because it means fabric feeds smoothly, evenly, without
being marred. Generally, heavy fabric requires a high
number setting; lightweight fabric requires a low num
ber setting.
• To increase
pressure, turn dial to higher number.
• To decrease
pressure, turn dial to lower number.
• For darning,
turn dial to
D,
vvhich releases pres
sure and permits darning without an embroidery
hoop.