SINGER 610U User Manual
Page 28
Attention! The text in this document has been recognized automatically. To view the original document, you can use the "Original mode".
CHAIN STITCHING (Continued)
be
r
1.
2.
3.
1
t
4.
f
Fig. 12
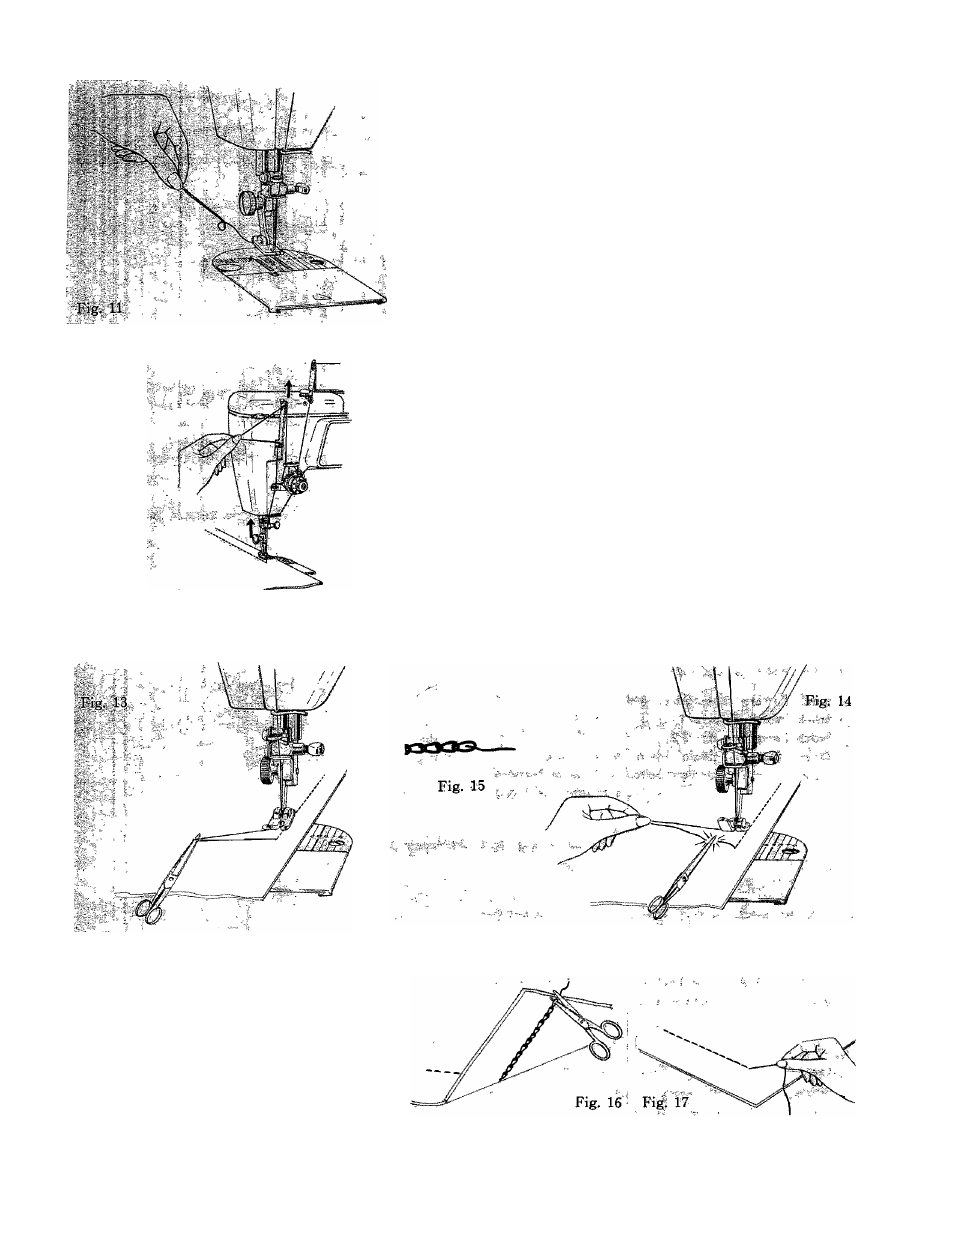
TO RELEASE CHAIN FROM THE MACHINE
When you finish chain stitching, the chain can easily
removed from the machine.
Raise presser foot.
Hold end of chain with your left hand.
Turn hand wheel slowly toward you with your right
hand until needle is all the way down in the needle
hole.
Then turn hand wheel slowly away from you, pull
ing gently on chain, which will unravel as needle
rises. (See Fig. 11)
TO END THE STITCHING IN THE FABRIC
Stop stitching at desired point, with take-up lever
in its highest position.
Raise presser foot.
With your finger, pull the thread through the take-
up lever, forming a loop between the take-up lever
and chain stitch thread guide. (See Fig. 12)
Pass scissors under presser foot so as to' draw the
loop down to the left of the foot. (See Fig. 13)
Hold the loop and cut the thread close to the end
of the stitching. (See Fig. 14)
Remove fabric from the machine by pulling it straight
back, away from you. This will cause the thread
end to pull through the fabric to the underside and
form a temporary lock. (See Fig. 15)
4.
5.
6
.
TO REMOVE THE STITCHING
1. Cut the last loop formed on the underside
of the fabric. (See Fig. 16)
2. Pick up free thread end from top surface
of fabric.
3. Pull the free thread end, removing entire
line of stitching. (See Fig. 17)
26