SINGER 610U User Manual
Page 38
Attention! The text in this document has been recognized automatically. To view the original document, you can use the "Original mode".
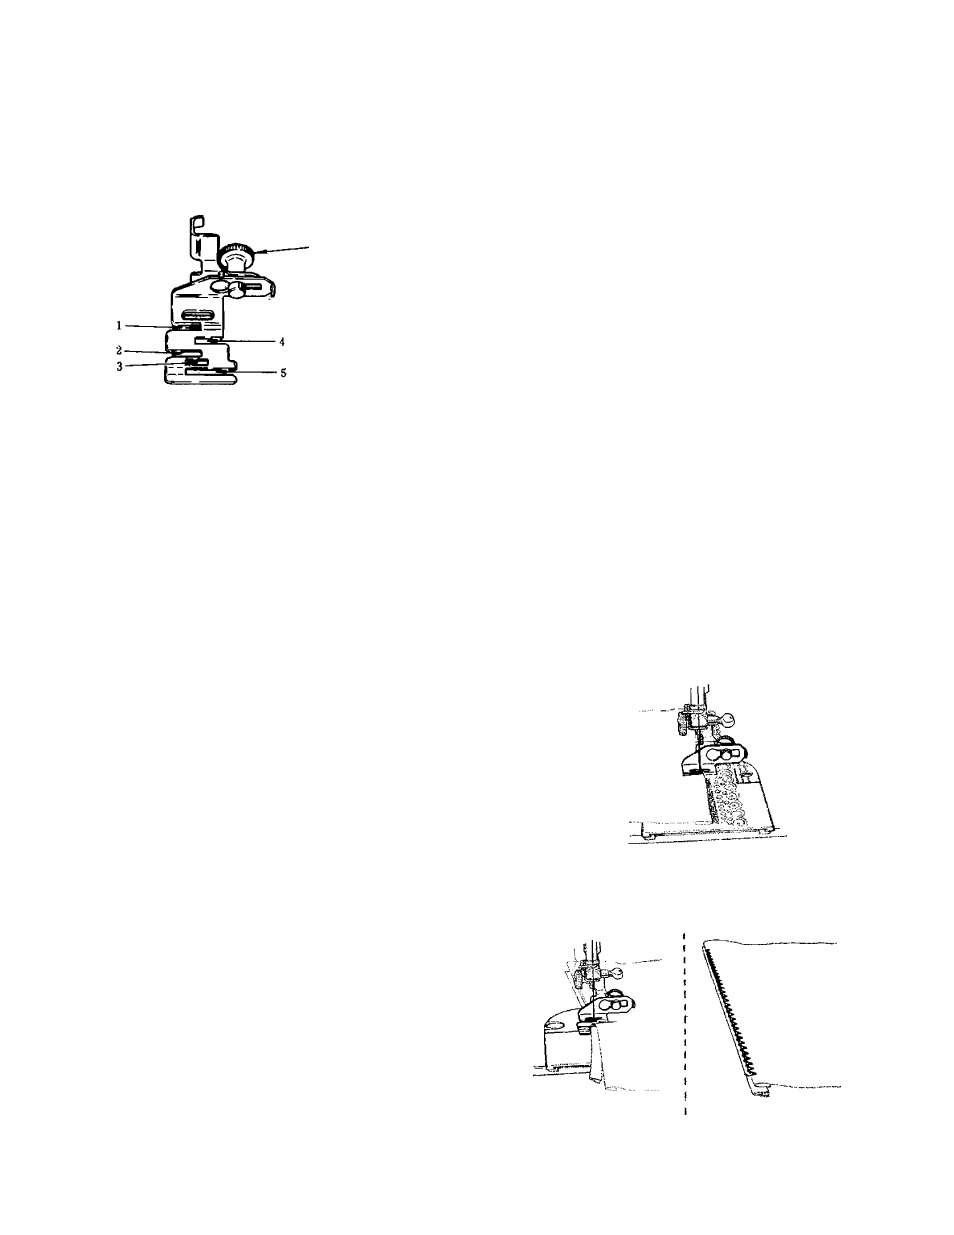
This attachment is fastened to machine in place of
regular presser foot, and will be found an indispensable
aid whenever stitching must be kept accurately on ex
treme edge of a piece of material.
The slots numbered from
1
to
5
in the sketch at left
serve as guides for sewing together laces, insertions
and embroideries, sewing in position hemmed or folded
edges, piping or sewing flat braid to a garment.
• Stitch Pattern Selectors :
AN
• Stitch Width Selector; 3
• Stitch Length:
• Presser Foot:
Edge-stitcher
• Throat Plate :
Straight Stitch or
General Purpose
TO ADJUST THE EDGE-STITCHER
The distance from line of stitching to edge of ma
terial in slots is regulated by moving thumb screw
A
to the right or left.
TO INSERT LACE OR RIBBON
1. Fold edge of material to which lace or ribbon is to
be sewn and insert it in slot
1
of edge-stitcher.
2. Insert lace or ribbon in slot 4 and proceed to sew.
3. Cut away surplus folded material close to stitching.
Lace or ribbon insertion can also be done with zigzag
stitching.
In
this
case,
use
General
Purpose
Throat
Plate and set Stitch Pattern and Stitch Width Selectors
Bt
BJ 2
or
BJ 3.
TO PIPE WITH EDGE-STITCHER
1. Cut piping bias and twice width of slot
3
so that it
can be folded once.
2. Insert piping with its folded edge to left in slot
3
and edge to be piped in slot
4.
As in the above case, piping can be done with zigzag
stitching,
36