Carburetor presets (fig. 39), Adjusting procedure, Idle speed adjustment – Sears 358.79828 User Manual
Page 24: Low speed mixture adjustment, High speed mixture adjustment, Acceleration check, Service and adjustments, Carburetor adjustments
Attention! The text in this document has been recognized automatically. To view the original document, you can use the "Original mode".
SERVICE AND ADJUSTMENTS
CARBURETOR ADJUSTMENTS
Carburetor adjustment is critical and if done improperly can permanently damage the engine as well as the car
buretor. Please read all instructions and consult the Troubleshooting section of this manual before beginning
this process.
If engine does not start, it may be flooded. If in doubt,
read the section on flooded engine in the starting section
of this manual prior to beginning any adjustments.
If you are unsure about adjusting the carburetor or expe
rience any problem while attempting this process, please
call the 1-800 number listed on the front cover of this
manual for further assistance.
The carburetor has been adjusted at the factory for sea
level conditions. Adjustments may become necessary if
the unit is used at significantly higher altiftjdes or if you
notice any of ttie follovring conditions:
• Blade or trimmer head moves when the engine runs at
idle speed. See “Idle Speed Adjustment”
• Engine will not idle. See “Idle Speed Adjustmenf and
. “Low Speed Mixture Adjustment*
• Engine dies or hesitates when it-should accelerate; See
“Acceieration Adjustment”
• Loss of cutting power which is not corrected by air filter
. deanfng. See “High Speed Mixture Adjustment”
NOTE: If the Cutting Attachment rotates during idle, turn
the idle speed adjuring screw (T") counterclockwise unh'l
the Cutting Attachment stops.
A
CAUTION:
MAKE
ALL
CARBURETOR
ADJUST
MENTS WITH TRIMMER HEAD ATTACHED.
BaNOT ATTEMPTTO ADJUST CARBURE
TOR WITH BLADE ATTACHED DUE TO DIF
FICULTY OF PROPERLY SETTING CARBU
RETOR.
SEVERE
ENGINE
DAMAGE
COULD OCCUR.
A
WARNING:
MAKE
CARBURETOR
ADJUSTMENTS
WITH THE LOWER END SUPPORTED TO
PREVENT TRIMMER HEAD FROM CON
TACTING ANY OBJECT. HOLD UNIT WITH
YOUR HAND.
THE TRIMMER HEAD WILL BE SPINNING
DURING MOST OF THIS PROCEDURE.
WEAR YOUR PROTECTIVE EQUIPMENT AND
OBSERVE ALL SAFETYiERECAOTIONS,
IN “LOW SPEED MIXTURE ADJUSTMENT,^
RECHECK
IDLE
SPEED
AFTER
EACH.
ADJUSTMENT.THETRIMMER
HEAD
MUST
NOT MOVE AT IDLE SPEED.
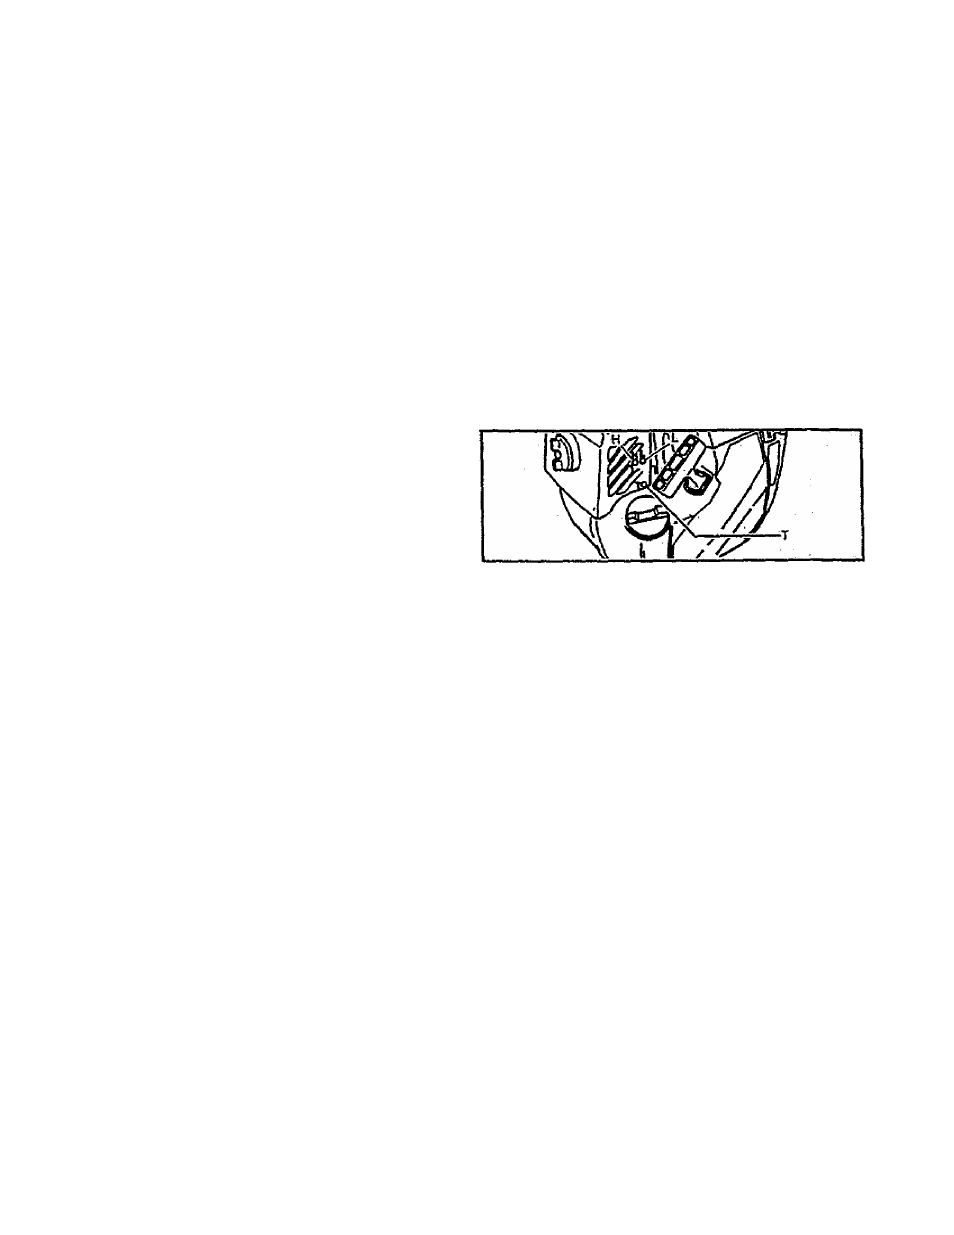
CARBURETOR PRESETS (Fig. 39)
The Carburetor has three adjusting screws:
L = Low speed mixture adjusting screw
H =: High speed mixture adjusting screw
T = Idle speed adjusting screw
If your engine will not start due to suspected improper car
buretor adjustment, the following presets may be required.
If used, it is recommended that all steps vri&iin the adjust
ment procedure be completed in order to assure a prop
erly set carburetor. If presets are not needed, proceed to
section “Idle Speed Adjustment.”
Very small adjustments can affect engine performance. It
is mportant to turn the screw a very small amount per
adjustment and test performance before making further
adjustments. Each adjustment should be no more than
the width of the slot in the adjusting screw.
• Turn both of the mixture screws (marked "H” and “L”)
- clockwise until they stop. Do not force the screws as
damage can occur. Then, turn each screw one (1) full
turn counterclockwise.
• Turn idle speed screw (“T”) clockwise 1/2 turn.
• Start the engine and operate tor ten (10) minutes to
warm up. Go to "Adjusting Procedure.”
ADJUSTING PROCEDURE
Engine operating speeds: Maximum operating speed:
11,000 RPM.
IDLE SPEED ADJUSTMENT
• Allow the warm engine to idle.
• Adjust the Idle Speed Screw until the engine continues
to run without stalling and without the blade or serni-
automatic head turning,
- Turn screw clockwse to increase engine speed if
0nntn^
cte/te
- Turn screw counterclocdtwise to stow engine down
and/orto keep the Nade-OrtrMnerheadtojm.tunv^.
• No further adjustments are necessary if blade or trim
mer head does not turn at idle speed and if perfor
mance is satisfactory.
Figure 39
LOW SPEED MIXTURE ADJUSTMENT
• Allow engine to idle.
• Turn the Low Speed Mixture Screw slovyiy clockwise
until the RPM Starts to drop. Note fr)e position.
• Turn the Low Speed Mixture Screw slowly counter
clockwise until the RPM speeds up and starts to drop
again. Note the position.
• Set the Low Speed Mixture Screw at the midpoint
between the two positions.
HIGH SPEED MIXTURE ADJUSTMENT
IMPORTANT-.DO NOT OPERATE ENGINE AT FULL
THROTTLE POR PROLONGED PERIODS WHILE
MAKING HIGH SPEED ADJUSTMENTS AS DAMAGE
:TQ.THE ENGINE CAN OCCUR.
> . Make a test cut in grass.
• Based on performance of the unit while cutting, adjust
the high speed mixture screw in 1/16 turn increments
as follows:
- Clockwise if unit smokes or loses power wij/te cuttíng.
Do not adjust for best power by sound or speed, but
- judge by how well the unit performs during operation.
- Counterdockwise if the unit has speed while not cut
ting, but dies or lacks power while cutting.
• Repeat the test cut in grass.
• Continue with 1/16 turn adjustments until the unit per
formance is acceptable while cutting.
• After completing adjustments, check for acceieration,
• If unit accelerates properly no further adjustments are
necessary. If not proceed to acceleration check.
ACCELERATION CHECK
• If the engine dies or hesitates instead of accelerating, krm
the Low Speed Mixture Screw 1/16 of a turn at a time
cduntenciockwise until you have smooth acx»(eration.
• Check the idle speed for stability and that the blade or
trimmer head does not turn. Adjust as necessary.
• Recheck for smooth acceleration and stable idle.
• Repeat process as necessary for acceptable perfor
mance.
- 2 4 -