Dual line replacement, Service and adjustments – Sears 358.79828 User Manual
Page 22
Attention! The text in this document has been recognized automatically. To view the original document, you can use the "Original mode".
SERVICE AND ADJUSTMENTS
DUAL LINE REPLACEMENT
A
WARNING
TRIMMER HEAD PARTS THAT ARE
CHIPPED, CRACKED, BROKEN, OR
DAMAGED IN ANY OTHER WAY CAN FLY
APART AND CAUSE SERIOUS INJURY. DO
NOT USE. REPLACE DAMAGED PARTS
BEFORE USING THE UNIT.
THE LINE SAVER MUST BE INSTALLED
ONLY FROM THE INSIDE OF THE
TRIMMER HEAD. IF INSTALLED ON THE
OUTSIDE OF THE TRIMMER HEAD, THE
UNE SAVER CAN FLY OFF AND BECOME
A DANGEROUS MISSILE.
USE ONLY ,095” DIAMETER GOOD
QUALITY LINE. NEVER USE WIRE, ROPE,
STRING, ETC.
USE ONLY SPECIFIED SEARS
REPLACEMENT PARTS. USE OF OTHER
BRANDS OF REPLACEMENT PARTS CAN
CAUSE DAMAGE TO YOUR UNIT OR
INJURY TO THE OPERATOR OR OTHER.
DAMAGE/INJURY CAUSED BY USE OF
ACCESSORIES/ATTACHMENTS NOT
SPECIRCALLY RECOMMENDED BY
SEARS WILL NOT BE REIMBURSED
IMPORTANT; ALWAYS CLEAN DIRT AND DEBRIS
FROM SPOOL AND HUB WHEN PERFORMING ANY
TYPE MAINTENANCE.
IMPORTANT: IF LINE SAVER FALLS OUT, REINSTALL
IT FROM THE INSIDE OF THE TRIMMER HEAD.
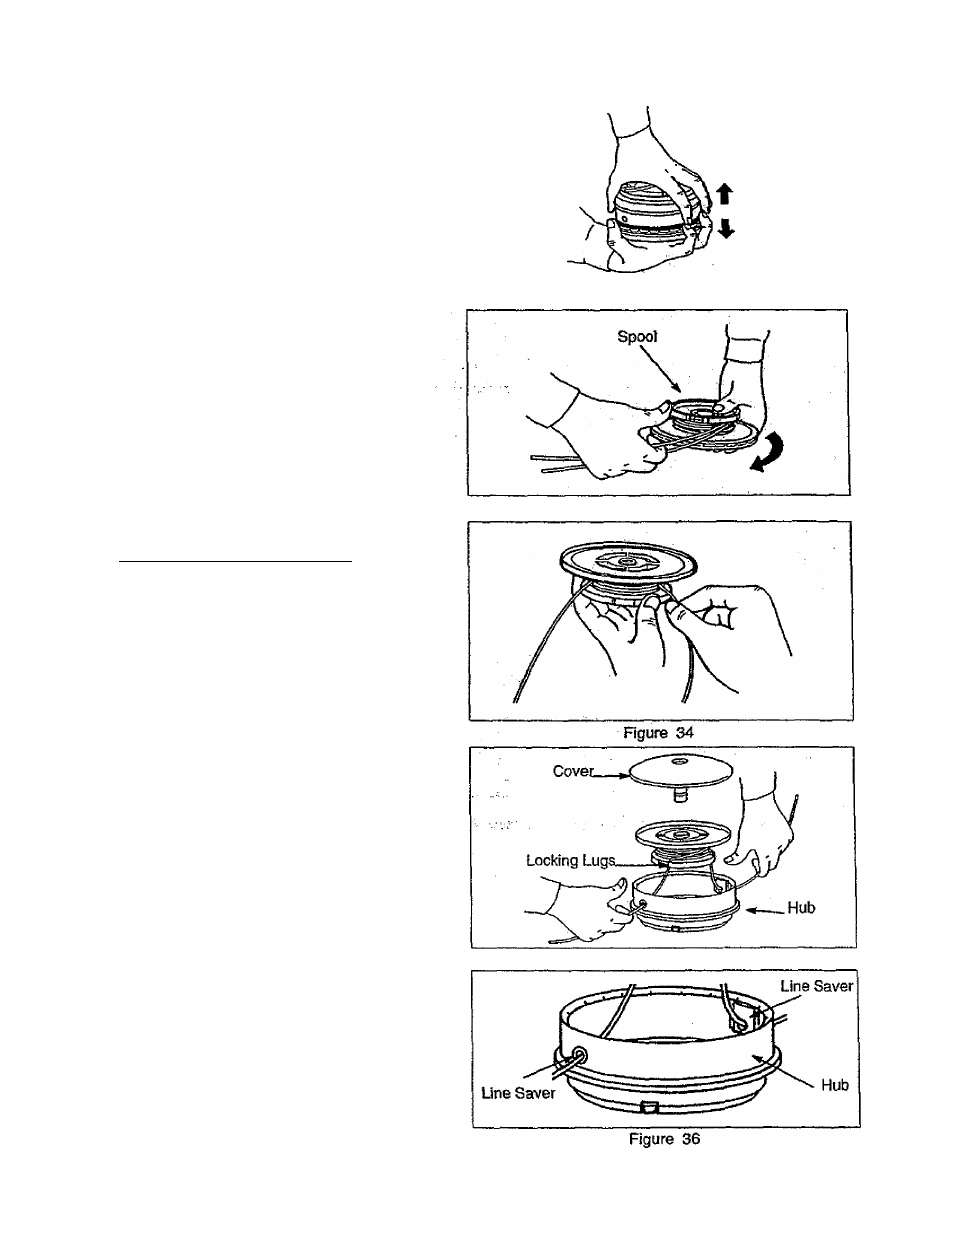
INSTALLING SPOOL WITH UNE ALREADY
WOUND
(Fig.
3 2 , 3 3 , 3 4 , 3 5 , & 3 6 )
NOTE: The line saver can become worn during use. :
Altera groove is worn into line, saver,, remove it from:
the hub, turn it upside down, and. reinstall tit .(with spooL
removed) to provide a new wear surface.
• Insert the locking pin in the gearbox hole while rotat*
ing the cutting head until it locks.
• Use spark plug wrench (clockwise) to loosen the cut
ting head nut.
• Pull apart the cover and hub. It may be difficult to pull
cover and hub apart due to an “O” ring located within
the cutting head.
• Remove spool from the hub.
• Remove any existing line from the spool.
• Insert line separately into two holes on spool. Push
lines completely into holes.
. • Following the arrow located on the spool, wind both
lines simultaneously and tightly by separating lines
with forefinger. Secure lines into locking lugs.
• Insert lines through holes keeping lines secure in
locking lugs. Before pushing spool completely into
hub, pull lines out of locking lugs. Spool should now
fit completely into hub.
• Snap cover and hub badt together.
• To reinstall, go to “Installing The Dual Line Head" in
file Assembly section,
Figure 32
Rgure 33
Figure 35
~ 2 2