Assembly – Sears 113.22643 User Manual
Page 7
Attention! The text in this document has been recognized automatically. To view the original document, you can use the "Original mode".
assembly
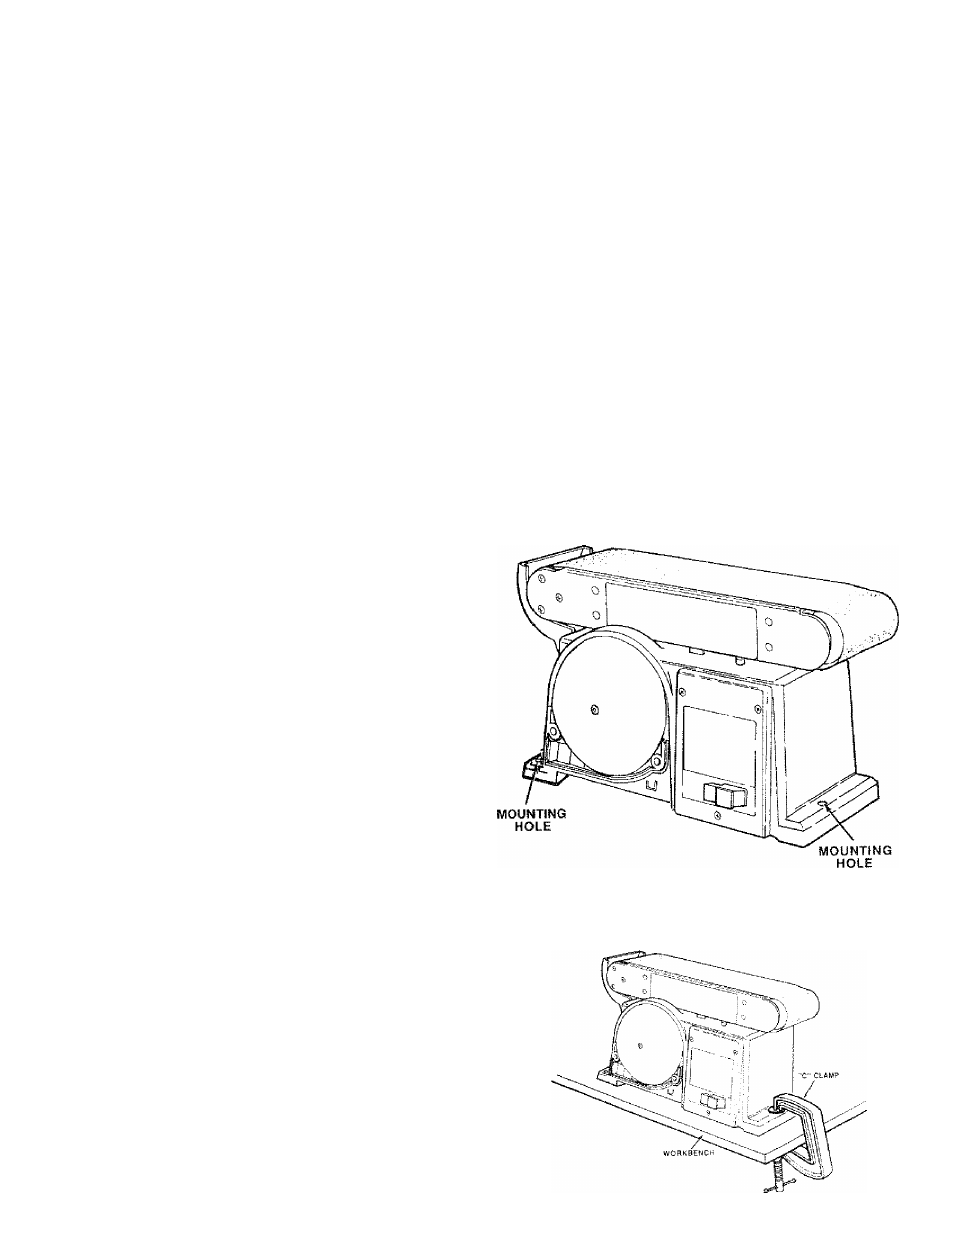
MOUNTIMG BELT AMD DISC SANDER
TO WORKBENCH
If belt and disc sander is to be used in a permanent
location, it should be fastened securely toafirm support
ing surface such as a workbench.
If nnounting to a workbench, holes should be drilled
through supporting surface of the workbench using
dimensions illustrated.
1. The unit should be bolted securely using 5/16" screws
and hex nuts (not included). Screw length should be
1 -1/2" plus the thickness of the bench top.
2. Locate and mark the holes where belt and disc sander
is to be mounted.
3. Drill (2) 3/8" diameter holes through workbench.
4. Place belt and disc sander on workbench aligning
holes on base with holes drilled in workbench.
5. Insert two 5/16" screws and tighten hex nuts.
24 MiN.-
OUTLINE OF SANDER
2 HOLES
3/8 DIAMETER
* I
2-21/32
J_L
3/4 ^Li________
141—
-13-7/16-
9/16
ALL MEASUREMENTS ARE INCHES UNLESS OTHERWISE NOTED.
An alternate method of mounting is to fasten belt and
disc sander to a mounting board. The board should be
of sufficient size to avoid tipping of sander while in use.
Any good grade of plywood or chipboard with a 3/4"
minimum thickness is recommended. (Thinner chip
board can break.)
CAUTION: To avoid injury from tool movement, use
5/16" or larger screws and nuts.
1. Follow instructions for mounting to workbench, sub
stituting a board 18” X 24" minimum size and using
5/16 inch flat head screws, tackwashers, and hex nuts
(not included). Screw length should be 1-1/2" plus the
thickness of the mounting board.
NOTE: For proper stability, holes must be counter sunk
so screw heads are flush with the bottom surface of
supporting board.
CAUTION: To avoid injury from tool movement,
supporting surface where belt and disc sander is
mounted should be examined carefully after mount
ing to insure that no movement during use can
result, if any tipping or walking is noted, secure
workbench or supporting surface before operating
belt and disc sander.
CLAMPiMG BELT AND DISC SANDER
TO WORKBENCH
The belt and disc sander can be clamped directly to a
workbench using two (2) or more “C” damps on base of
unit (one clamp on each end of unit).