Sears 113.22643 User Manual
Page 17
Attention! The text in this document has been recognized automatically. To view the original document, you can use the "Original mode".
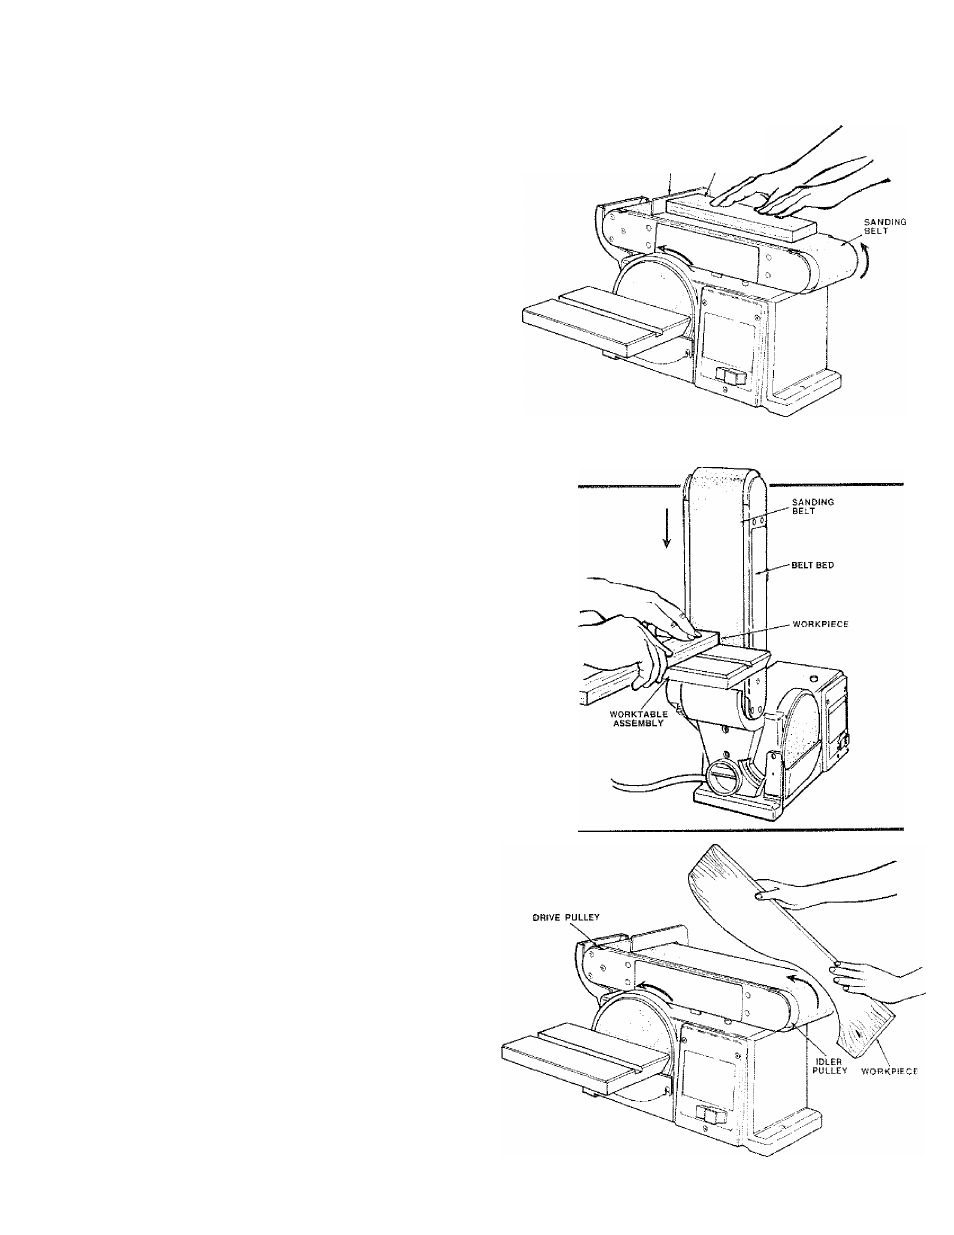
SURFACE SAI^DING OM THE SAHDiMG
BELT
WARNING: To avoid injury from slips, jams or
thrown pieces, adjust the backstop to clear the
sanding surface by no more than 1/16 of an inch.
When checking clearance between the belt and
work support, press the belt flat against the metai
beneath It.
Hold the workpiece firmly with both hands, keeping
fingers away from the sanding belt.
Keep the end butted against the backstop and move the
work evenly across the sanding belt. Use extra caution
when sanding very thin pieces.
For sanding long pieces, remove the work support.
Apply only enough pressure to allow the sanding belt to
remove material.
SANDING CURVED EDGES
Always sand inside curves on the idler puiiey as shown.
WARNING: Never attempt to sand the ends of a
workpiece on the idler puiiey. Applying the end of
the workpiece to the idler pulley could cause the
workpiece to fly up and result in an injury.
WORK SUPPORT WORKPIECE
END SANDING ON THE SANDING BELT
It is more convenient to sand the ends of long work
pieces with sanding belt in a vertical position.
See “Basic Operation - Positioning Beit Bed" for adjust
ing the belt bed, and see “Assembly - Installing Table
Assembly” for adjusting worktable.
Move the work evenly across the sanding belt. For
accuracy, use a miter gauge (accessory).
17