Hole location, Feeding, Adjustments – Sears 113.21308 User Manual
Page 21: Warning: for your own safety turn, Switch “off ” and remove plug from power, Quill return spring, Hole location feeding, Quili return spring
Attention! The text in this document has been recognized automatically. To view the original document, you can use the "Original mode".
WARNING: TO AVOID INJURY FROM SPINNING
WORK OR TOOL BREAKAGE, ALWAYS CLAMP
WORKPIECE
AND
BACKUP
MATERIAL
SECURELY
TO TABLE BEFORE OPERATING DRILL PRESS
WITH THE TABLE TILTED.
To return table to original position: loosen the bevel
lock, tilt table back to 0° on bevel scale, and retighten
bevel lock,
HOLE LOCATION
Make a DENT in the workpiece where you want the
hole... using a CENTER PUNCH or a SHARP NAIL.
Before turning the switch ON, bring the drill down to
the workpiece lining it up with the hole location.
FEEDING
Pull down on the feed handles with only enough effort
to allow the drill to cut.
Feeding TOO SLOWLY might cause the drill to burn
. , . Feeding TOO RAPIDLY might stop the motor . . .
cause the belt or drill to SLIP ... tear the workpiece
LOOSE or BREAK the drill bit.
adjustments
WARNING: FOR YOUR OWN SAFETY TURN
SWITCH “OFF ” AND REMOVE PLUG FROM POWER
SOURCE OUTLET BEFORE MAKING ANY ADJUST
MENTS. TO AVOID INJURY FROM THROWN PARTS
DUE TO SPRING RELEASE, FOLLOW INSTRUC
TIONS CAREFULLY AND WEAR EYE GOGGLES.
QUILL RETURN SPRING
1. Move the stop nuts down to their lowest position
and lock in place with wrench to prevent quill drop
ping while tensioning spring.
2. Lower table for additional clearance.
3. Work from left side of Drill Press.
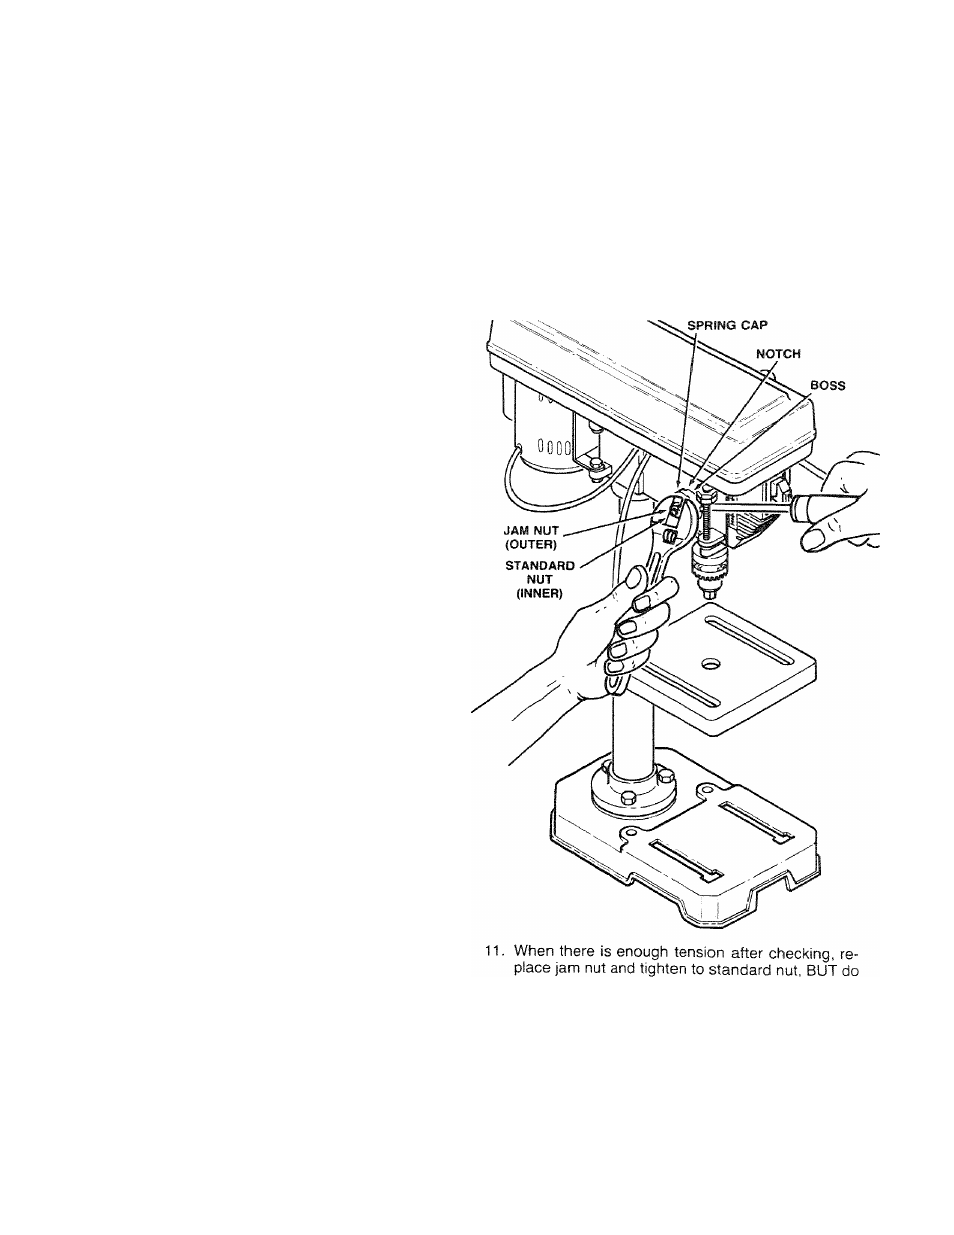
4. Place screwdriver in lower front notch of spring
cap, and hold it in place while loosening and remov
ing jam [outer] nut only.
5. With screwdriver remaining in notch, loosen large
standard [inner] nut (approximately 1 /8") until notch
disengages from boss on head. DO NOT REMOVE
THIS NUT.
6. Carefully turn screwdriver counter clockwise and
engage next notch in boss. DO NOT REMOVE
SCREWDRIVER.
7. Tighten standard nut with wrench only enough to
engage boss. Do not overtighten as this will restrict
quill movement.
8. Move stop nuts to upper most position and check
tension while turning feed handles.
9. If there is not enough tension on spring, repeat
steps 4-8 moving only ONE notch each time and
checking tension after EACH repetition.
10. Proper tension is achieved when quill returns gently
to full up position when released from 3/4" depth.
o>
E
12
.
not overtighten against standard nut.
Check quill while feeding to have smooth and un
restricted movement. If movement is too tight,
loosen jam nut and SLIGHTLY loosen standard
nut until unrestricted. Retighten jam nut.
21