Evaporator replacement – Carrier 26H User Manual
Page 34
Attention! The text in this document has been recognized automatically. To view the original document, you can use the "Original mode".
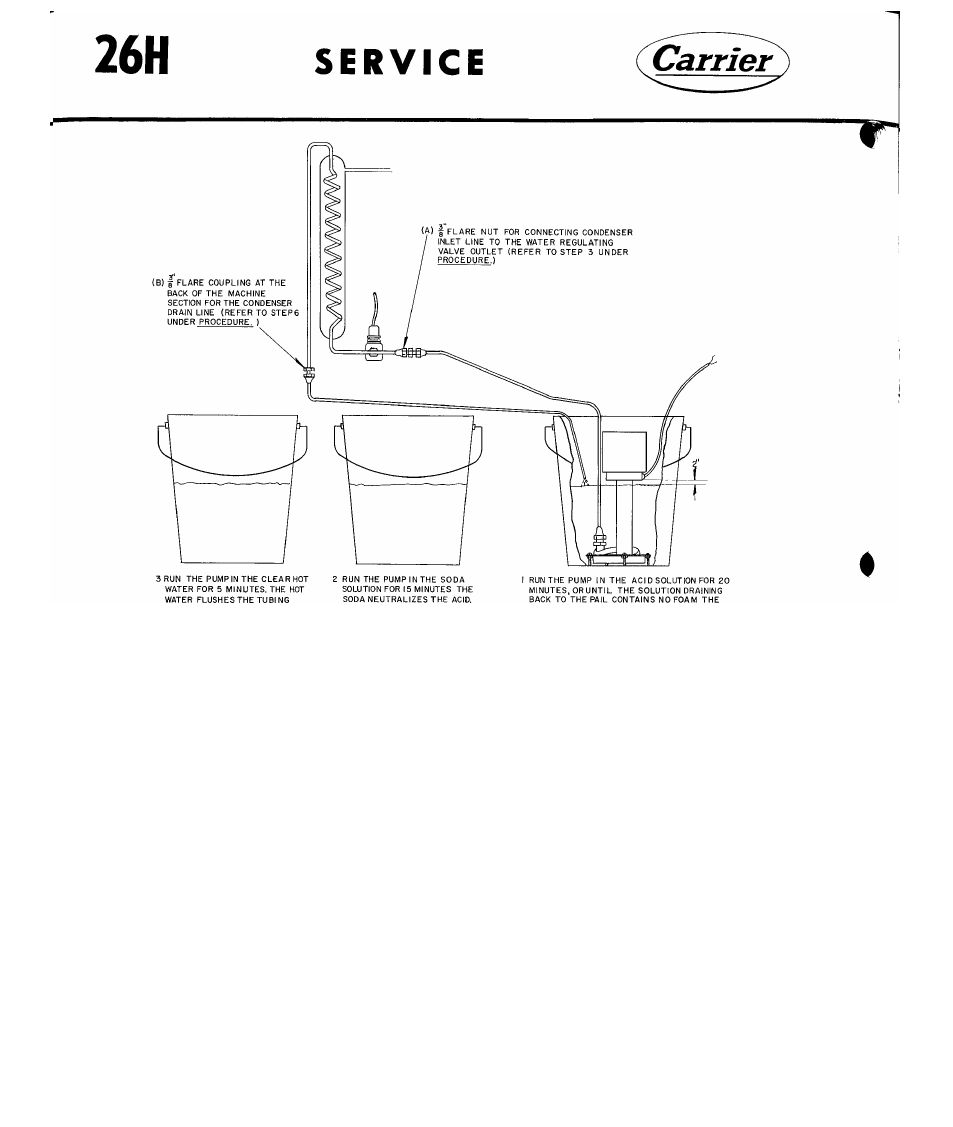
A C I D D I S S O L V E S T H E S C A L E
FIG. 16 - CONDENSER CLEANING PROCEDURE
CONDENSER REPLACEMENT
10. EVAPORATOR REPLACEMENT
The condenser is mounted in a vertical position
on the left side of the unit.
a. Close the water supply valve before removing
the condenser.
b. Remove front, top and left side panels.
c. Slowly bleed refrigerant from the system as
described in Section 8.
d. Unsweat all refrigerant tubing connections
while the suction valve is still open. All of
these joints are phos-copper.
e. The condenser is held by a strap screwed to
the unit frame. Lift the condenser up and out.
f. After replacing the condenser, evacuate and
recharge the system as described in Sections
4 and 8.
Bulged freezing columns may be indicated by "ex
cessive " defrost time; 4-5 minutes before the first
ice drops and 4 minutes or longer before all the ice
drops is considered excessive defrost time.
yo determine if columns are bulged remove spreader
plates (see Fig. 17), and place light under freezing
columns and observe from the top of each column.
If several columns are seriously bulged and unit
has excessive defrost time even with adeguate
charge, the evaporator assembly should be re
placed.
REPLACEMENT PROCEDURE
1. Remove front, top and side panels.
2. Slowly bleed refrigerant charge as described
in Section 8.
26H-57PD
34