Top Flite TOPA0101 User Manual
Page 35
❏
4. Cut the hinge slots in the wing and ailerons.
❏
5. Taper the leading edge of the aileron to
match the cross-section on the plan.
❏
6. Make two (four for flaps) 3/4" x 1" horn
reinforcement blocks from leftover 1/8" plywood.
❏
7. Mark the locations of the reinforcement
blocks on the ailerons and flaps (if used) as shown
on the plan. Cut away some of the balsa material
to allow the blocks to be inset flush with the bottom
of the ailerons and flaps. Use 6-minute epoxy to
glue the pieces in position.
❏
8. Blend the reinforcement blocks with a
sanding block.
THIS COMPLETES THE BASIC
CONSTRUCTION SEQUENCE
FINISHING
COWL FINISHING
❏
1. Clean the fore and aft cowl pieces with warm
water and a mild detergent to remove any molding
residue. Use rough sandpaper to score areas
where the two pieces are glued together. Test fit
the forward and aft cowl pieces together. It is
easiest to trim any “flash” from the cowl pieces
before they are glued together.
❏
2. While holding the two cowl pieces together,
apply thin CA from the inside and allow it to wick
into the joint.
❏
3. Carefully apply some thin CA to the outside
of the joint. Sand the seam down to the original
level or slightly below. Fill any imperfections with
your favorite filler. Bondo auto body filler can be
used in very small amounts to fill cowling
imperfections. Use of Bondo or similar fillers is
not
recommended for other parts of the model.
❏
4. Sand the entire cowl with 400 grit sandpaper.
❏
5. Test fit the cowl to determine the cooling,
glow plug and exhaust hole locations (see Cooling
Notes section). Cut out the necessary holes. A
Dremel MultiPro is useful here.
❏
6. Fit and glue the baffle in place now (see
Cooling Notes on page 40).
❏
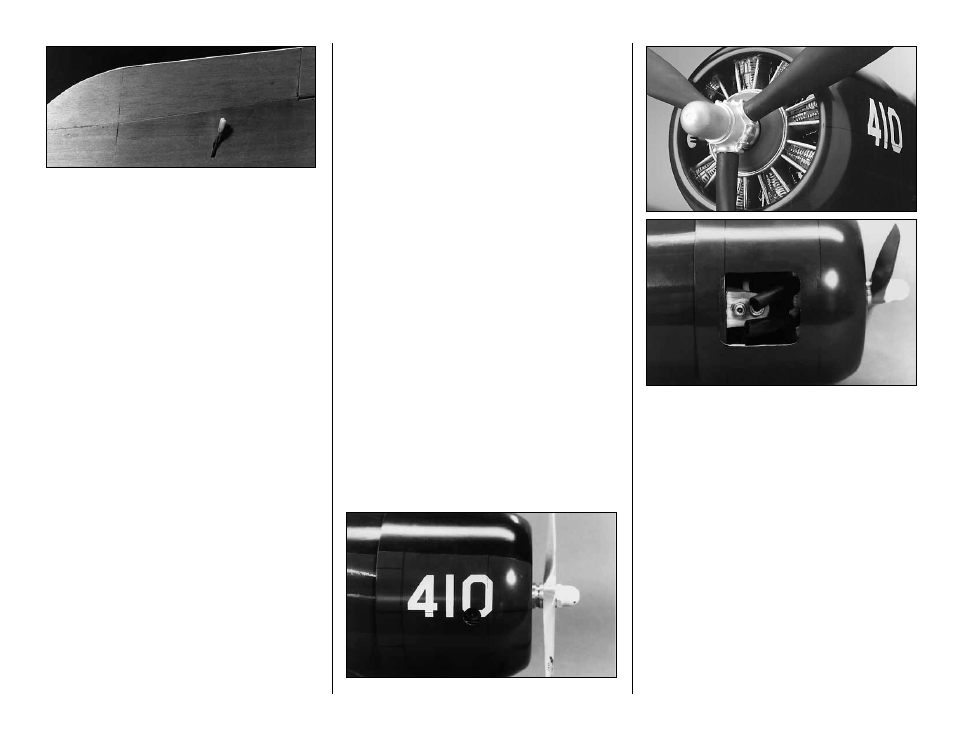
7. Paint the cowling as desired. For best results,
prime and sand the cowl first (see the following
cowl detail photos).
FINAL SANDING
Nearly every imperfection in your wood structure
will show through the covering material. Therefore,
before covering, you should make a final check of
the entire structure. Fix any “dings,” then sand the
entire structure smooth using progressively finer
grades of sandpaper.
FUELPROOFING
Note:
Fuelproofing may be done after covering.
❏
1. Fuelproof the firewall area and the cowl
baffle. Black K&B Superpoxy paint was used for
this on the prototypes.
35