Top Flite TOPA0101 User Manual
Page 27
❏
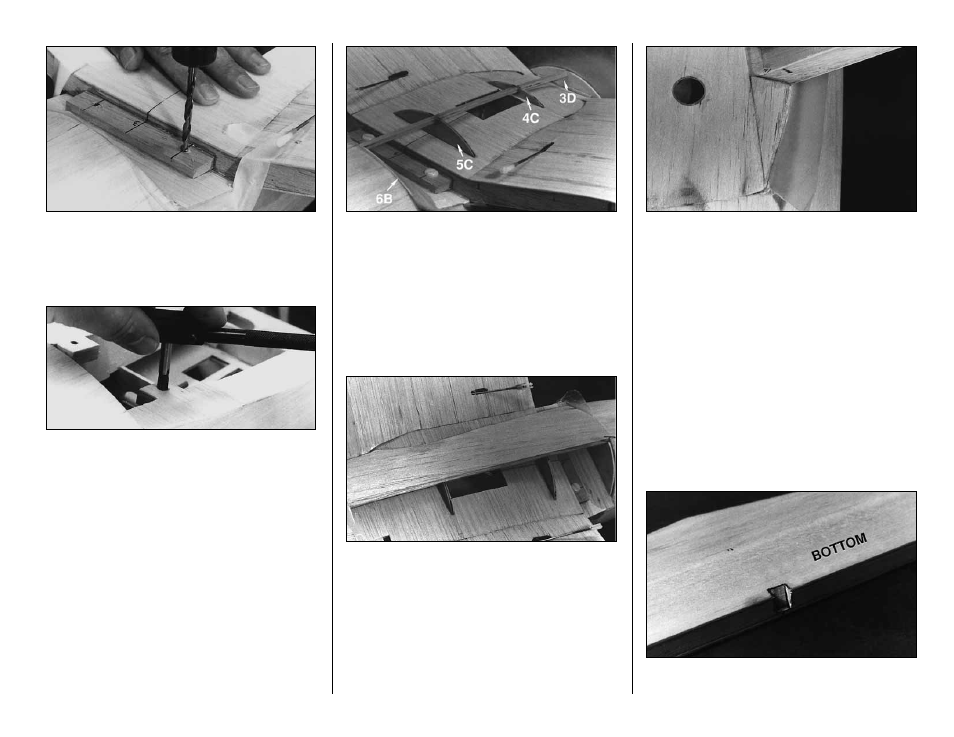
10. Tape and hold the wing firmly down. Use a
13/64" bit to drill through the pilot holes in the
tapered bolt plate and through the wing bolt blocks.
❏
11. Remove the wing and tap the wing bolt
blocks in the fuse with a 1/4-20 tap. Drill out the
tapered bolt plate in the wing with a 1/4" drill to
clear the wing bolts.
❏
12. Keep the saddle covered with waxed paper.
Bolt the wing onto the fuselage with two 1/4-20
nylon bolts.
❏
13. Bevel the edges of the 1/8" die-cut plywood
F-6B
to allow the wing saddle to blend into the
fuselage (see fuse side view). Glue F-6B in place;
the waxed paper
must
keep the glue off
the fuselage.
❏
14. Test fit
F-3D
at the front of the wing saddle.
Trim it if necessary so it matches up nicely with F-
3B. Use waxed paper to make sure it does not get
glued to the fuselage. Glue F-3D to the wing.
❏
15. Glue a 3/16" sq. stringer between F-3D and
F-6B. Slide
F-4C
and
F-5C
under the stringer. Trim
the height of F-4C and F-5C if necessary to obtain
a smooth profile in the belly-pan area.
❏
16. Cut the 3/32" x 3" x 30" balsa belly-pan
sheeting using the approximate pattern on the
plan. Fit and glue the sheeting in place as shown
in the photo.
❏
17. Cut 1/2" access holes in the belly pan
sheeting for the wing bolts. Glue lengths of
cardboard tubes into the access holes, but do not
glue the bolts. Trim their length close with a knife,
then sand flush with a block and sharp sandpaper.
❏
18. Make two triangles from 1/8" leftover balsa.
Glue them in place behind the wing TE and fair in.
STAB & FIN MOUNTING
❏
1. Notch the bottom of the stab as shown to
allow elevator horn movement.
27