Top Flite TOPA0101 User Manual
Page 13
❏ ❏
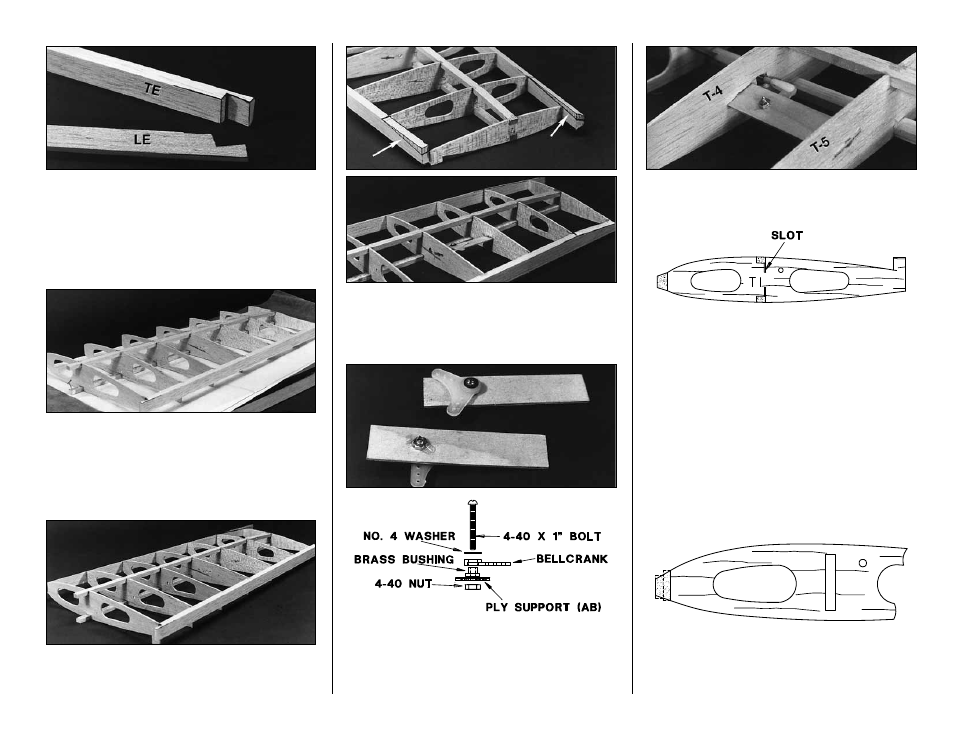
6. Notch the inner end of the shaped LE and
TE stock to match the plan.
❏ ❏
7. Glue the TE to the ribs. Notice that T-7 is
glued flush with the top (toward plan) edge of the TE.
❏ ❏
8. With the wing slightly weighted down so
the entire top spar and all the jig tabs rest on the
building board, apply glue to all joints involving the
bottom spar. Make sure the bottom spar is
securely glued at T-6 where it is notched.
❏ ❏
9. Glue the LE to the ribs, centering it on all
ribs except T-7. T-7 is glued flush with top edge
(toward plan) of the LE.
❏ ❏
10. Draw lines with a pen and a straight
edge as shown in the photos to mark the tapering
of the bottom of the LE and TE. Use a knife and a
sanding block to carefully taper the LE and TE.
❏ ❏
11. Assemble the
bellcrank parts
onto the
die-cut 1/16"
ply support
– make a left and a right.
Be sure to put a drop of 6-minute epoxy on the
thread and nut of the 4-40 bolt to prevent it from
vibrating loose.
❏ ❏
12. Glue the bellcrank assembly securely in
place through the slots in ribs T-4 and T-5.
❏ ❏
13. Cut a 1/16" x 3/8" slot in the top and
bottom of T-1 so the 1/16" plywood spar joiners
can pass through the rib and overlap the main spar
when the panels are joined.
REPEAT THE WING TIP PANEL STEPS 1-13 TO
BUILD THE OPPOSITE PANEL. BE SURE TO
MAKE A LEFT AND A RIGHT TIP PANEL.
WING JOINING
❏
1. Trim off all tip panel jig tabs
except
the tabs
on the T-7’s.
❏
2. Sand the center section LE and TE (using a
block or sanding bar where possible) to approximate
the shape of the outer panel LE and TE.
Be careful
13