Top Flite TOPA0101 User Manual
Page 24
❏
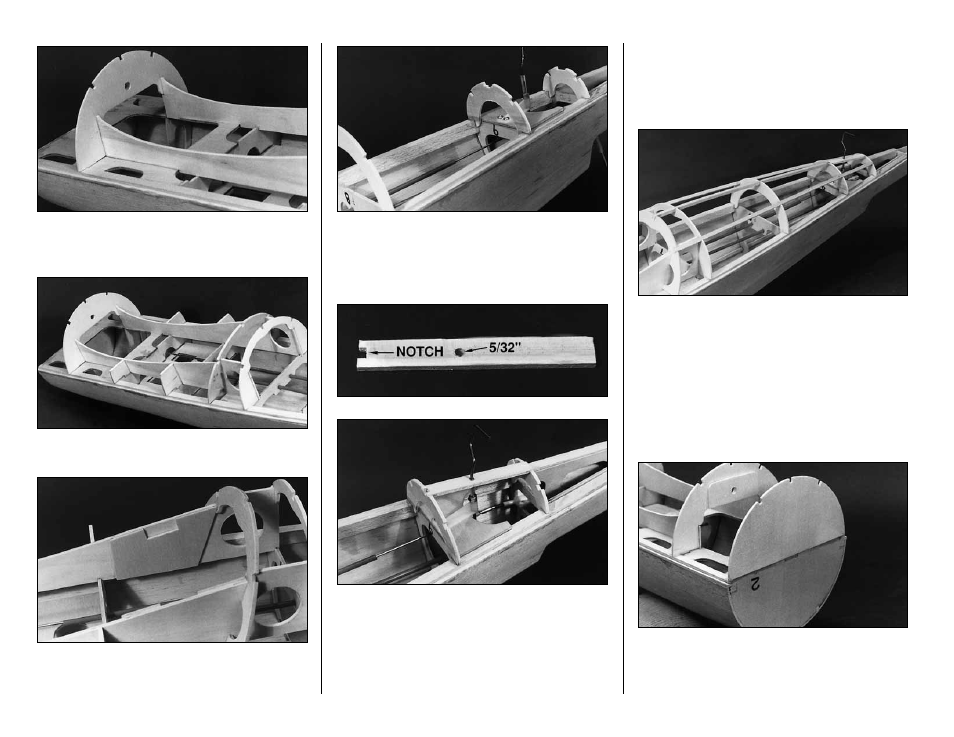
15. Interlock F-3B and the wing saddles
together on the bottom of the fuse. Glue them to
the fuselage and to each other.
❏
16. Glue
F-4B, F-5B, F-6 and F-7B
in place as
indicated on the plan and in the photos.
❏
17. Glue the
wing saddle triplers (ST)
to the
inside of the wing saddle just forward of F-6 as
shown on the plan.
❏
18. Glue
F-8B, F-9B and F-10B
in position as
shown on the plan.
❏
19. Drill a 5/32" hole where indicated by the
punch mark in the 1/8" die-cut plywood tailwheel
support. It is helpful to contour the edges of the
tailwheel support slightly to allow the sheeting to
smoothly transition into it. Glue the tailwheel
support in place between F-9 and F-10. Roughen
the lower nylon tailwheel bearing with some fine
sandpaper and glue it to the tailwheel support. Be
careful not to get glue inside the bearing. A little
petroleum jelly applied to both ends will help
protect the inside of the bearing from glue.
❏
20. Glue in the lower aft 3/16" sq. stringers as
shown in the photo. The center one is notched
slightly to where it engages the tailwheel support.
❏
21. Trim the upper fuse side sheeting flush with
F-2. Use a bar sander to obtain a smooth
front surface.
❏
22. Carefully align and glue F-2A to F-2. This
can be accomplished with the fuselage pointing
nose down, resting on F-2 over a waxed paper
covered flat surface.
24