Warning – Toa HY-VM7W User Manual
Page 8
8
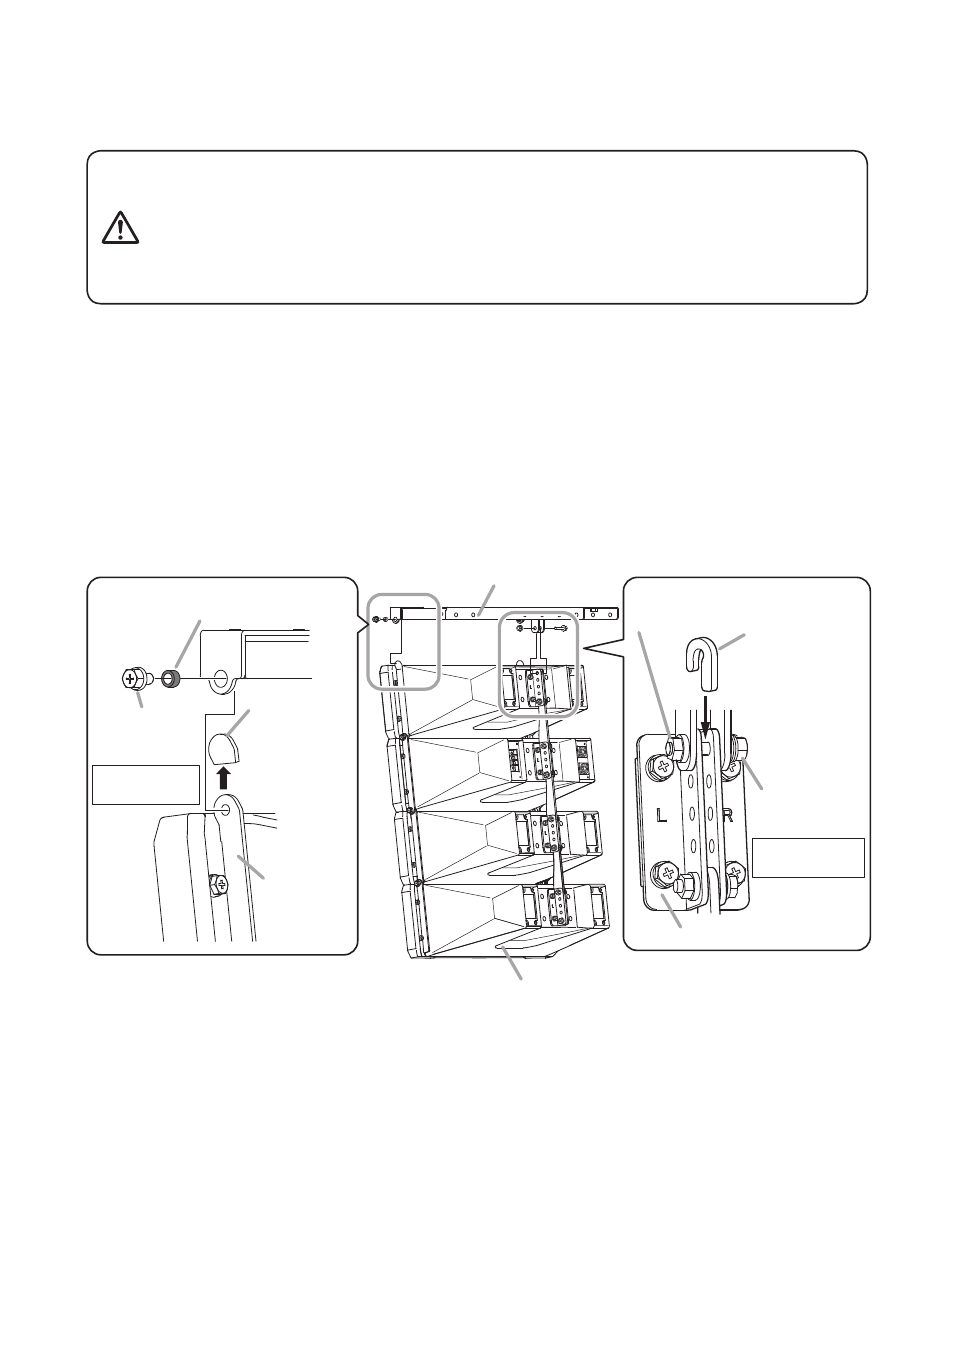
5. SUSpeNDINg THe SpeAker FrOM A ceILINg
(only the T-bracket is used)
The HX-7B or HX-7W Speaker System can be suspended from a ceiling by only using the T-bracket.
Note
Similarly, fix the T-bracket to the end of the
side angle plate on the opposite side.
HX-7B or HX-7W
T-bracket
Spacer ø9.2 (0.36")
(accessory)
Rear bracket
Hex head
bolt M6x12
(accessory)
Side angle plate
Protection cover
Note
Remove the
protection covers
from the side
angle plates
before joining.
1
-1
Tightening torque:
5 N·m
J-spacer
(accessory)
1
-2
(1) Lightly secure.
(3) Tighten firmly.
(2) Insert.
Flange nut for M6
(accessory)
Hex head
bolt M6x30
(accessory)
Tightening torque:
5 N·m
Tighten the bolts securely, as instructed below.
Failure to follow instructions precisely could result in a falling speaker
and potential personal injury.
• Ensure that all bolts are securely inserted as far as their threads go,
then securely fasten each bolt with a nut.
• Tighten all the bolts with the designated tightening torque.
For tightening, use a Phillips screwdriver, or open- or box-end wrench.
WArNINg
Step 1. Attach the T-bracket to the speaker.
Attach with the speaker set above as shown in the figure.
Fix the T-bracket to the speaker at all 3 indicated positions.
1-1. Fix the T-bracket to both ends of the side angle plates of the speaker front.
Use the supplied bolts (with spring and plain washers) and spacers.
1-2. Fix the T-bracket to the speaker’s rear bracket.
Fix to the rear bracket’s endmost hole.
Use the supplied bolt (with spring and plain washers), J-spacer, and flange nut.
For details, refer to the procedures (1) to (3) as shown below.
Note
After tightening the bolt, ensure
that the J-spacer is firmly fixed.