Warning – Toa HY-VM7W User Manual
Page 3
3
3.2. Installation
Tighten the bolts securely, as instructed below.
Failure to follow instructions precisely could result in a falling speaker
and potential personal injury.
• Ensure that all bolts are securely inserted as far as their threads go,
then securely fasten each bolt with a nut.
• Tighten all the bolts with the designated tightening torque.
For tightening, use a Phillips screwdriver, or open- or box-end wrench.
WArNINg
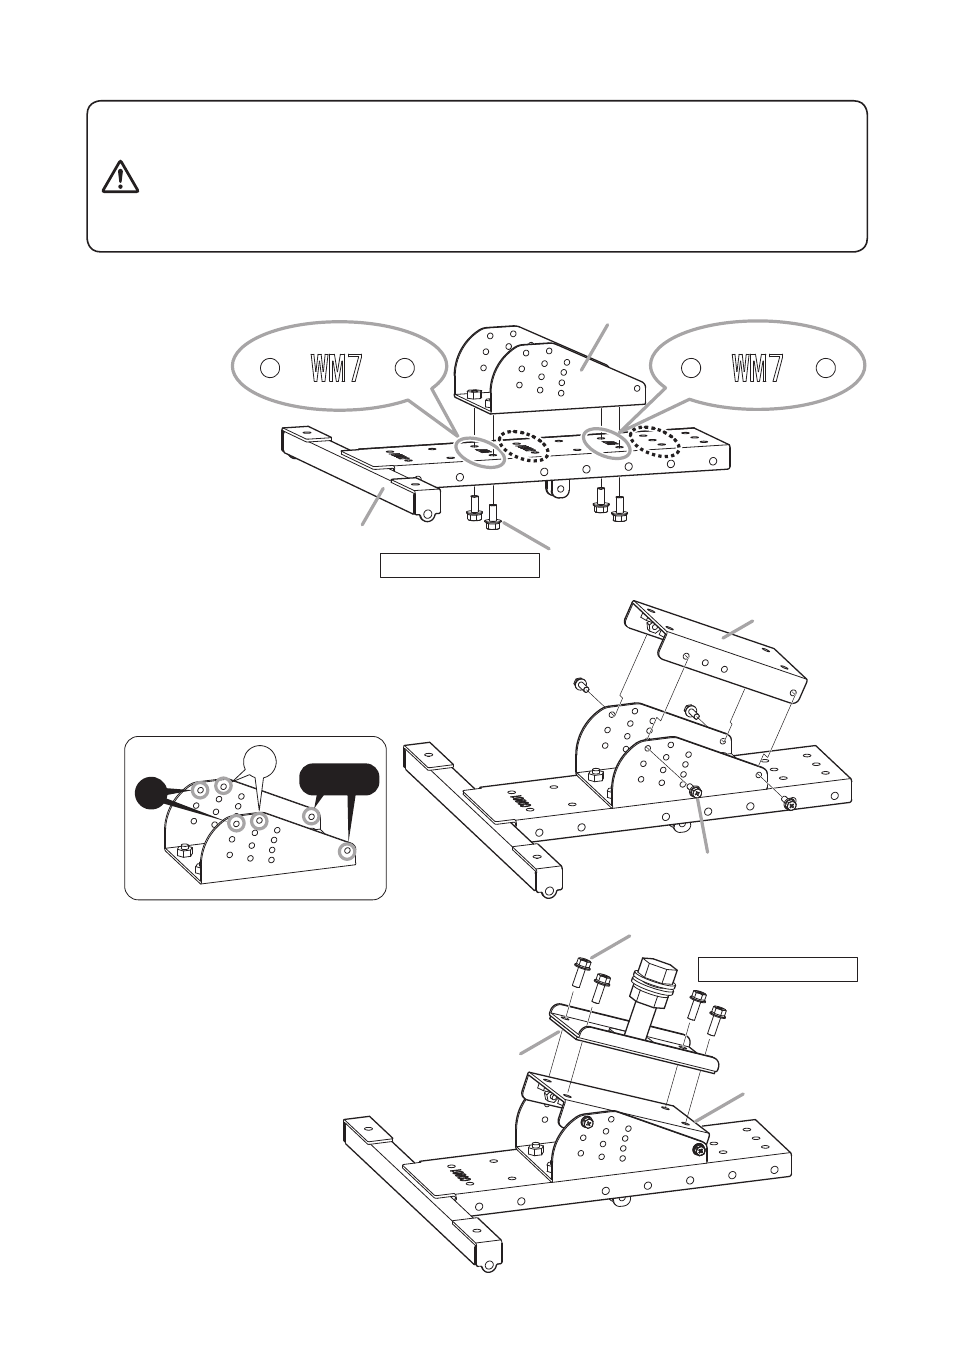
Step 1. Attach the angle bracket to the T-bracket.
Use four of the supplied bolts to secure.
Step 2. Attach the mounting base to the angle bracket.
Temporarily secure it in the angle bracket’s 20°
position* using four of the supplied bolts.
* 25º position only when the angle bracket’s angle
is set to 25º.
Step 3. Attach Bracket B of the HY-WM7B or HY-WM7W
to the mounting base.
Use four of the bolts supplied with the HY-WM7B
or HY-WM7W to secure.
Angle bracket
T-bracket
Hex head bolt M8 x 20 with spring
and plain washers (accessory)
Tightening torque: 8 N·m
Angle bracket
20°
20°, 25°
25°
Mounting base
Hex head bolt M6 x 20 with spring
and plain washers (accessory)
HY-WM7B or HY-WM7W
(Bracket B)
Mounting base
Hex head bolt M8 x 25 with spring
and plain washers (HY-WM7B's or
HY-WM7W's accessory)
Tightening torque: 8 N·m
Note
Only when the angle bracket’s
angle is set to 25º in Step 10
(p. 5), use the mounting holes
enclosed with dashed lines.