Warning, Direct speaker ceiling mounting – Toa HY-VM7W User Manual
Page 10
10
6. DIrecT SpeAker ceILINg MOUNTINg
(only the T-bracket is used)
The HX-7B or HX-7W Speaker System can be mounted to ceilings or beams by only using the T-bracket.
Step 1. Mount the T-bracket to the ceiling or beam using bolts, etc.
Ceiling or beam mounting bolts and nuts are not supplied.
Use nuts and bolts that are appropriate for the ceiling’s or
beam’s structure and composition. Failure to do so may cause
the speaker to fall, resulting in personal injury.
WArNINg
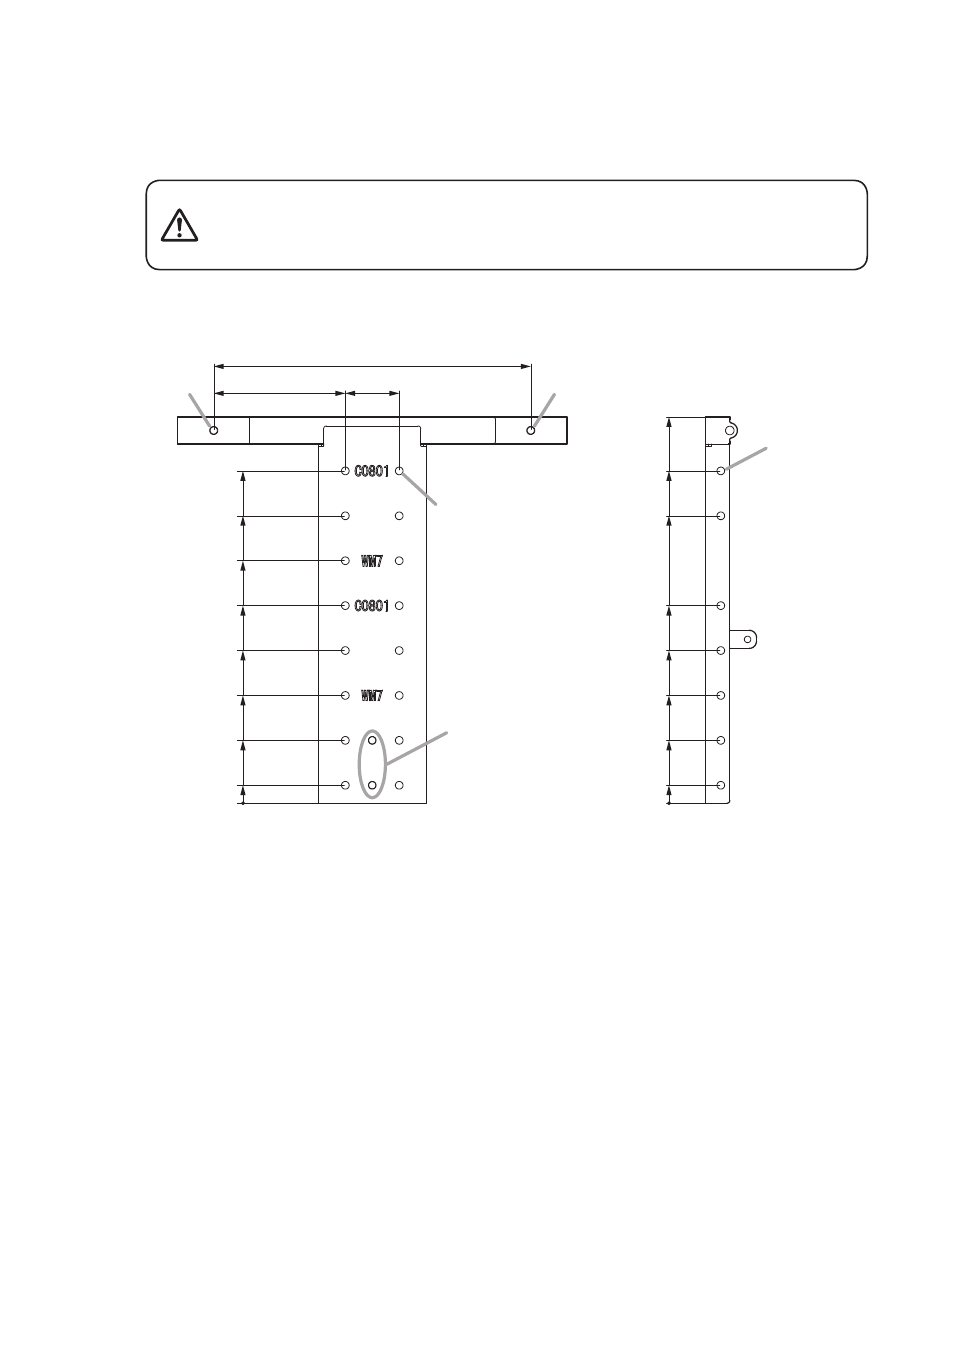
[Mounting dimensions]
Unit: mm
(Front)
(Right side)
353 (13.9")
60 (2.36")
164.5 (6.48")
0
20 (0.79")
70 (2.76")
120 (4.72")
170 (6.69")
220 (8.66")
0
430 (16.93")
270 (10.63")
320 (12.6")
370 (14.57")
20 (0.79")
70 (2.76")
120 (4.72")
170 (6.69")
220 (8.66")
270 (10.63")
320 (12.6")
370 (14.57")
ø9 (0.35")
(with M8 weld nut)
ø9 (0.35")
(with M8 weld nut)
ø9 (0.35")
(with M8 weld nut)
ø8.5 (0.33")
(16 positions)*
ø8.5 (0.33")
(14 positions)*
Note: Left-side surface same.
* These holes not fitted with M8 weld nuts.