Warning – Toa HY-VM7W User Manual
Page 6
6
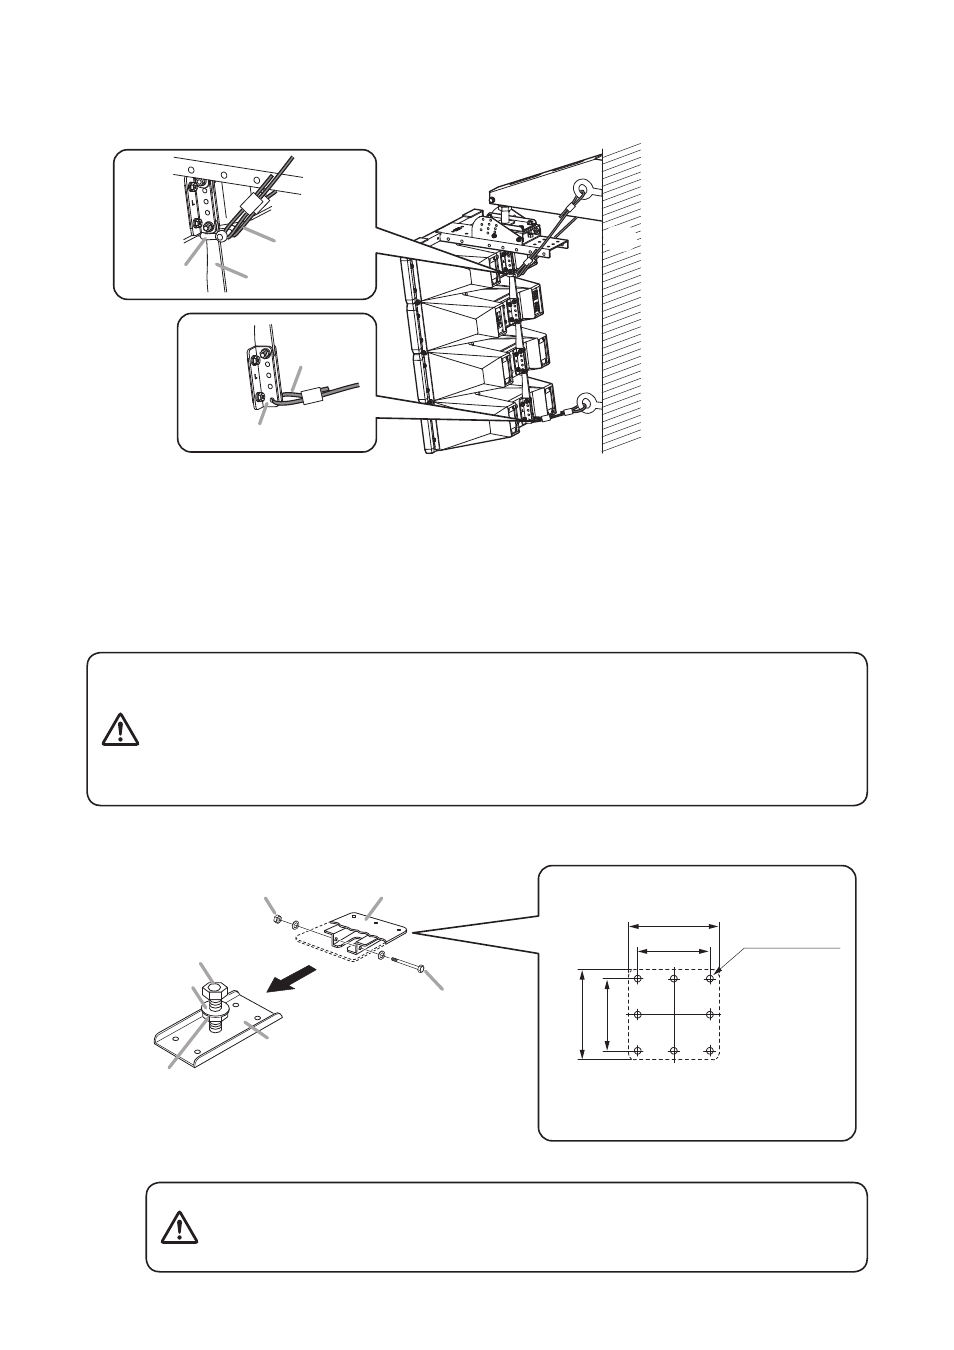
Step 11. Mount the safety wires and stopper wire.
For the safety wire mounting method, refer to the operating instructions supplied with the HX-7B or
HX-7W speaker.
Wall
Safety wire
Stopper wire
Rear bracket
Note
Secure the safety wire to beams,
pillars or other strong structures.
Note
Mount to the rear bracket's idle hole.
Rear angle bar
Shackle
4. MOUNTINg THe SpeAker TO A ceILINg
(using the optional HY-c0801 or HY-c0801W bracket)
Mount the HX-7B or HX-7W Speaker System to a ceiling by using the HY-VM7 in combination with the optional
HY-C0801 or HY-C0801W Speaker Ceiling Mounting Bracket.
Step 2. Mount Bracket A of the HY-C0801 or HY-C0801W to a ceiling using four or more bolts.
Step 1. Remove the safety bolt from Bracket A of the HY-C0801 or HY-C0801W, and detach Bracket B.
Tighten the bolts securely, as instructed below.
Failure to follow instructions precisely could result in a falling speaker
and potential personal injury.
• Ensure that all bolts are securely inserted as far as their threads go,
then securely fasten each bolt with a nut.
• Tighten all the bolts with the designated tightening torque.
For tightening, use a Phillips screwdriver, or open- or box-end wrench.
WArNINg
Ceiling mounting bolts and nuts are not supplied.
Use nuts and bolts that are appropriate for the ceiling’s structure
and composition. Failure to do so may cause the speaker to fall,
resulting in personal injury.
WArNINg
Nut for M8
Safety bolt
Fixed nut
HY-C0801 or HY-C0801W
(Bracket B)
HY-C0801 or HY-C0801W
(Bracket A)
150 (5.91")
120 (4.72")
8 - ø11 (0.43")
Unit: mm
150 (5.91")
120
(4.72")
[Bracket A's mounting dimensions]
Horizontal angle
adjustment nut
Plain washer
Note
Be sure to use 4 mounting holes at 4
corners in Bracket A.