Warning – Toa HY-VM7W User Manual
Page 5
5
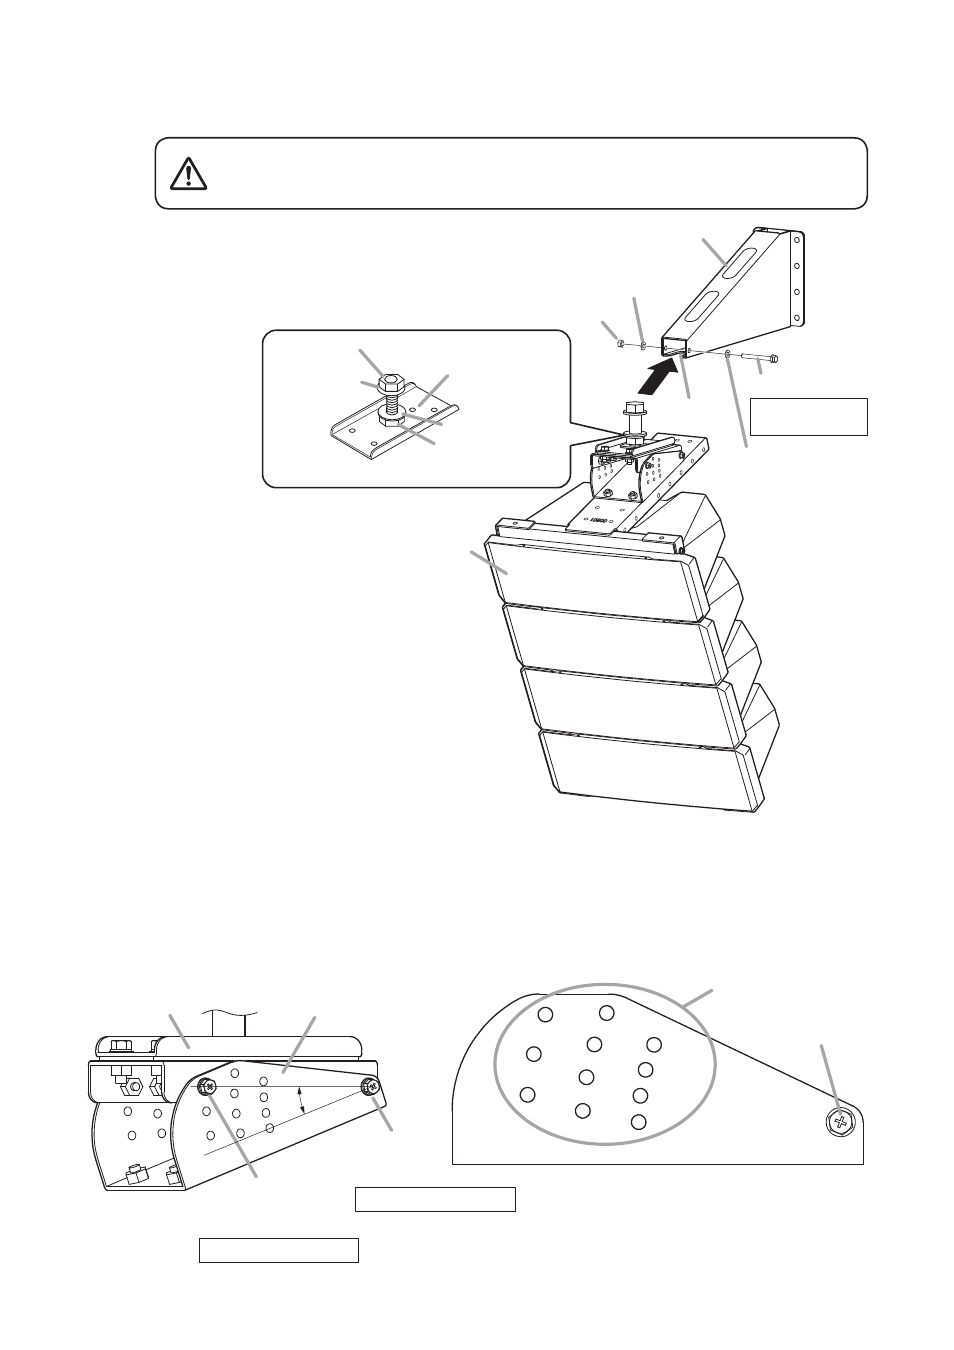
Step 7. Fit the HY-WM7B’s or HY-WM7W’s Bracket B bolt into the notch of Bracket A.
In this event, a fixed washer must be positioned above the notch, and a plain washer positioned below
it.
Step 8. Insert the safety bolt into Bracket A
of the HY-WM7B or HY-WM7W, and
tighten the bolt securely with a nut.
Step 9. Adjust the speaker’s horizontal angle.
B’s horizontal angle adjustment nut.
Horizontal angle adjustment range:
90° to left and right (180° in total)
Step 10. Set the angle bracket’s angle and secure with a bolt.
The speaker’s downward tilt angle is determined by the angle bracket’s set angle.
10-1. Remove the angle setting bolt, then fit it into the desired angle setting hole and fix.
10-2. Tighten the partially inserted fulcrum bolt.
Owing to the speaker’s size and weight, be sure that at least
two persons are available to install the unit. Failure to do so
could result in personal injury.
WArNINg
Fixed nut
Fixed washer
Plain washer
HY-WM7B or HY-WM7W
(Bracket B)
HY-WM7B or HY-WM7W
(Bracket A)
Safety bolt
Notch
HX-7B or HX-7W
Nut for M8
Plain washer for M8
Plain washer for M8
7
9
8
Horizontal angle
adjustment nut
Tightening torque:
8 N·m
Angle adjustment bolt
Fulcrum bolt
Angle bracket
10
-2
10
-1
HY-WM7B or HY-WM7W
(Bracket B)
Tightening torque: 3 N·m
Tightening torque: 3 N·m
20°
[Mounting example when set to 20°]
[Angle adjustment holes]
20°
12.5°
5°
25°
17.5°
10°
2.5°
22.5°
15°
7.5°
0°
Fulcrum bolt
Angle bracket
Angle adjustment holes
(0 to 25°, 11 positions)