3 blowers, belts and drives – Reznor RBL (Cabinet Blower) Unit Installation Manual User Manual
Page 9
Form I-RBL, P/N163219R2, Page 9
CAUTION: An
external duct system
static pressure not
within the limits
shown on the rating
plate, or improper
motor pulley or belt
adjustment, may
overload the motor.
5.3 Blowers, Belts and Drives
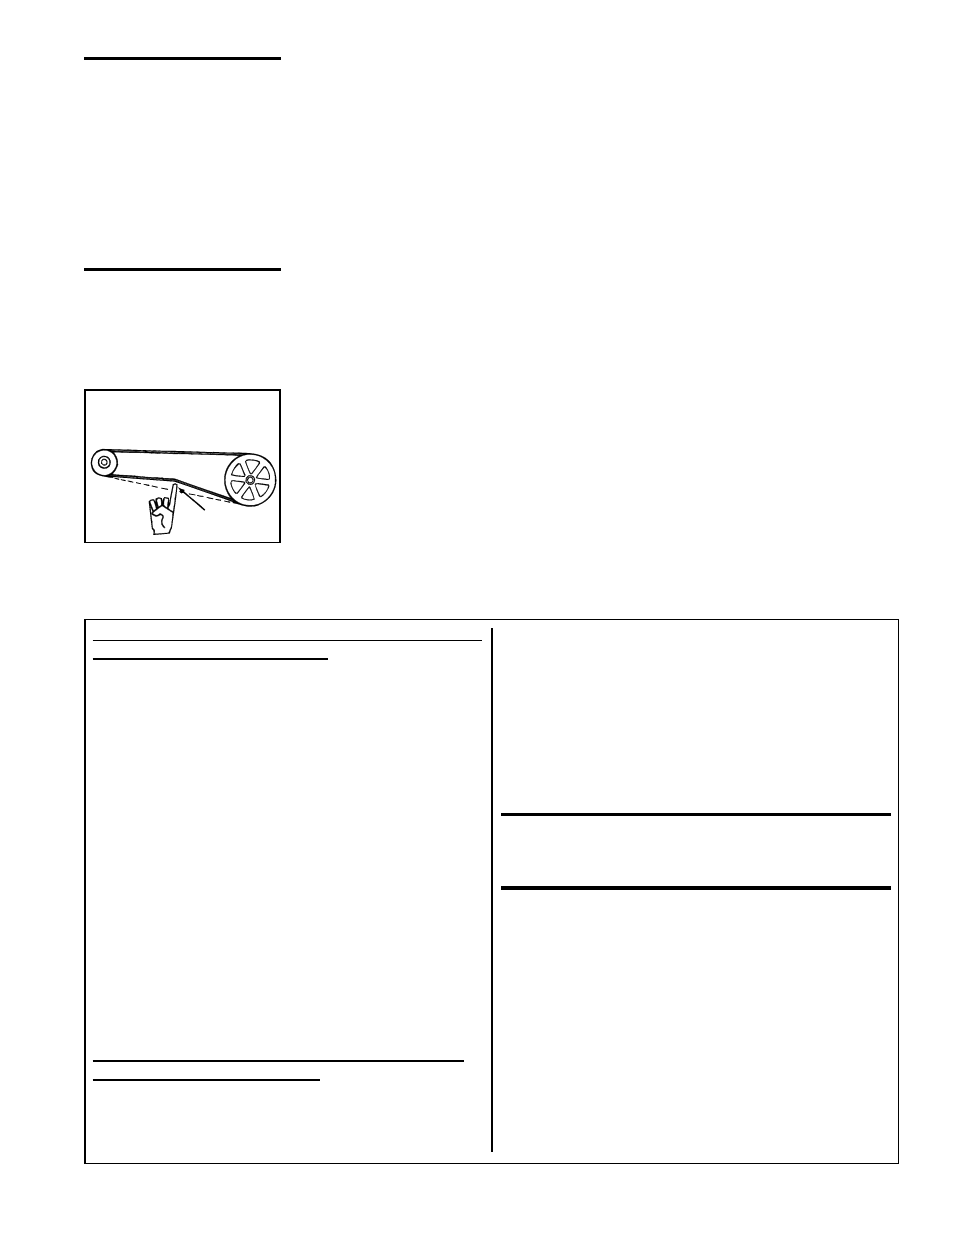
Check belt tension. Proper belt tension is important to the long life of the belt and
motor. A loose belt will cause wear and slippage. Too much tension will cause exces-
sive motor and blower bearing wear. Adjust the belt tension by turning the adjusting
screw on the motor base until the belt can be depressed 3/4" (19mm). (See
FIGURE
14.) After correct tension is achieved, re-tighten the locknut on the adjustment screw.
Be sure that the belt is aligned in the pulleys.
Adjusting Blower Speed - The system is set at the factory for the RPM required to
meet the CFM and external static pressure specified on the order. If estimated external
static pressure is incorrect, or changes were made to the duct system, the blower RPM
may have to be adjusted.
Motors are equipped with adjustable pitch pulleys which permit adjustment of blower
speed.
3/4 (19mm)
FIGURE 14 -
Check Belt Tension
D. No warm air duct should come in contact with masonry walls. Insulate around all
air ducts through masonry walls with not less than 1/2 inch (13mm) of insulation.
E. Insulate all exposed warm air ducts passing through an unheated space with at
least 1/2 inch (13mm) thickness of insulation.
F. For optional bottom openings, insert ducts from below roof deck through roof open-
ing into cabinet. Form 1" (25mm) flanges, fold over, and fasten with sheetmetal
screws. Gain access by removing side panels from blower and downturn plenum
sections.
G. Duct Supports -- Suspend all ducts securely from adjacent buildings members. Do
not support ducts from unit duct connections.
H. Duct Sizing -- Proper sizing of the warm air ductwork is necessary to ensure a
satisfactory heating installation. The recognized authority for such information is
the Air Conditioning Contractors Association, 2800 Shirlington Road, Suite 300,
Arlington, VA 20036 (www.acca.org). A manual covering duct sizing in detail may
be purchased directly from them.
To make adjustments to units with less than a 5HP
motor, follow these instructions.
1. Loosen belt tension and remove the belt.
2. Loosen the set screw on the side of the pulley away
from the motor.
3.
To increase the blower speed, turn the adjustable
half of the pulley inward.
To decrease the blower
speed, turn the adjustable half of the pulley outward.
One turn of the pulley will change the speed 8-10%.
4. Tighten the set screw on the flat portion of the pulley
shaft.
5. Replace the belt and adjust the belt tension. Adjust
tension by turning the adjusting screw on the motor
base until the belt can be depressed 3/4". (See
FIGURE 14.) Re-tighten the lock nut on the adjusting
screw. Be sure that the belts are aligned in the pulley
grooves properly and are not angled from pulley to
pulley.
6. Check the motor amps with an amp meter. The
maximum motor amp rating on the motor nameplate
must not be exceeded.
For units with 5 HP and larger motor, follow these
instructions for adjusting RPM:
1. Slack off all belt tension by moving motor towards
driven shaft until belts are free of grooves. For easiest
adjustment, remove the belts from the grooves.
2. On the outer locking ring, locate the two locking
screws that are directly across from each other.
Loosen these two screws, but do not remove them.
Do not loosen any other screws.
3. Adjust sheave to desired pitch diameter by turning
the outer locking ring. One complete turn of the
outer locking ring will result in .233" change in pitch
diameter. To decrease blower speed, increase
diameter; to increase blower speed, decrease
diameter.
CAUTION: Sheaves should not be adjusted in
either direction to the point where movable and
stationary flanges are in contact.
4. After completing adjustment, tighten both locking
screws in the outer locking ring (loosened in Step 2).
5. Replace belts and move motor away from the driven
shaft to apply sufficient belt tension to prevent
slippage. (See
FIGURE 14.) Proper belt tension is
important to the long life of the belt and motor. A
loose belt will cause wear and slippage. Too much
tension will cause excessive motor and blower
bearing wear. Be sure that the belts are aligned in
the pulley grooves and are not angled from pulley to
pulley.
6. Check motor amps with an amp meter. The maximum
motor amp rating on the nameplate must not be
exceeded.