Step 17, Steps 17-18, Red rocket-x installation instructions – RED ROCKET-X User Manual
Page 12
COPYRIGHT © 2014 RED.COM, INC
RED ROCKET-X INSTALLATION INSTRUCTIONS
955-0033, REV-B
|
12
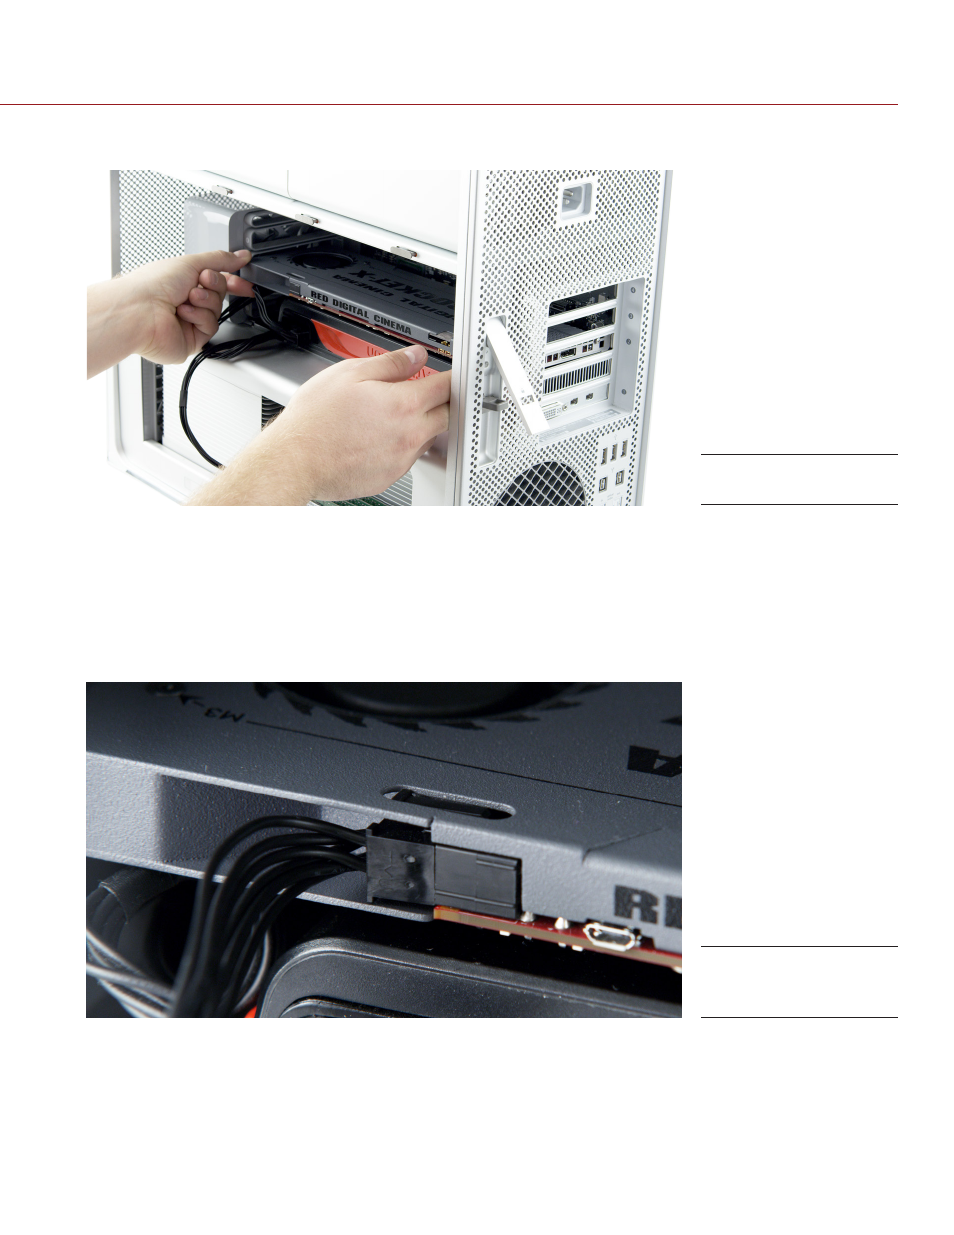
16. Line up the RED ROCKET-X connectors with slot 2, and then gently but firmly press the card into the slot,
ensuring that the lip at the end slides between slot 2 and slot 3.
NOTE: To prevent damage to your system and the RED ROCKET-X, DO NOT rock the card or use excessive
force when installing the RED ROCKET-X.
17. Plug your 6-pin PCIe power cable (either a PCIe 6-pin to 6-pin power cable or the included PCIe 6-pin to
6-pin Dual Y Power Splitter) into the RED ROCKET-X. Make sure that the latch of the power cable aligns
with the corresponding slot on the RED ROCKET-X.
WARNING: If you use the PCIe 6-pin to 6-pin Dual Y Power Splitter (included) to connect only the
RED ROCKET-X or graphics card, ensure that the unused connector does not come in contact with a fan
or any moving parts.
18. If you’re using the PCIe 6-pin to 6-pin Dual Y Power Splitter (included) to connect both the graphics card
and the RED ROCKET-X to a single power connector in the Mac Pro, plug the second connector on the
PCIe 6-pin to 6-pin Dual Y Power Splitter (included) into the graphics card. For more information on differ-
ent ways to connect power, go to
.
19. If you’re using the HD-SDI slot filler, follow the instructions below to install and connect the HD-SDI slot
filler:
A. Remove one (1) free slot bracket from the system.
Insert RED ROCKET-X
Connect Power to
RED ROCKET-X