Red rocket-x installation instructions – RED ROCKET-X User Manual
Page 10
COPYRIGHT © 2014 RED.COM, INC
RED ROCKET-X INSTALLATION INSTRUCTIONS
955-0033, REV-B
|
10
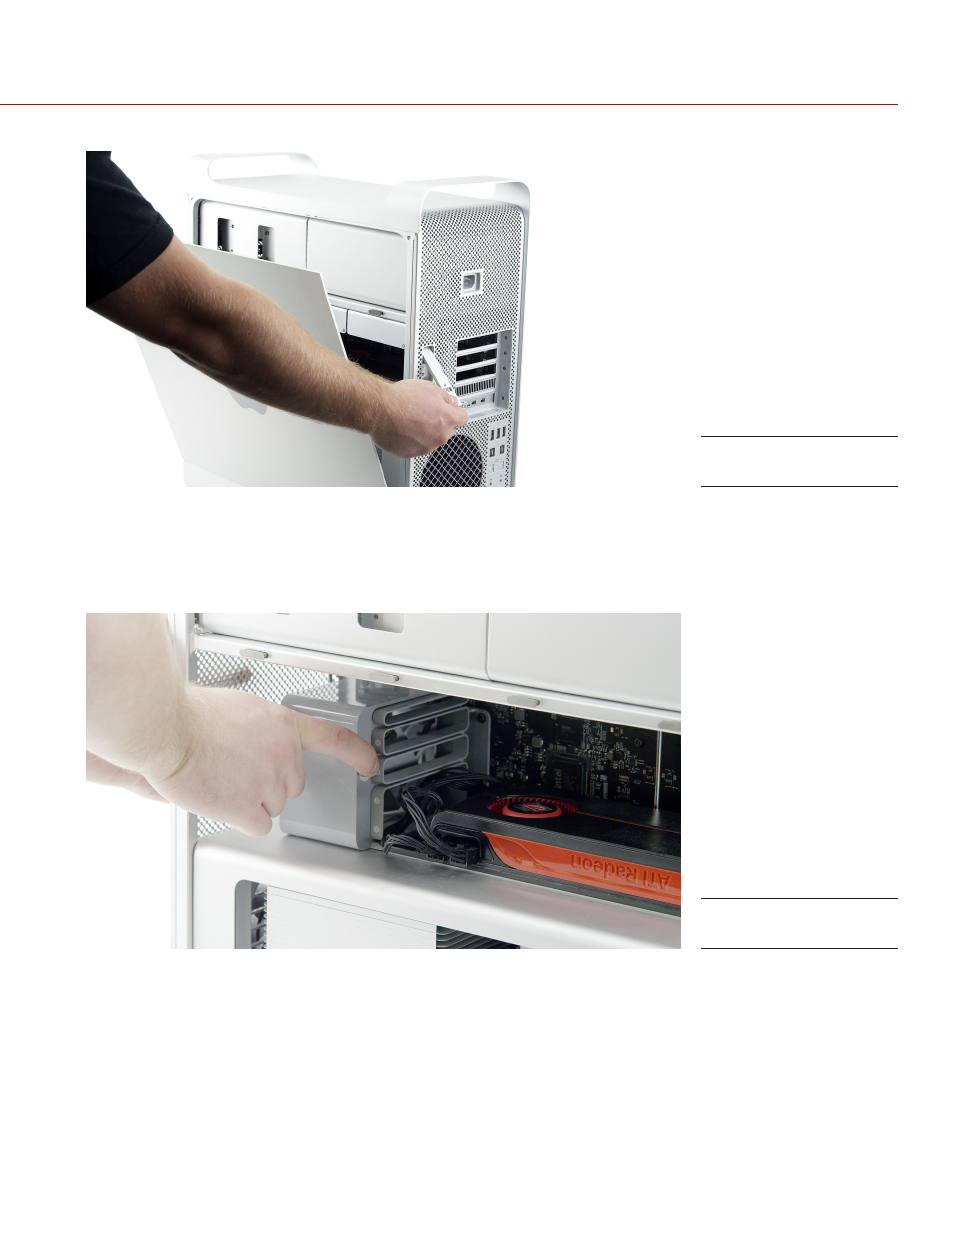
6. Remove the side access panel.
7. Remove all hard drives except the one in the first bay (the one farthest to the left).
8. Loosen the two (2) thumbscrews that secure the PCI bracket to the enclosure and remove the PCI bracket.
9. Remove any cards that are not in slot 1 from the system.
10. Press the button on the PCI slider and move the PCIe fan to the side to create more room for installing the
RED ROCKET-X (you will slide the PCIe fan back into place after you install the RED ROCKET-X).
11. Connect your power cable(s) to the Mac Pro based on your configuration needs:
‒ If the graphics card is connected to one Mac Pro power connector and the other power connecter is
unused, connect a 6-pin PCIe power cable (either a PCIe 6-pin to 6-pin power cable or the included
PCIe 6-pin to 6-pin Dual Y Power Splitter) to power connector B on the backplane board (this is the
upper power connector that is closer to the optical drive). You will connect the 6-pin PCIe power cable
to the RED ROCKET-X in
.
‒ If both Mac Pro power connectors are in use, disconnect the graphics card from the power connector
and connect the PCIe 6-pin to 6-pin Dual Y Power Splitter (included) to power connector B on the back-
plane board (this is the upper power connector that is closer to the optical drive). You will connect the
PCIe 6-pin to 6-pin Dual Y Power Splitter to the graphics card and the RED ROCKET-X in
NOTE: For more information on different ways to connect power, go to
.
Remove Panel
Slide PCIe Fan Away