Mount the engine – Great Planes Tracer 46 Kit - GPMA0400 User Manual
Page 32
allowing it to tilt to either side. When satisfied with the
alignment of the fin, glue it in place with thin CA. Hint: Proper
alignment of your fin to your stab is critical to proper flight
performance, so take your time to be sure it is just right.
❏
6. Use medium CA to glue the fin fillets in place.
❏
7. Use a small amount of filler to fill the gap at the front
of the fin.
❏
1. Cut the “spreader bars” from the supplied Great Planes
engine mount, then use a hobby knife to remove any
flashing leftover from the molding process so that the halves
fit together well.
❏
2. Temporarily attach the engine mount to the firewall
with four 6-32 x 1" bolts and #6 flat washers. Do not tighten
the screws all the way, because you still need to adjust
the mount.
❏
3. Place the engine on the mount and slide the halves in
or out until the engine fits properly. Position the mount so
the molded-in “tick marks” are equally spaced from the
horizontal centerline you drew on the firewall. When the
engine mount is adjusted and positioned, tighten the
mounting screws.
Note: If you are using a larger engine than the .46 it may be
necessary to sand the left fuse side flush with the firewall,
so that the mount fits.
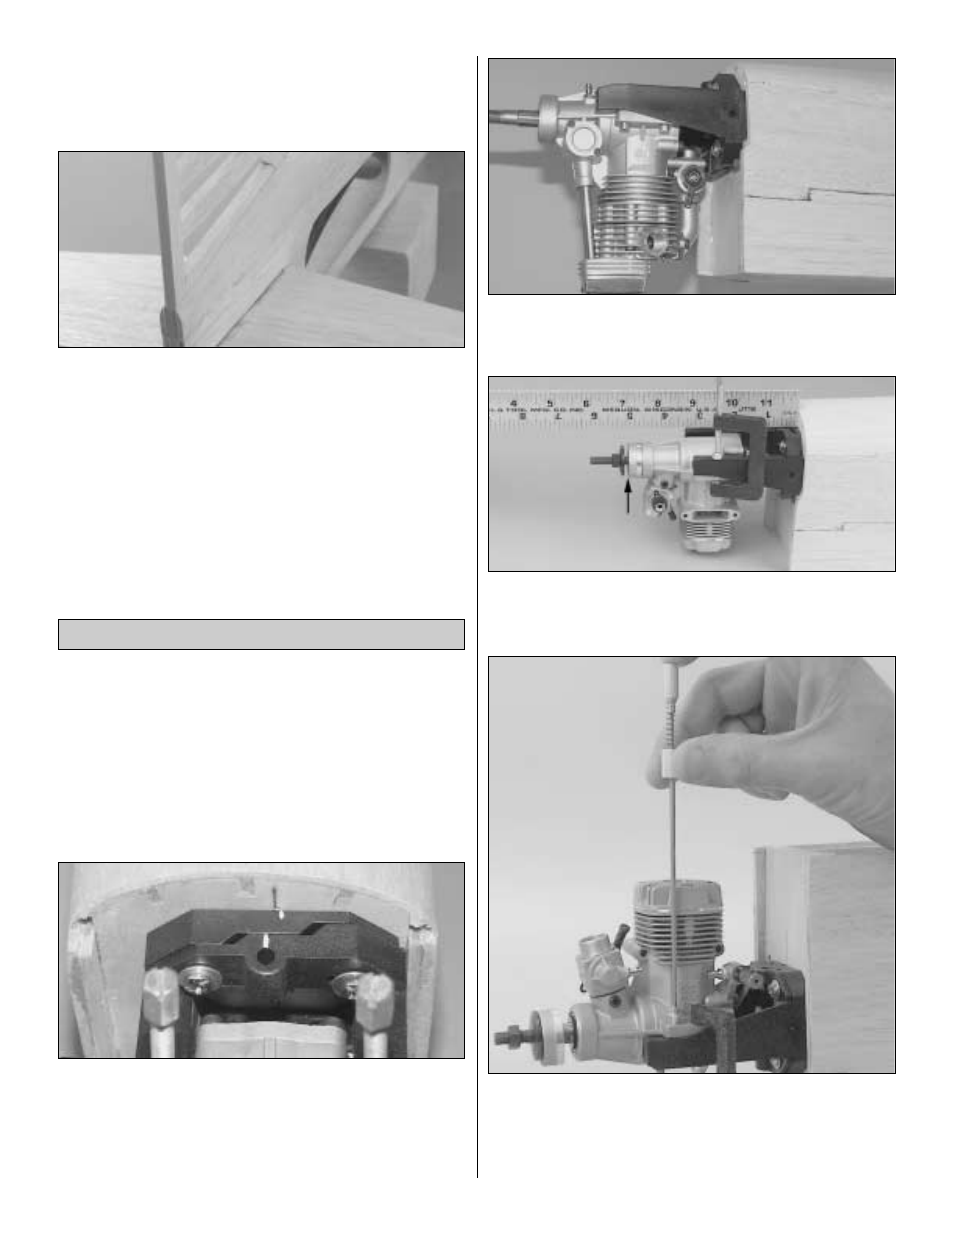
❏
4. Position the engine on the mount so the drive washer
(or the back of the spinner) is 5" away from the firewall and
clamp in place.
❏
5. Use the Great Planes Dead Center
™
Engine Mount
Hole Locator (GPMR8130) to mark the locations of the
bolt holes. Remove the engine from the mount and drill four
7/64" holes. Tap the four holes with a 6-32 tap. Mount the
engine with the four 6-32 x 1" socket head bolts.
Mount the Engine
32