Great Planes Tracer 46 Kit - GPMA0400 User Manual
Page 25
❏
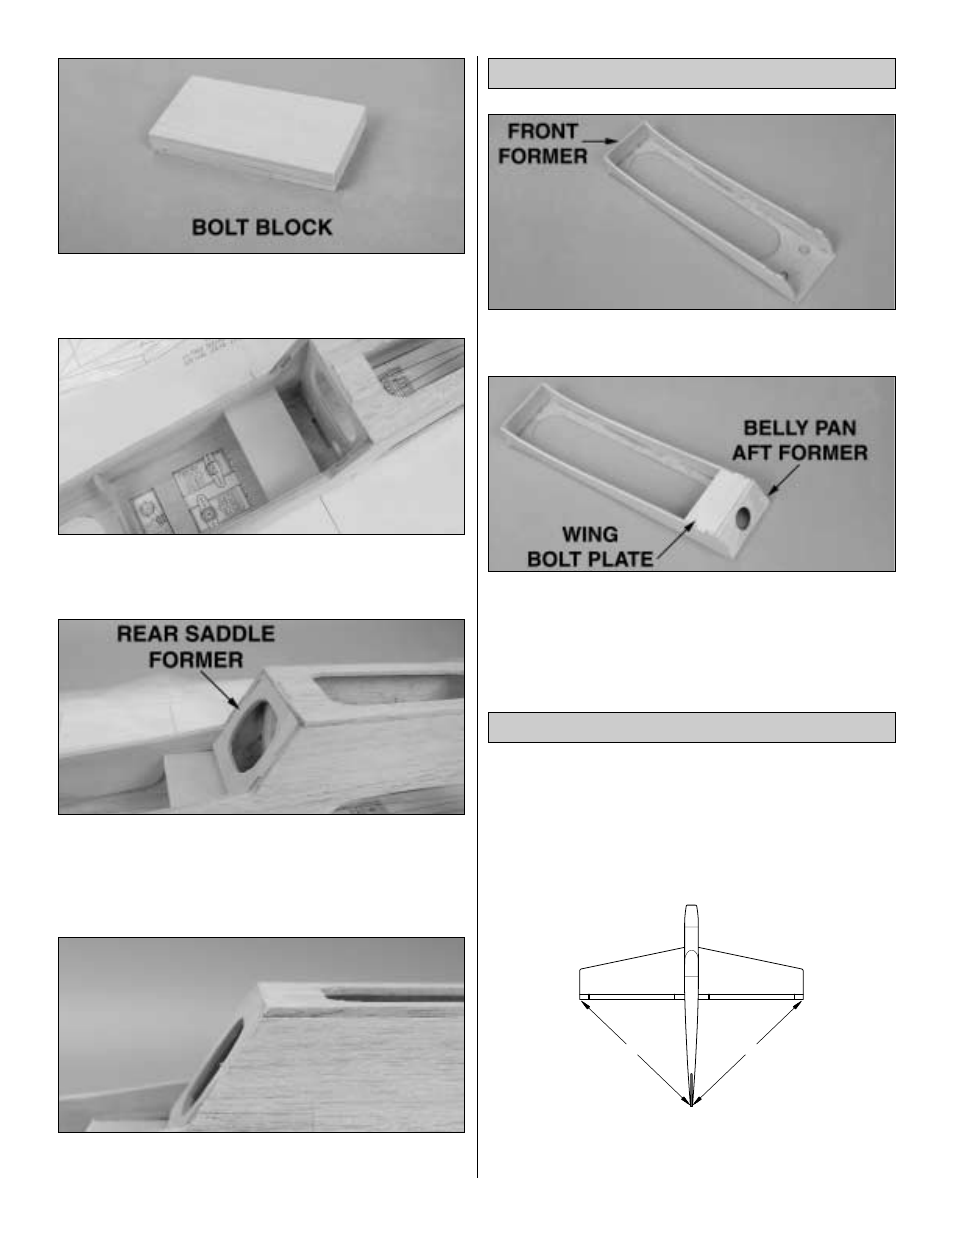
18. Using 6-minute epoxy, glue the three die-cut 1/8" ply bolt
plates together to make what is now called the bolt block.
❏
19. Epoxy the bolt block securely in place in the fuse.
❏
20. Sand a taper on the bottom edge of the die-cut 1/8"
ply rear saddle former. Fit it in place, adjusting the taper
until a good fit is achieved. Glue the former in place.
❏
21. Sand the front of the aft fuse bottom to the angle of
the rear wing saddle former.
❏
1. Glue the die-cut 1/8" ply belly pan sides and belly
pan front former perpendicular to the belly pan bottom.
❏
2. Glue the die-cut 1/8" ply belly pan aft former and
wing bolt plate in place as shown in the photo. NOTE: The
punch marks in the wing bolt plate must be facing down so
that they will be visible through the belly pan bottom when
the belly pan is upside-down.
❏
1. Sand the entire wing saddle area lightly until the fuse
side doublers and fuse sides are flush.
❏
2. Trial fit the wing on the fuse. It may be necessary to
enlarge the holes in F2 slightly to get the wing to fit
correctly.
❏
3. Stick a T-pin through the center of the aft end of the
fuselage bottom. Tie a string to the T-pin. Pull the string to
the TE of the wing tip and put a piece of masking tape on
A
A
A = A
Mount the Wing to the Fuselage
Assemble the Belly Pan
25